Overview
Configure Microsoft 365 or Office 365 journaling rules to archive email messages sent or received by all or selected users of your Microsoft 365 or Office 365 domain. Ensure you have configured Microsoft 365 or Office 365 send connector (SMTP connector), and a recipient to receive NDRs (Non-delivery Reports) before configuring the journaling rules. Follow the steps mentioned in this article to configure the Microsoft 365 or Office 365 journaling rules for all or selected users on your Office 365 domain.
Configure Microsoft 365 or Office 365 journaling rules for all the users
Log in to the Microsoft 365 or Office 365 admin interface using valid admin credentials.
Search for and navigate to the Admin Center
Access the Exchange Admin Center

In the Other Features section, click on the current location link for Journal Rules

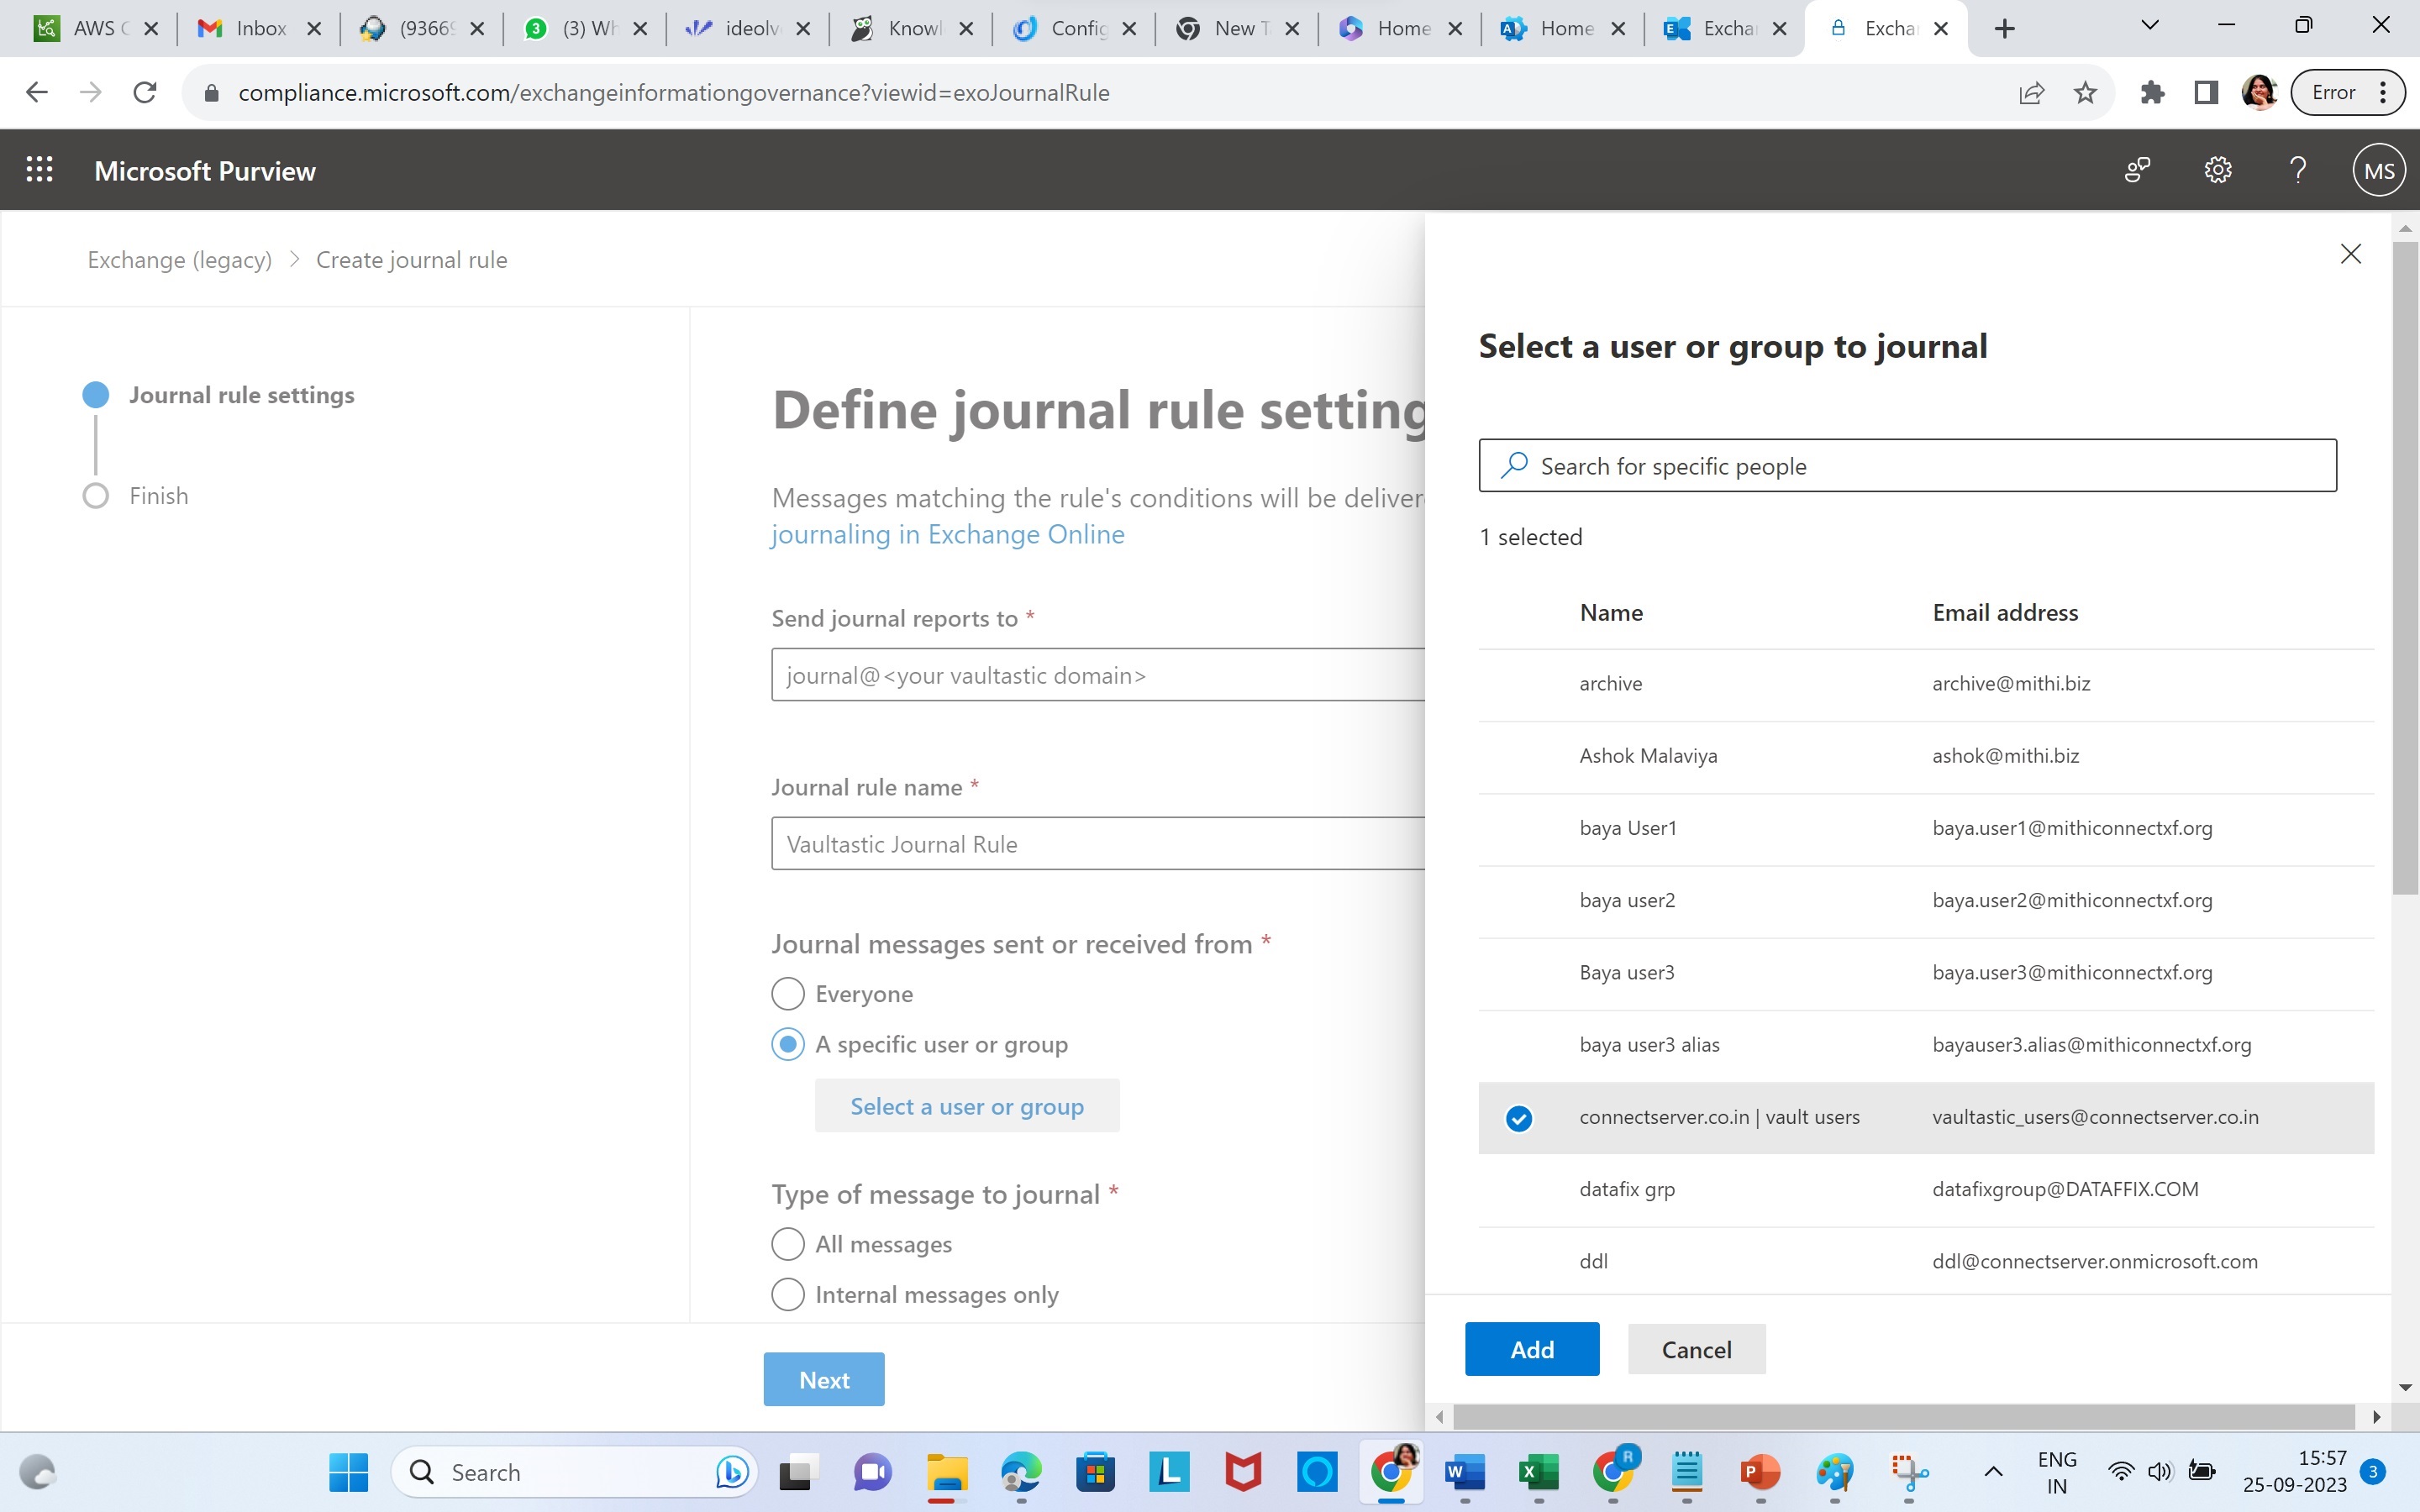
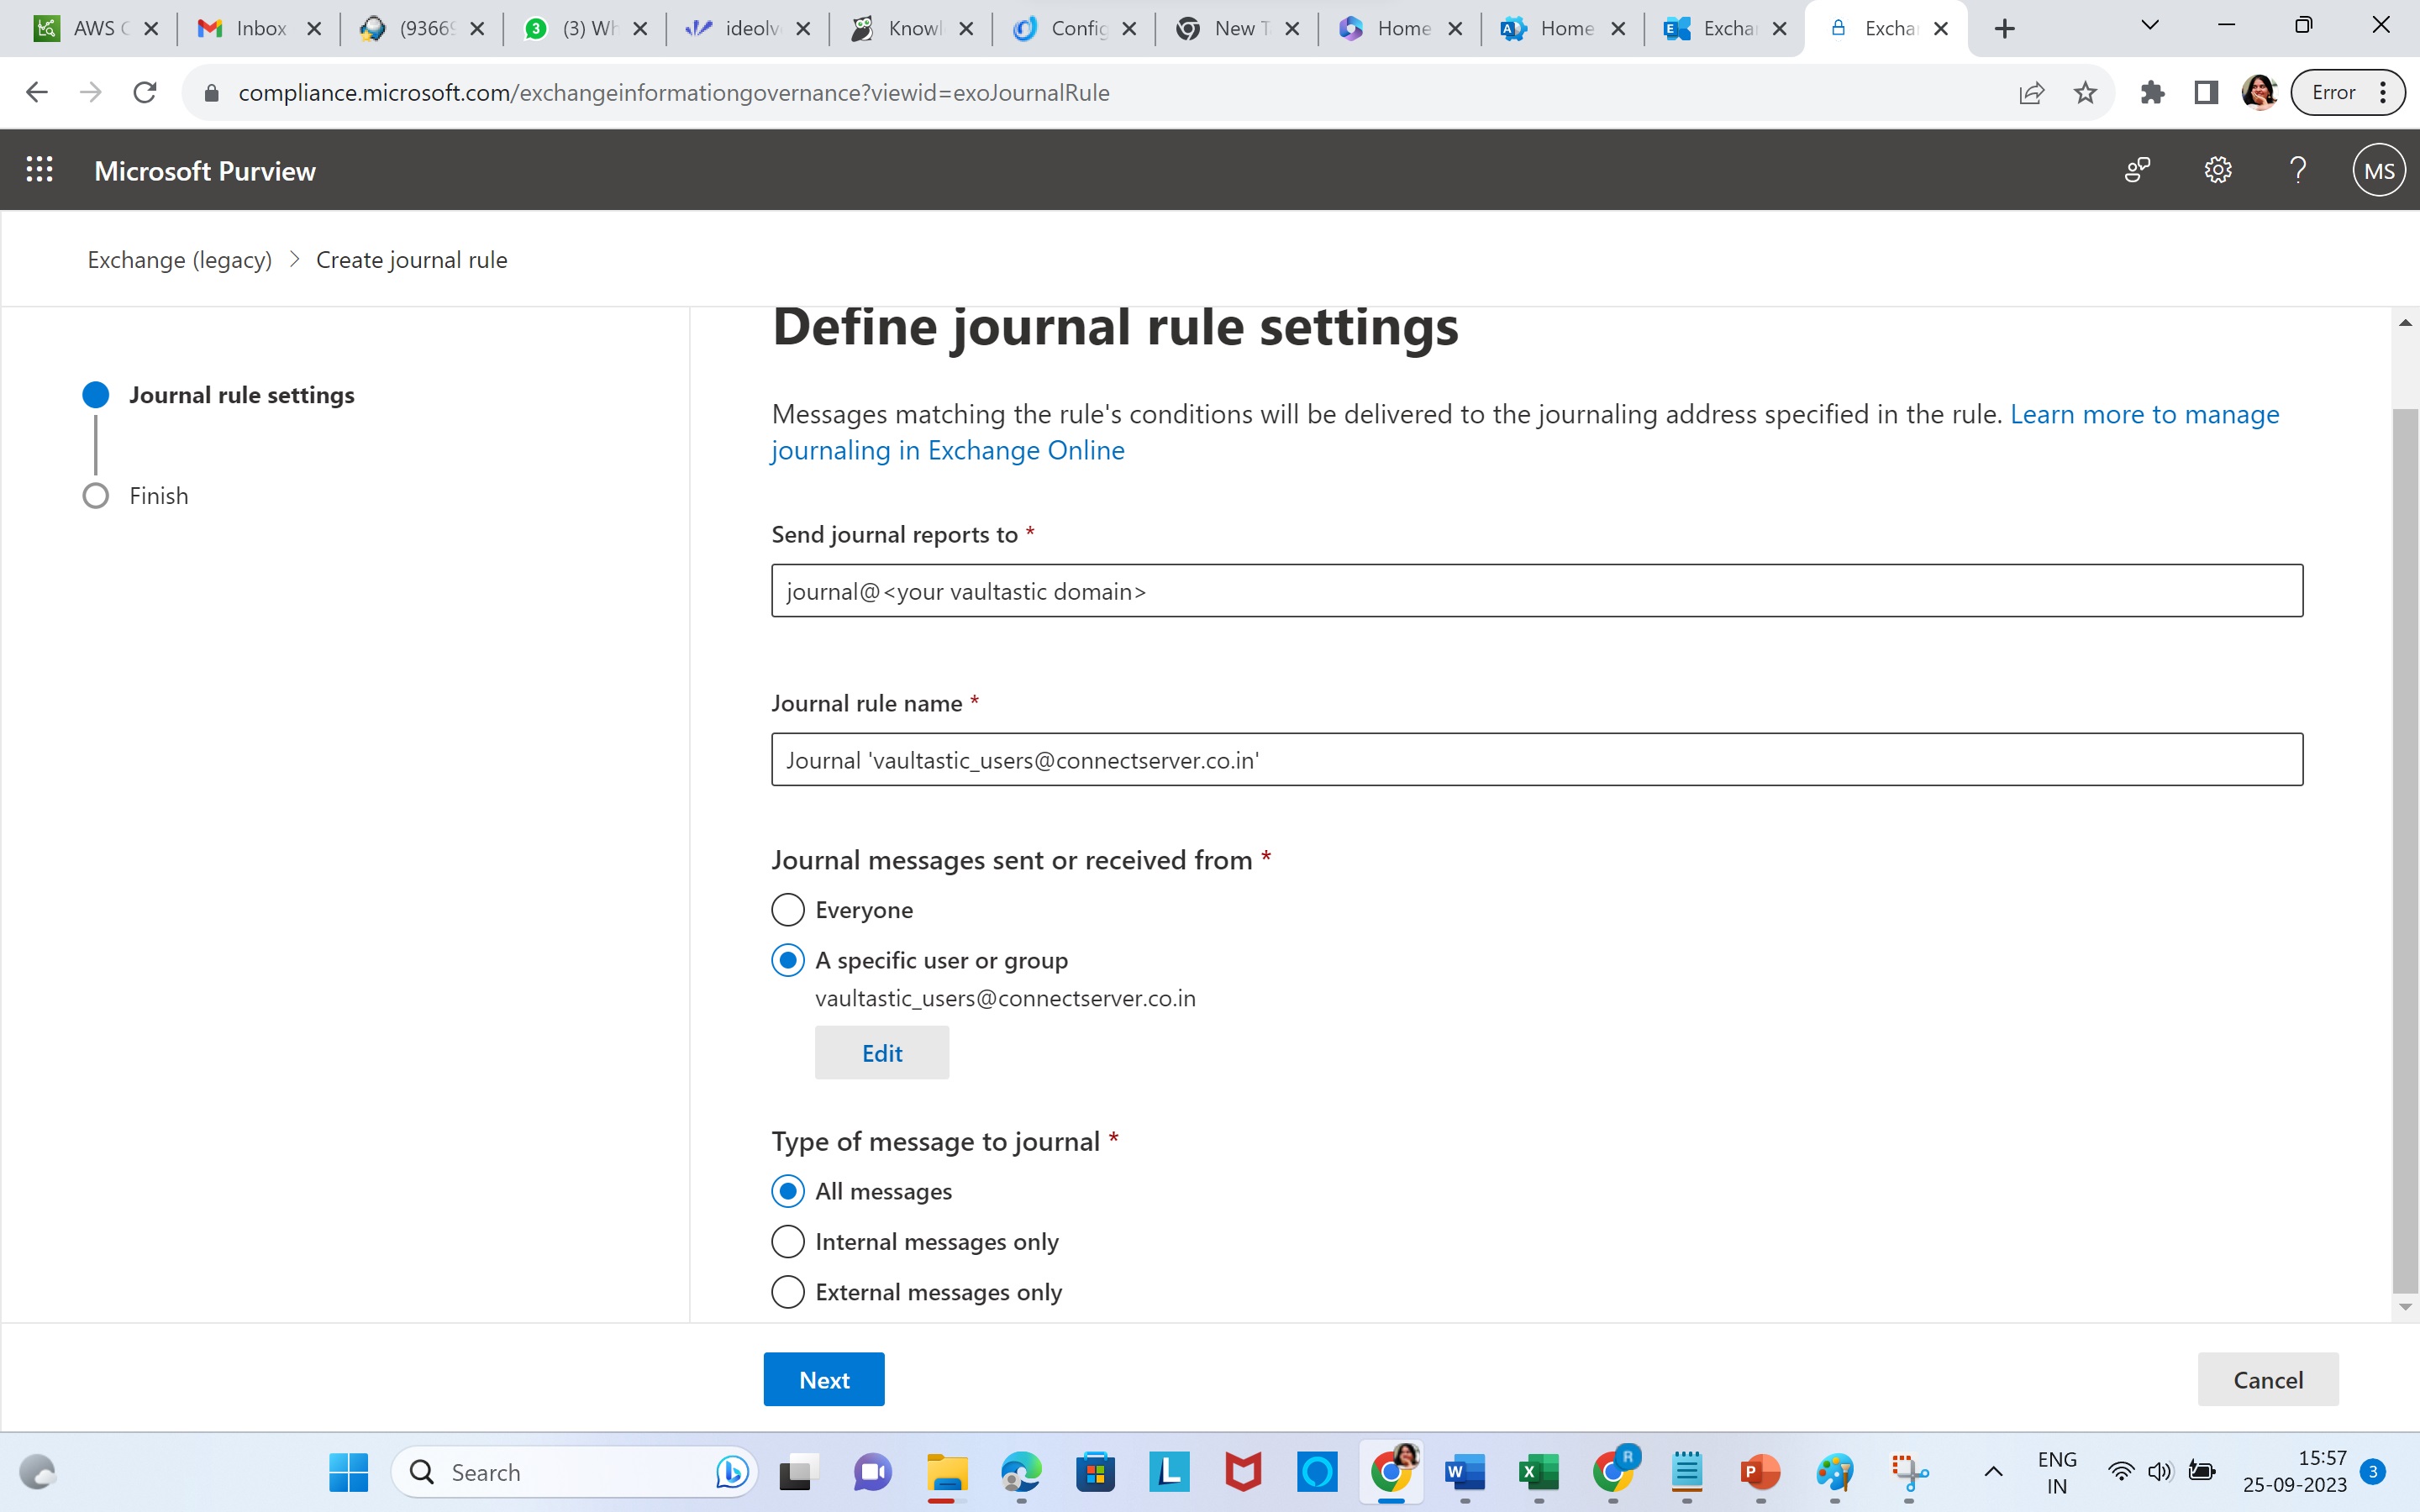
On the Define journal rule setting page,
- In the edit box for Send journal reports to, add journal@<your vaultastic domain>
- Give a suitable Journal Rule name
- In the section for Journal messages sent or received from,
- Select Everyone if you want to journal mail for all users in your domain
- Select A specific user or group, if you want to journal mail for selected users. In the pop-up, select the group or user, click Add.

In Type of message to journal, select All messages
Click Next
Review and submit the rule

To reflect the changes, please log out and re-login to the admin portal.
With that, Microsoft 365 or Office 365 journaling setup is complete. As per the rule, all mail messages of all the users of the Microsoft 365 or Office 365 domain will be archived on their respective accounts on the Vaultastic domain.
NOTE: Journal rules typically take upto 3-4 hours to reflect.