Configure a chat account in Spark application
You can configure a chat account in Spark to send or receive instant messages to the contacts on your roster.
Note: You can not configure the priority value for this application. This will affect in syncing messages from mobile users. So if you are using a xmpp chat app on your mobile you may miss the chat messages on desktop client.
Steps to configure a Chat Account
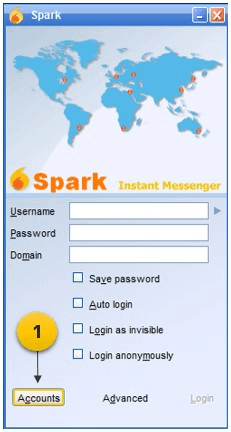
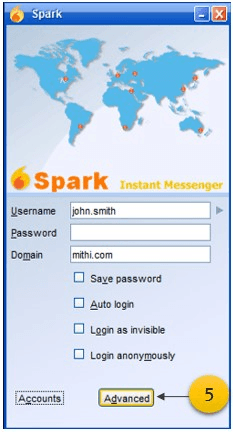
1. Download the application and install it on your machine. Click the Accounts button to start account configuration wizard.
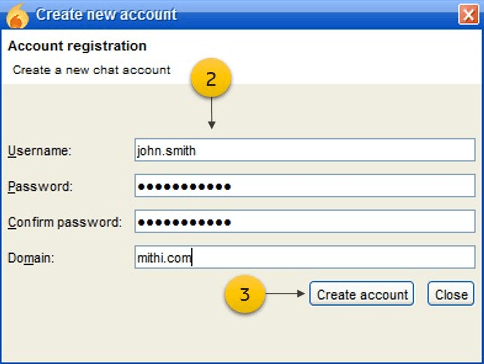
2. Provide account details viz. Username, Password, and Domain.
3. Click the Create account button to verify the information.
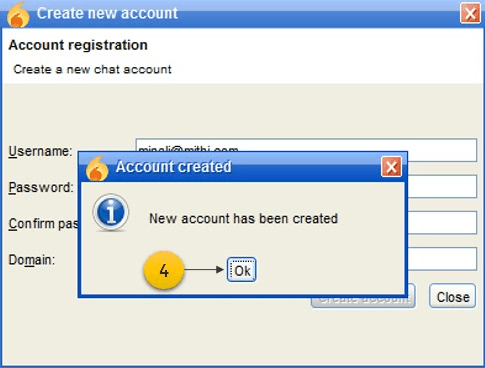
4. On successful verification, a message will be displayed on the screen. Click Ok to continue.
5. Click the Advanced to button to view Preferences
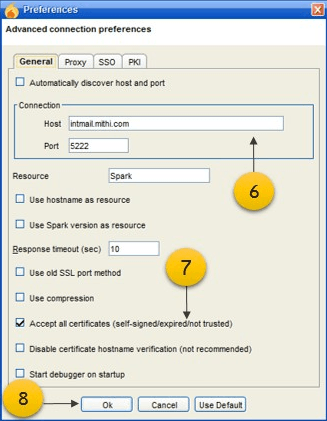
6. In the Host box, enter the server name and enter the number 5222 in the Port box.
7. Select the check-box to Accept all certificates (self-signed/expired/not trusted).
8. Click Ok to continue.
9. On the login window, enter your username, account password, domain and click the Login button.
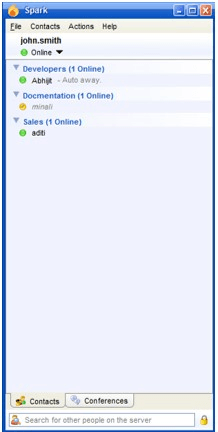
Successful login to your account opens the chat application showing the roster.