Configure an IMAP email account on your iOS device
Step 1: Go to the Add Account screen
- Go to the Settings screen.
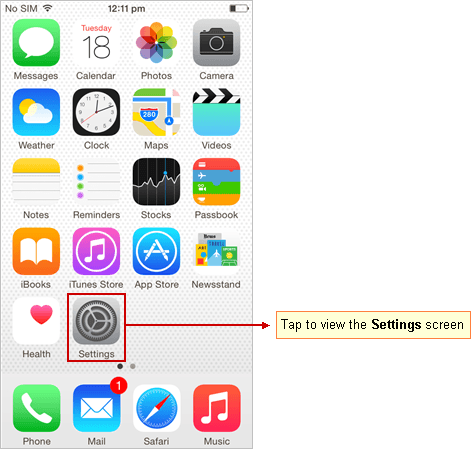
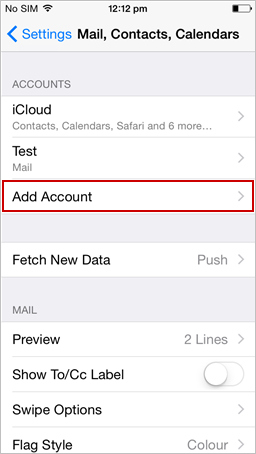
- On the Settings screen, tap Mail.
- Tap Add Account.
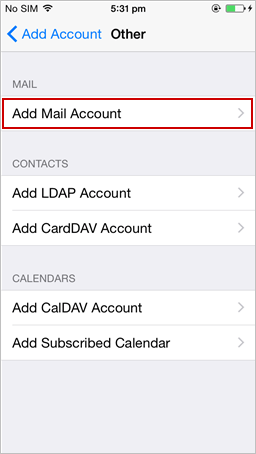
- Tap Other.
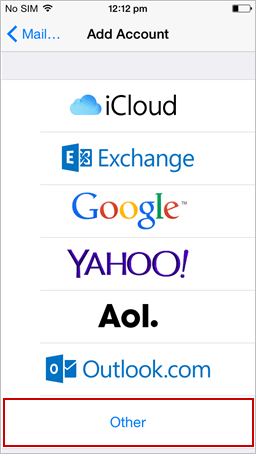
- Tap Add Mail Account.


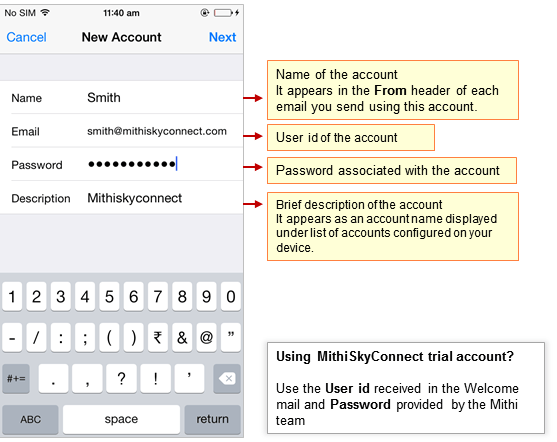
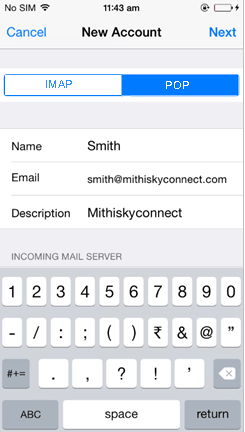
Step 2: Provide account information
- Enter your account information and then tap Next.

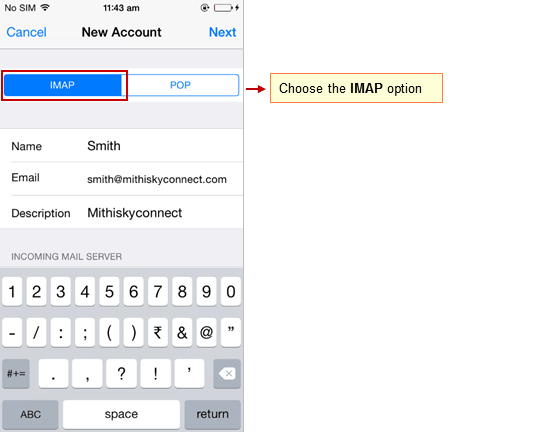
Step 3: Choose account type
- Make sure IMAP option is selected at the top.

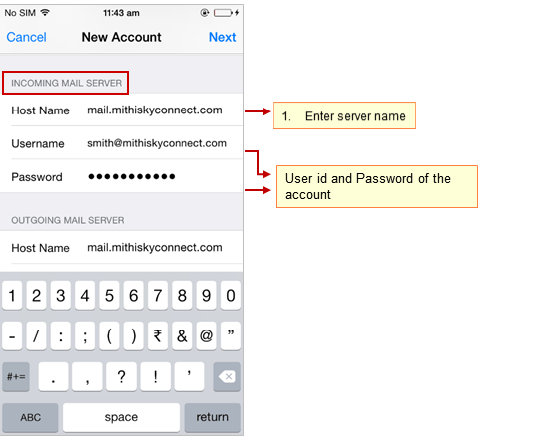
Step 4: Provide Incoming Server Settings
Scroll down and enter Incoming Mail Server details.
- Hostname: Enter server name.
- SkyConnect Trial Account user: Provide the server name as mail.mithiskyconnect.com
- Other Users: Provide the server name in the format {domain}.mithiskyconnect.com Example: acmecorp.mithiskyconnect.com
- Username and Password: Provide User id and the password associated with the account. If you are using Mithi SkyConnect Trial account, provide user id and password which you have received in the Welcome Mail.
TIP: If you change the password in the future, an error occurs and application fails to fetch emails from the server.


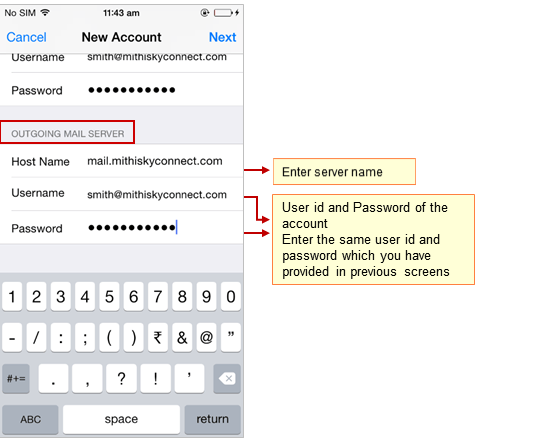
Step 5: Provide Outgoing Server Settings
Scroll down and provide Outgoing Mail Server details. Then, tap Next.
- Hostname: Enter server name.
Don't know your server name? Access the online help to know the server settings required to configure your account.
- Username and Password: Provide User id and the password associated with the account. If you are using Mithi SkyConnect Trial account, provide user id and password which you have received in the Welcome Mail.
TIP: If you change the password in the future, an error occurs and application fails to fetch emails from the server.
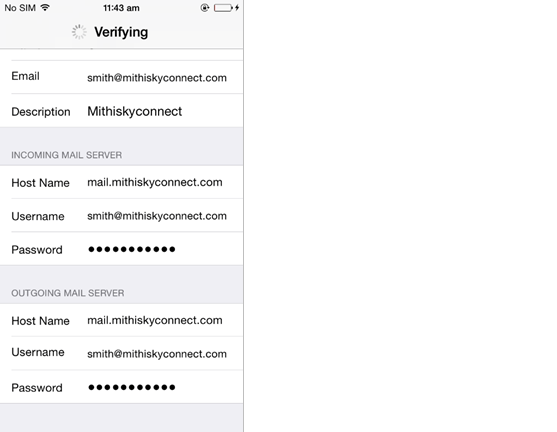
- iOS verifies the settings provided and connects using SSL to the server by default. After successful verification, save the configured account on your device.


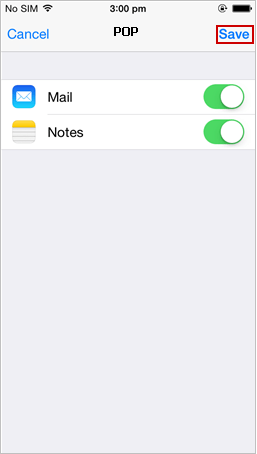
Step 6: Save the account
- Tap to Save the account on your device.
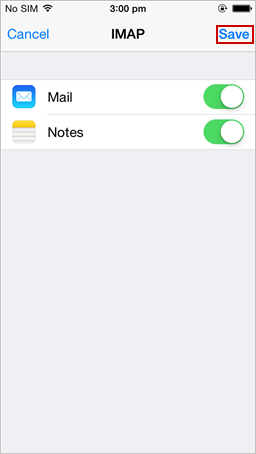
- Now, your account is configured and listed under Accounts section on your device.


By default iPhone save a copy of an email sent in the Sent folder on iPhone. It is a good practice to save it on the server. To save a copy of an email sent on the server, refer the steps mentioned in the Manage your email account configured on your iOS device
Configure a POP email account on your device
Step 1: Go to the Add Account screen
- Go to the Settings screen.

- On the Settings screen, tap Mail.
- Tap Add Account.

- Tap Other.

- Tap Add Mail Account.


Step 2: Provide account information
- Enter your account information and then tap Next.


Step 3: Choose account type
- Make sure POP option is selected at the top.

Step 4: Provide Incoming Server Settings
Scroll down and enter Incoming and Outgoing Mail Server details.
- Hostname: Enter server name.
Don't know your server name? Access the online help to know the server settings required to configure your account.
- Username and Password: Provide User id and the password associated with the account. If you are using Mithi SkyConnect Trial account, provide user id and password which you have received in the Welcome Mail.
TIP: If you change the password in the future, an error occurs and application fails to fetch emails from the server.
- iOS verifies the settings provided and connects using SSL to the server by default. After successful verification, save the configured account on your device.


Step 5: Save the account
- Tap to Save the account on your device.
- Now, your account is configured and listed under Accounts section on your device.


Manage your email account configured on your iOS device
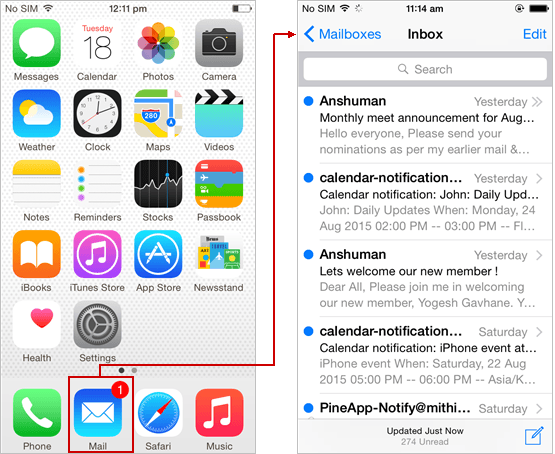
View your mailbox
From home screen tap the mail icon and choose your account to view emails from your mailbox.
- Now you can compose your message, add attachments to the message and send it to required recipients.
- Tapping the To / Cc / Bcc field, application displays a list contacts on your mobile. Choose the required contact from the list.
- You can access all the shared / global contacts of your organization, configure an LDAP account on your iOS device.
- Also, if required you can import your personal contacts to your mobile device.
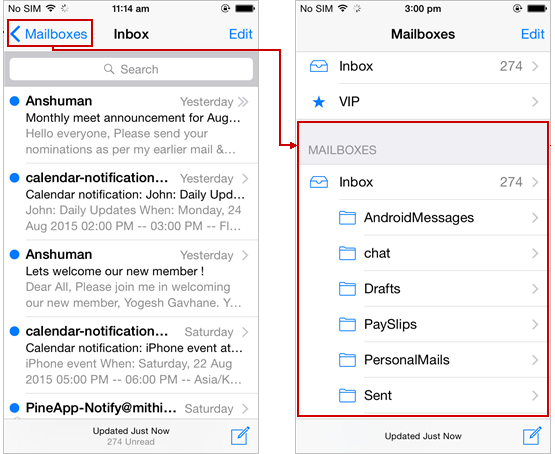
View IMAP folders
Note: You can access all the IMAP folders on your mobile only If you have configured an IMAP type of account on your device.
iPhone mail application syncs all the IMAP folders from server to your device automatically. To view IMAP folders, tap your account from Inbox screen.
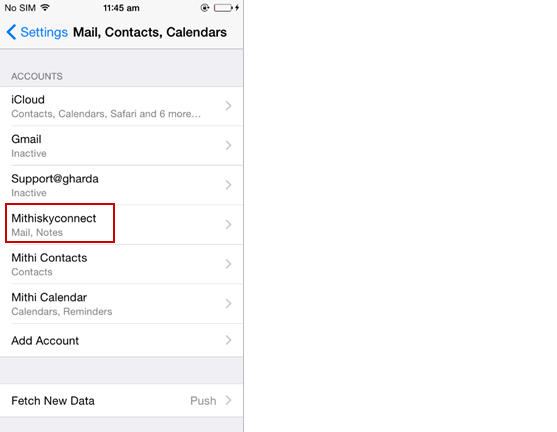
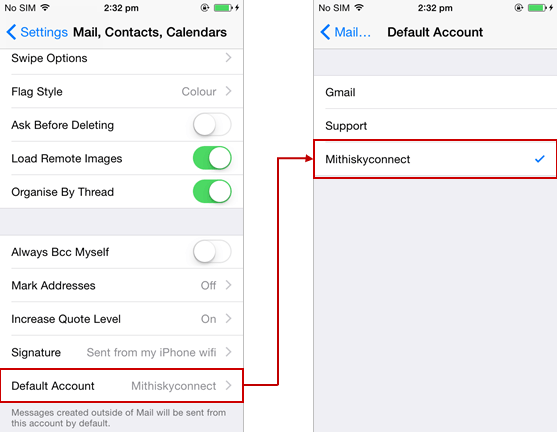
Set default mail account
If you have configured multiple email accounts on your iPhone, you can set a default mail account from the list. Default account setting option is visible only when multiple accounts are configured on your device. To set your email account as a default account:
- Go to the Home screen and choose Settings => Mail, Contacts, Calendars
- Then, scroll down, tap Default Account and then choose your account.

Save a copy of an email sent on the server
If you are using a POP type of account you need to customize settings on mobile to save a copy of an email sent in the Sent Items folder on the server. Follow the steps as given below.
- Go to the Advanced settings of the mail account.
- Tap to choose the Sent Mailbox settings.
- Here, choose the Sent Items folder on the server.
TIP: To navigate to the Advanced Settings screen:
- Go to Home screen and choose Settings => Mail
- Tap to choose your mail account.
- Scroll down and choose Advanced option.

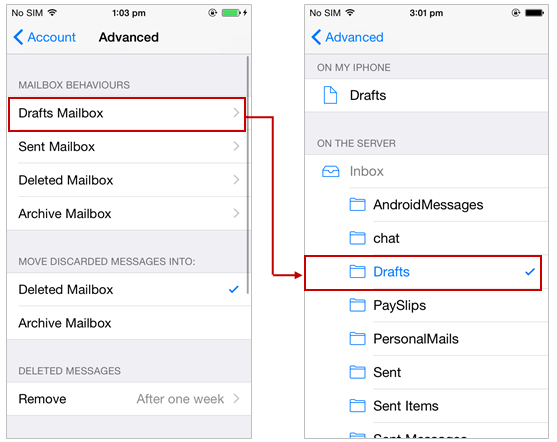
Save a copy of a draft on the server
Note: You can access all the IMAP folders on your mobile only If you have configured an IMAP type of account on your device.
By default iPhone saves the draft in the Drafts folder on iPhone. It is a good practice to save it on the server. To save a draft on the server:
- Go to the Advanced settings of the mail account.
- Tap to choose the Drafts Mailbox settings.
- Here, choose the Drafts folder on the server.

TIP: To navigate to the Advanced Settings screen:
- Go to Home screen and choose Settings => Mail
- Tap to choose your mail account.
- Scroll down and choose Advanced option.
Move the deleted email on the server
By default iPhone moves the deleted email in the Trash folder on iPhone. It is a good practice to save it on the server. To move the deleted email in the Trash folder on the server:
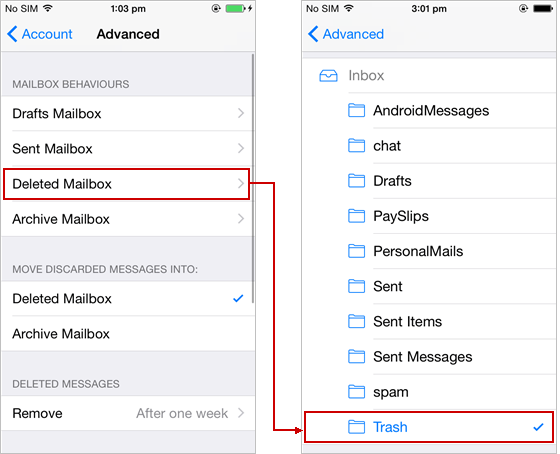

- Go to the Advanced settings of the mail account.
- Tap to choose the Deleted Mailbox settings.
- Here, choose the Trash folder on the server.
TIP: To navigate to the Advanced Settings screen:
- Go to Home screen and choose Settings => Mail
- Tap to choose your mail account.
- Scroll down and choose Advanced option.
Update Password
- Go to Home screen and choose Settings => Mail
- Tap to choose your mail account.
- Tap SMTP => Change password of the account
- Scroll down and choose Advanced option => choose Incoming Server Settings => update password of your account
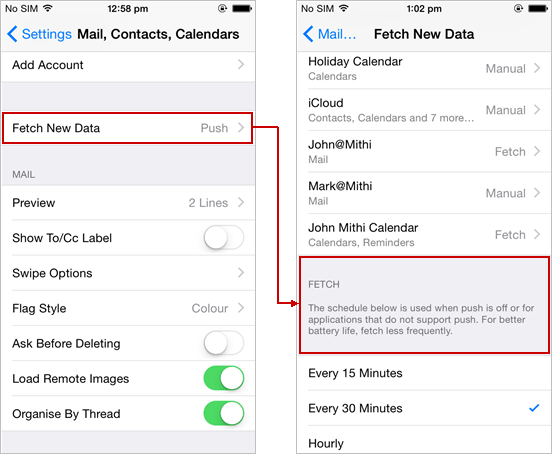
Set minimum background fetch interval
Schedule minimum background fetch interval to improve the battery life of your iOS device. To set minimum background fetch interval
- From home screen, go to Settings => Mail
- Scroll down to tap the Fetch New Data option.
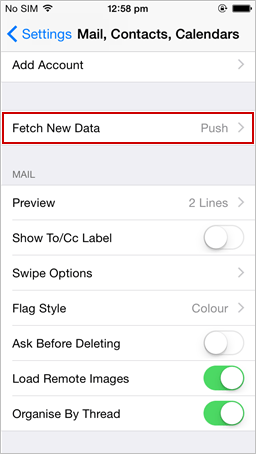
- Choose the option so that iOS will fetch the data less frequently. If you choose to fetch data foe every 15 minutes, iOS will wake up every 15 minutes for that. This could affect the battery life of the iPhone.


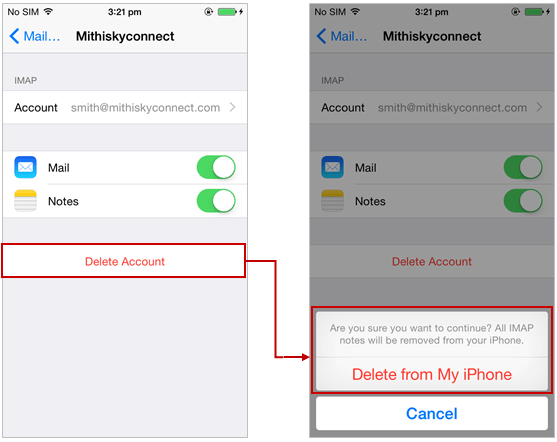
Remove account from device
- Go to Settings => Mail screen
- Tap to choose your account from the list
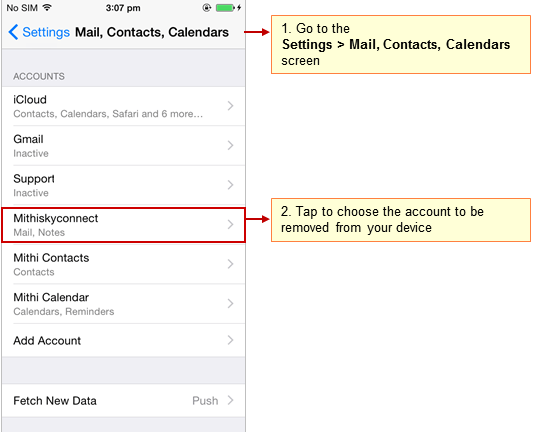
- Tap Delete to remove your account from your device