Overview
- This topic defines the steps to configure the forwarding of mails sent to users not found on the Google workspace setup to the SkyConnect setup.
- IMPORTANT NOTE: In the example, the following values are seen in the screen shots. Please replace with your custom names
- Domain name: vaultastic.io
- Route name: vaultastic.io routing
Step 1: Configure a route for the sub domain
- Navigate to Admin > Apps > G Suite > Gmail > Hosts
- Create a new mail route.
- Give a suitable name to the route
- In Specify Email Server, select Multiple Hosts and enter mx1.mithi.com : 25 and mx2.mithi.com: 25
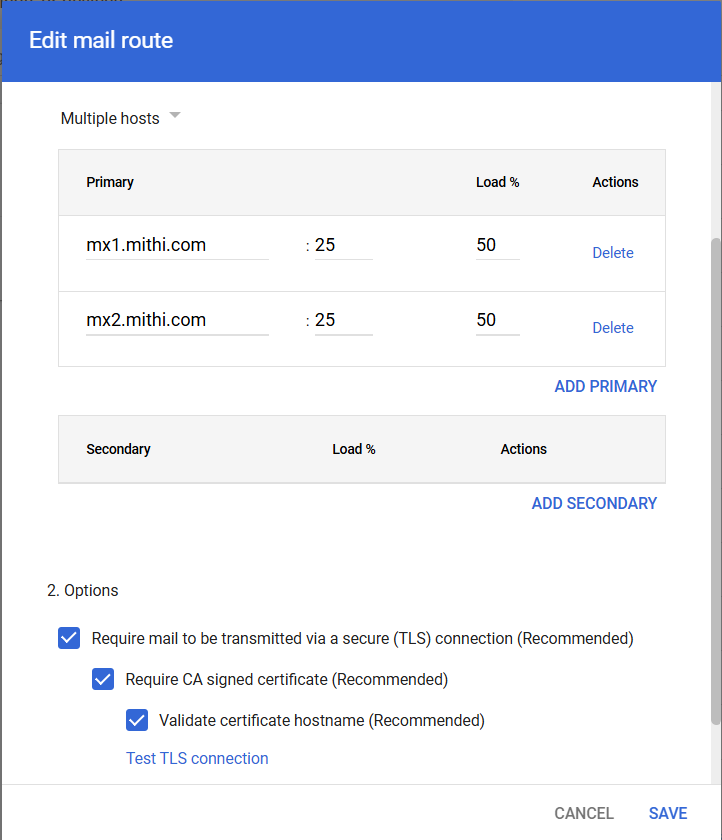
- In Options section
- Select Require mail to be transmitted via a secure TLS connection
- Select require CA signed certificate
- Select Validate certificate hostname
- Click Test TLS connection. Wait for the test to complete
- On successful completion. Save the route.

Step 2: Add a routing rule for incoming mail
- Navigate to Admin > Apps > G Suite > Gmail > Advanced Settings > Routing
- Create a mail routing rule
- Give a suitable name to the Rule
- In Email messages to affect, select all options Inbound, Internal-receiving)
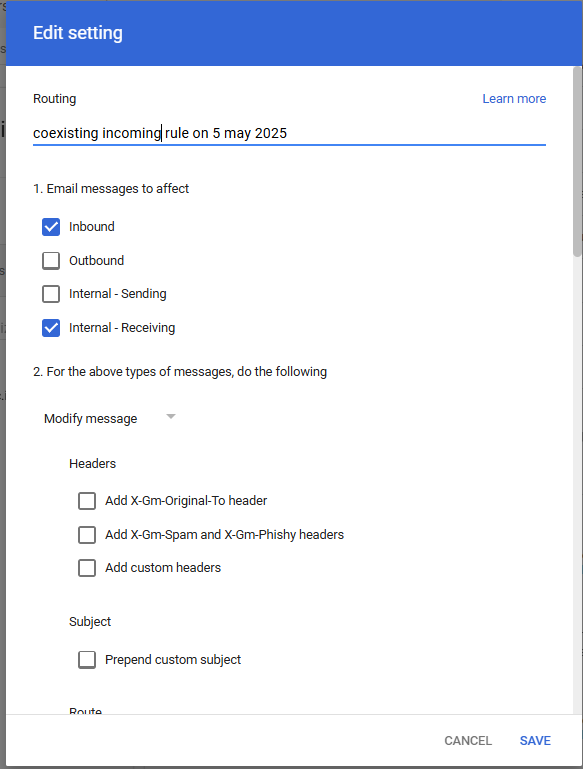
- In the Second section of the setup, DO NOT Modify message.
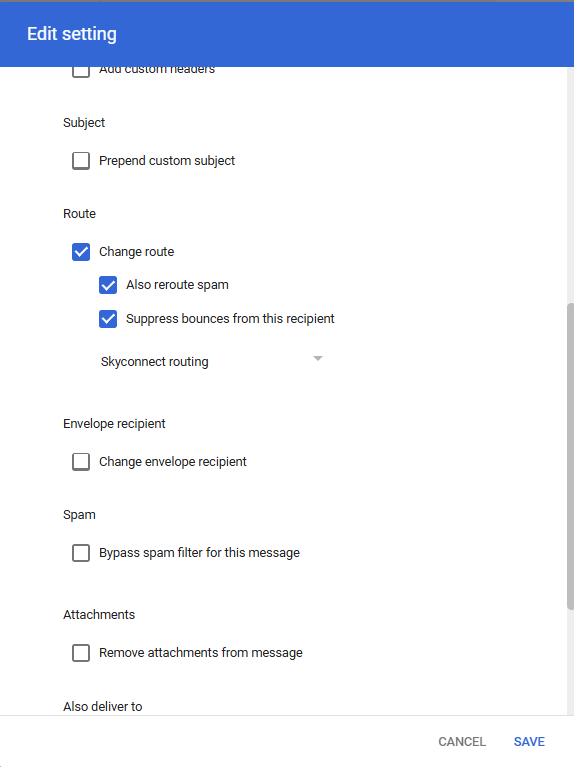
- Go to the Routes section,
- Select Change Routes and from the drop down list select the route created in STEP 1
- Check box for Also reroute spam and Suppress bounces from this recipient
- Click on Show Options
- Under B. Account types to affect, select Unrecognized/catchall setting
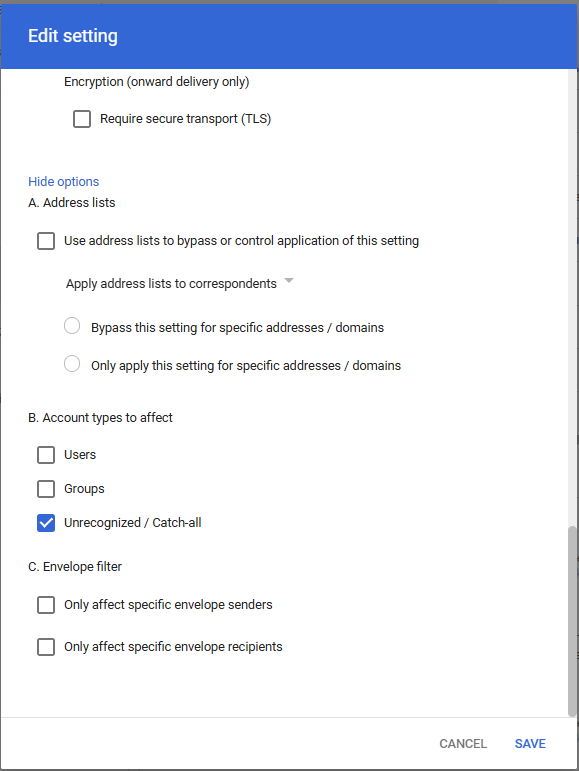
- Under B. Account types to affect, select Unrecognized/catchall setting
- Save the rule.


