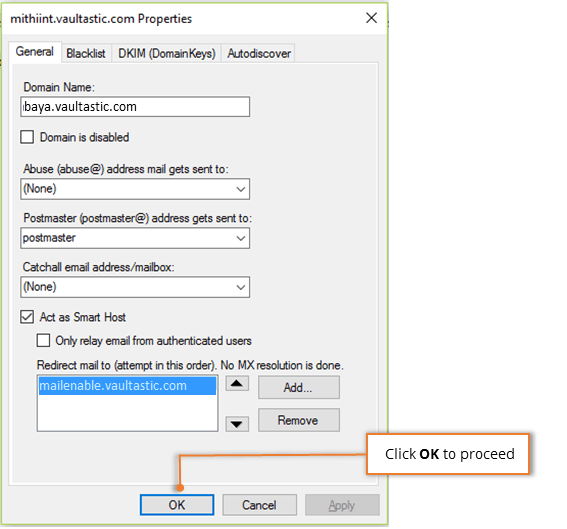
Before adding mail filters for the users of your domain, you need to follow the steps mentioned below to add mail route for the Vaultastic server. This mail route is a SMTP connector which will be used to route mail from MailEnable to Vaultastic.
As this is a one-time job, if you have already added the mail route for the Vaultastic server, you can skip this step and go to the next step to add mail filter for the user.
Navigate to the MailEnable Admin Console
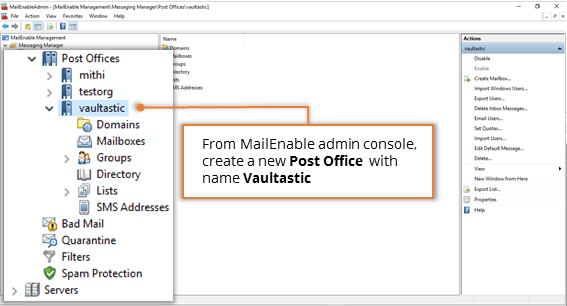
Create a new Post Office say Vaultastic
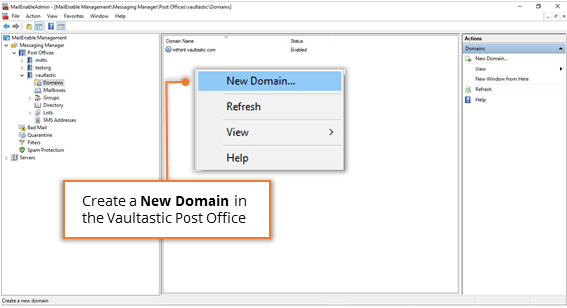
Add New Domain to Vaultastic Post Office.
Configure properties of the domain as follows.
Specify domain name in the format {domain-name}.vaultastic.com
For example:
If the name of your MailEnable domain is baya.in then domain name for the corresponding Vaultastic domain will be baya-in.vaultastic.com
The details of your Vaultastic domain would have been shared with you in the welcome mail, when your domain was created on Vaultastic.
Enable the option to act the domain as a Smart Host.
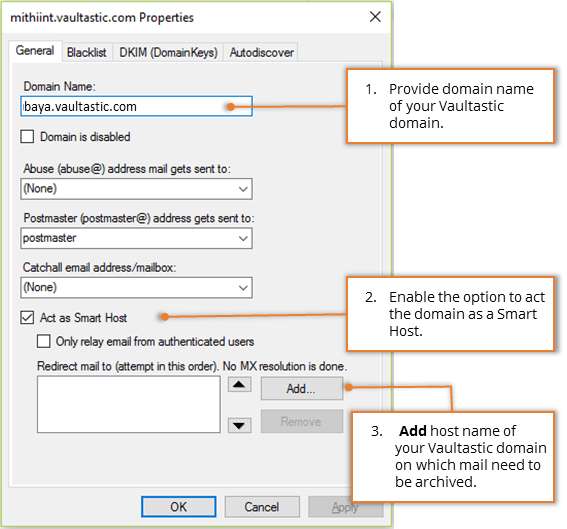
Add host name as mailenable-v4.Vaultastic.com
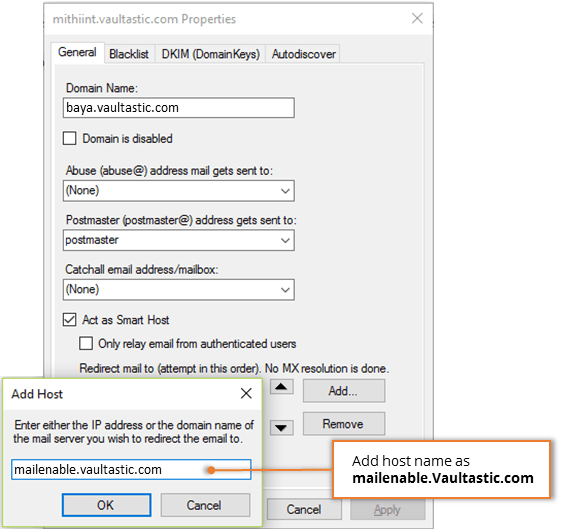
NOTE: The diagram shows mailenable.vaultastic.com instead of mailenable-v4.vaultastic.com. Use mailenable-v4.vaultastic.com
Click OK to finish the domain adding process.
