Configure your account
Step 1- Copy server settings from Baya Online Help
- Log in to your SkyConnect account using Baya
- Click the Help button to launch online help
- Click Mobile > Calendar button
- Copy the settings viz. Server name, URL, and id
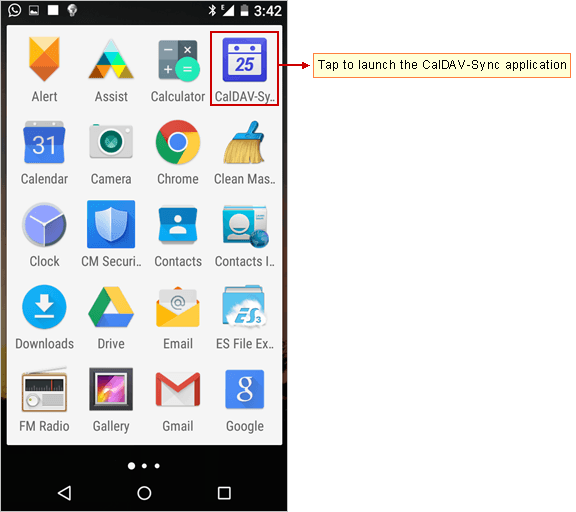
Step 2: Install CalDAV Application on your mobile
Install CalDAV-Sync an Android CalDAV Client from the Google Play Store.
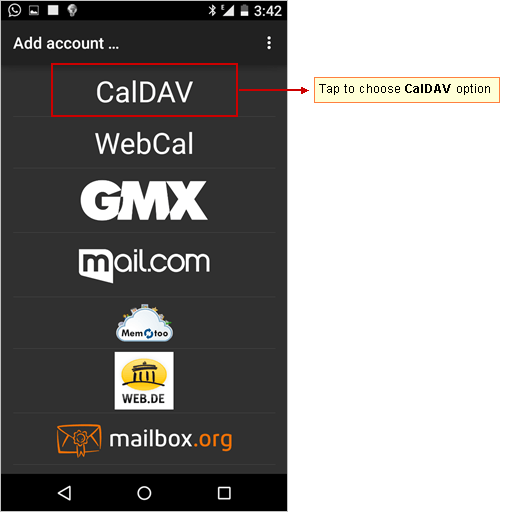
Step 3: Go to Add account screen
- Go to the Home screen and tap the CalDAV-Sync application.
- Then, choose the Create new account option which displays the Add Caldav account screen.


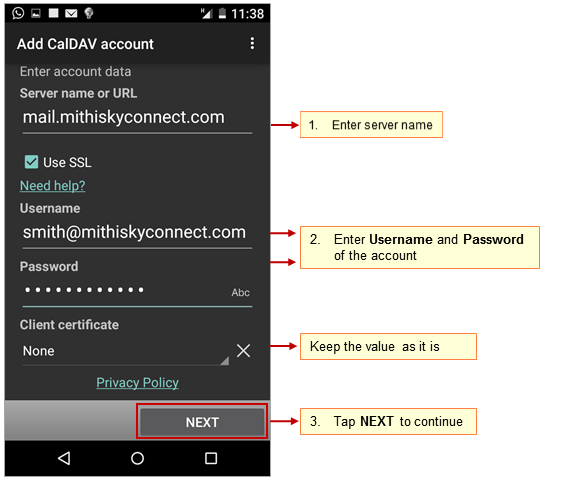
Step 4: Provide account information
- Server name or url: Enter server name
Don't know your server name? Access the online help to know the server settings required to configure your account.
- User name: Enter your complete email id.
- Password : Password associated with your account. Use the settings copied from Baya V3 interface.
- Keep the Use SSL check-box selected.
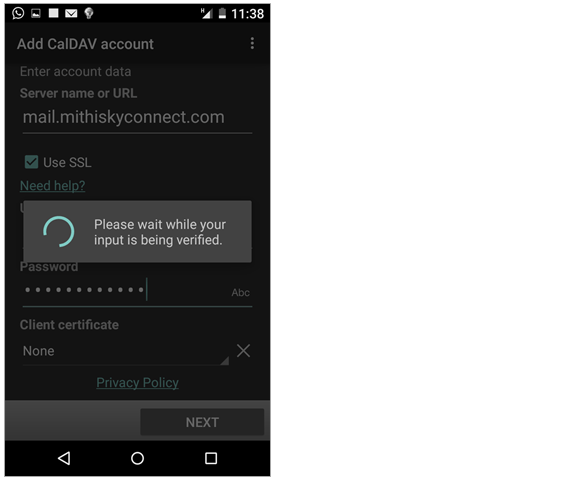
- Tap Next to proceed.
- Application verifies the settings provided and displays all the calendar accounts to sync which includes the subscribed and shared calendars to view events from.


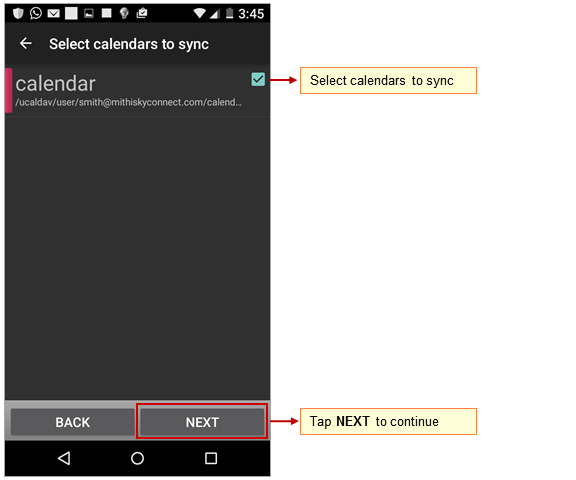
Step 5: Customize the account settings
- Select the required calendars to sync with your mobile.
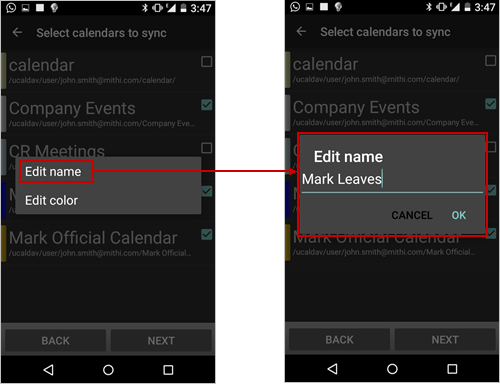
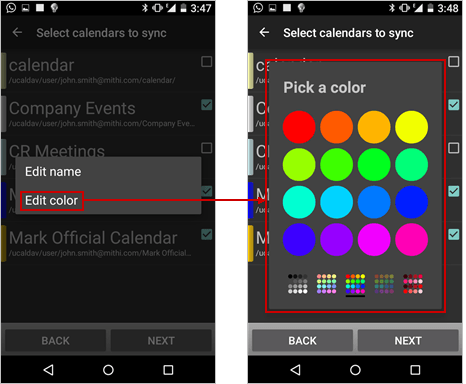
- If required, you can press and hold the calendar for a while to edit its name or the color to display.For example, following image describes the process of editing name and color of calendar.


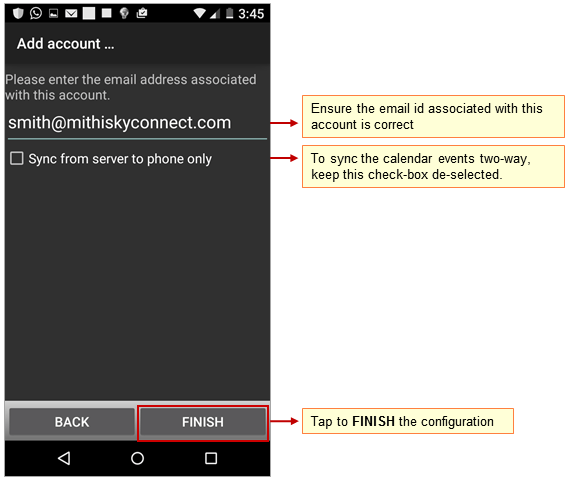
Step 6: Finish the configuration
- Make sure the email address populated by the application is correct.
- Keep the Sync from server to phone only check-box deselected. So as to configure the account for two-way-sync.
- Tap the Finish option to complete the set up.

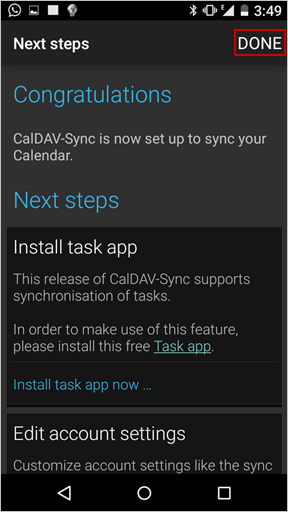
Step 7: Save the account
- Tap DONE to exit the setup.
Manage your calendar account
View events from the calendar account
You can use the native calendar or the planner application on your mobile to view the events from the account. To view events: From the Home screen, choose the calendar application. You can change the calendar-view to display events on your mobile.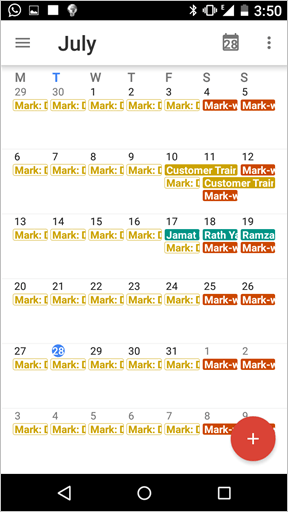
Add an event using mobile
Following procedure helps you to add an event to the calendar account on the Connect Xf server using your mobile. You can set alarms to for the these upcoming events to receive Pop-up or email alerts. You can receive email alerts for the upcoming events and meetings if the calendar alarm service on your server is on. To add an event:
- Tap the + New Event on the calendar screen.
- Choose the calendar on the server.
- Provide required details
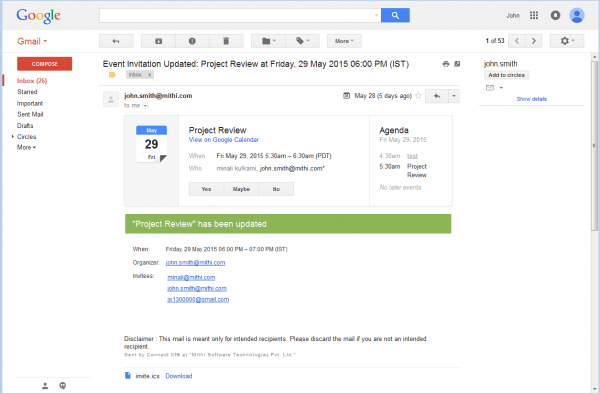
- Tap the Save option to complete the process. As the account is configured for two-way-sync, you can see this event from your desktop or web client as well. This way, you too can access and manage your calendar on the Connect Xf server using android device.All the attendees on same domain receive invites in the Inbox folder of the calendar application.
 All the participants on external domain get email invite which they can process further.
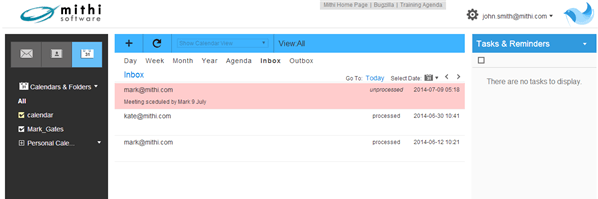
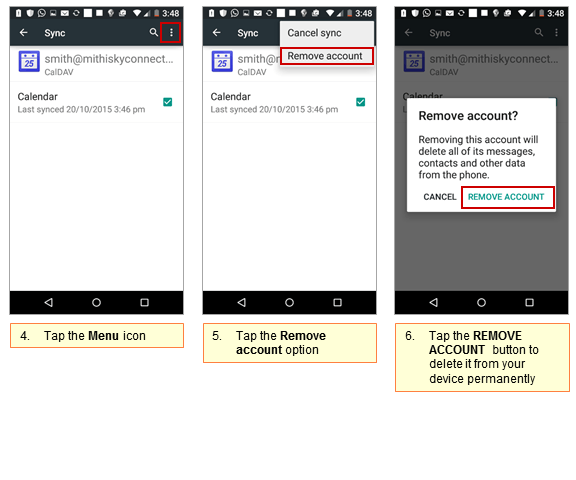
Remove the account
- Go to the Settings screen and scroll down to the Accounts section
- Tap the CalDAV option
- Choose the account to be removed from the device.
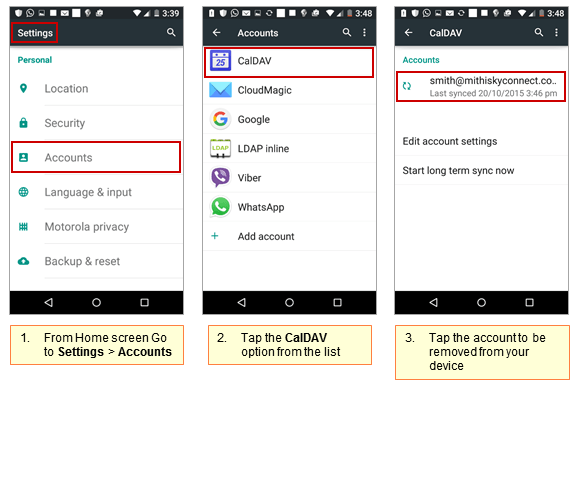
- Tap the Menu icon.
- Tap the Remove Account option.
- Tap the REMOVE ACCOUNT button to confirm deletion.