To archive mail from your primary domain hosted on CPanel, you need to configure filters. These filters forward mail from your primary server to the Vaultastic server.
To configure forwarding, you need to login to the Exim server using SSH. It is required to configure the following filters to archive mail on Vaultastic.
Filter to forward a copy of received mail to archive account
Filter to forward a copy of sent mail to archive account
A. Create a filter to forward a copy of received mail to the archive account
To configure a filter to forward a copy of received mail, you need to create a file /etc/valiases/. This file will contain the rule for forwarding a copy of received mail to Vaultastic.
For example, to configure the filter to forward all received mail on the domain baya.in to its corresponding Vaultastic domain, create a file /etc/valiases/baya.in

Open the file /etc/valiases/ in vi editor
vi /etc/valiases/

For example:
vi /etc/valiases/baya.in
Add all the user ids as per the format mentioned below
{userid}@{domainname}: {userid}@{domainprefix}.vaultastic.com

For example,
To forward mail received from users amit and deepa on the baya.in domain, add lines mentioned below
amit@baya.in: amit@baya-in.vaultastic.com
deepa@baya.in: deepa@baya-in.vaultastic.com
Save the file
B. Create a filter to forward a copy of sent mail to the archive account
To configure a filter to forward a copy of sent mail, you need to create a file /etc/cpanel_exim_system_filter2. This file will contain the rule for forwarding all sent mail to Vaultastic.
Once the file is created, you need to set this fie to the Systems Filter from the Web Host Manager interface.
Create the cpanel_exim_system_filter2 file

Login to the server using ssh
Make a copy of the System Filter file using the command mentioned below
cp /etc/cpanel_exim_system_filter /etc/cpanel_exim_system_filter2
Open the System Filter file in the vi editor
vi /etc/cpanel_exim_system_filter2
Add user details for whom you want to enable archiving in the format mentioned below
if $sender_address: contains “{userid}@{domainname}”
then
unseen deliver “$sender_address_local_part@{domainprefix}.vaultastic.com”
endif

For Example:
If you need to enable archiving for the users amit and deepa’ on the baya.in domain,
enter the following lines in the filter file.

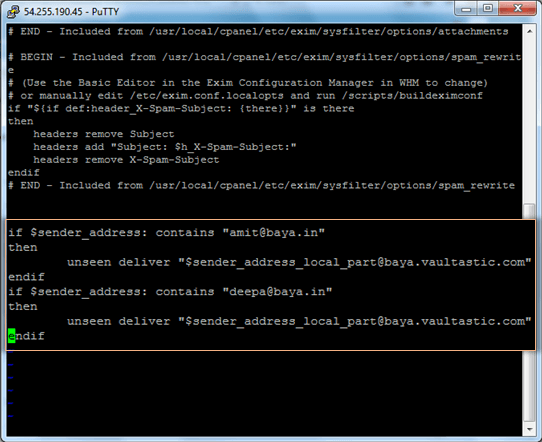
if $sender_address: contains “amit@baya.in”
then
unseen deliver “$sender_address_local_part@baya-in.vaultastic.com”
endif
if $sender_address: contains “deepa@baya.in”
then
unseen deliver “$sender_address_local_part@baya-in.vaultastic.com”
endif
Save the file
- Set the System Filter file from WHM interface
- Set the System Filter file to /etc/cpanel_exim_system_filter2
- Login to WEB HOST MANAGER using valid credentials.

- From the left panel search box, search for exim. This will navigate you to the Exim Configuration Manager section quickly.

- Click the Exim Configuration Manager button.

- Select the Basic Editor tab
- Locate the System Filter File section
- Select the Edit option and paste the string as mentioned below
/etc/cpanel_exim_system_filter2

- Scroll down and click the Save button.

- This will update the settings and restart the Exim server.

