Configure IMAP email account in Blue Mail app
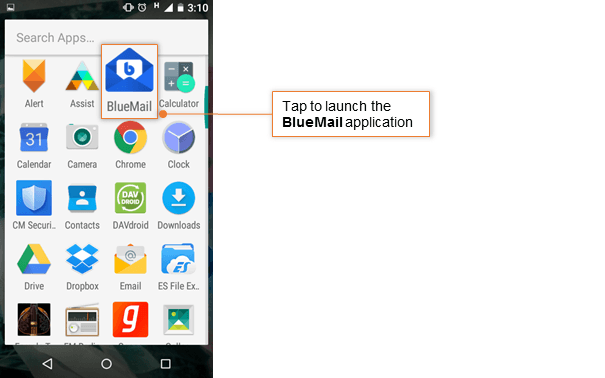
Step 1:Install Blue Mail Application
- You need to download and install the Blue Mail app on your mobile device.
- Launch the Blue Mail application from the home screen.

Step 2: Go to the Add Account screen
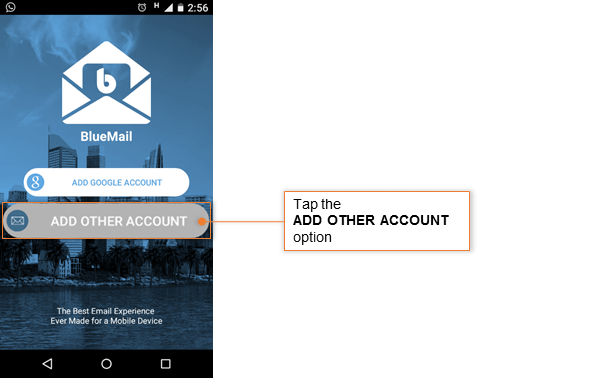
- Tap the ADD OTHER ACCOUNT option.
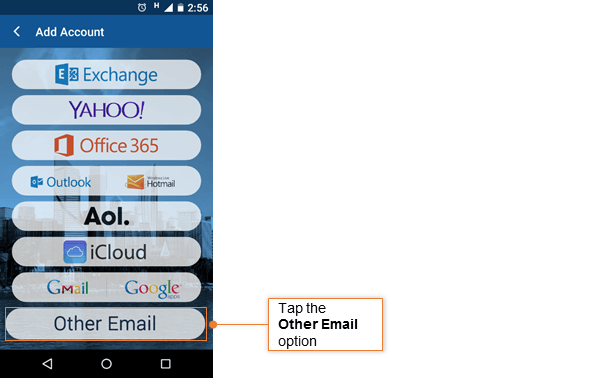
- Tap Other Email account to be configured.
Step 3: Provide User Information
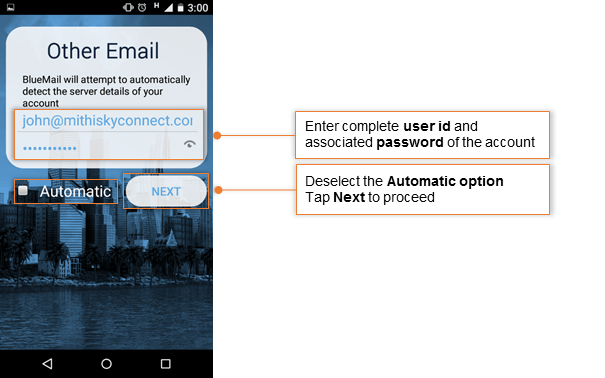
- Enter complete User Id and associated Password of the account. If you are using Mithi SkyConnect Trial account, provide user id and password which you have received in the Welcome Mail.
-
Deselect the Automatic option
-
Tap Next to proceed
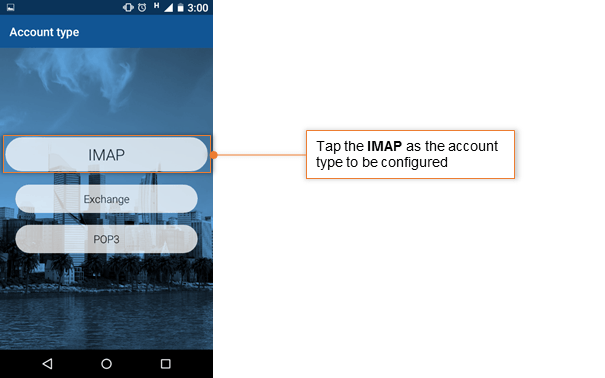
Step 4: Choose Account Type
- Tap the IMAP as the account type to be configured
Step 5: Provide Incoming Server Settings
-
User name : User name for account is displayed here
-
Authentication: Choose PLAIN option
-
IMAP Server: Enter Server name
-
Security Type: Choose the SSL/TLS option from the list
-
Port: Keep the default value 993 as it is.
-
Tap Next to proceed.

- BlueMail application verifies the settings provided.


Step 6: Customize account settings and finish the configuration
-
-
Provide text string which will get attached to each outgoing message as your signature.
-
Give your account appropriate name which displays in the list of accounts configured on your mobile device.
-
Tap Done to proceed.

-
Customize the settings to decide the behavior of the application for incoming mails to this account.
-
Tip to save the battery life of your device
-
Choose the option so that Android will fetch the data less frequently. For example, if you choose to fetch data foe every 15 minutes, Android will wake up every 15 minutes for that. This could affect the battery life of the your mobile.
-
Tap Done to finish the configuration.
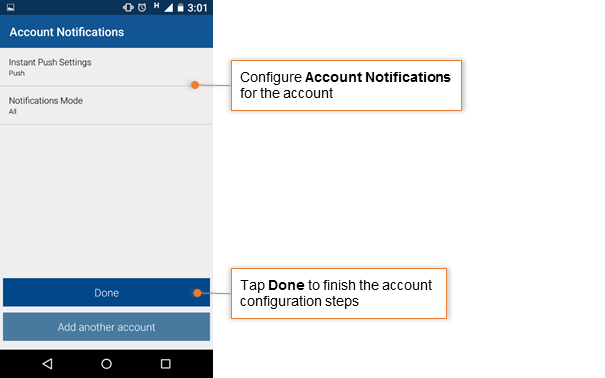
-
Application creates an account on your mobile.
-


Configure POP email account in Blue Mail app
Step 1: Install Blue Mail Application
-
You need to download and install the Blue Mail app on your mobile device.
-
Launch the Blue Mail application from the home screen.
Step 2: Go to the Add Account screen
-
Tap ADD OTHER ACCOUNT option.

-
Tap Other Email account to be configured.

Step 3: Provide User Information
- Enter complete User Id and associated Password of the account. If you are using Mithi SkyConnect Trial account, provide user id and password which you have received in the Welcome Mail.
-
Deselect the Automatic option
-
Tap Next to proceed
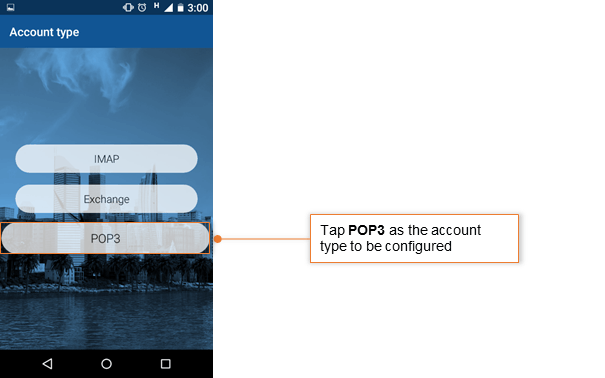
Step 4: Choose Account Type
-
Tap the POP3 as the account type to be configured
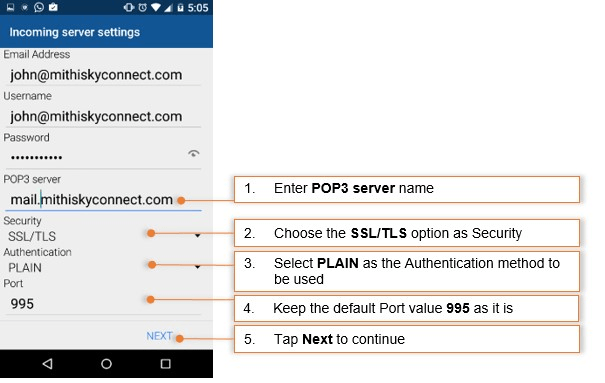
Step 5: Provide Incoming Server Settings
-
User name: User name for account is displayed here
-
Authentication: Choose PLAIN option
-
POP3 Server: Enter Server name
-
Security Type: Choose the SSL/TLS option from the list
-
Port: Keep the default value 995 as it is.
-
Tap Next to proceed.
-
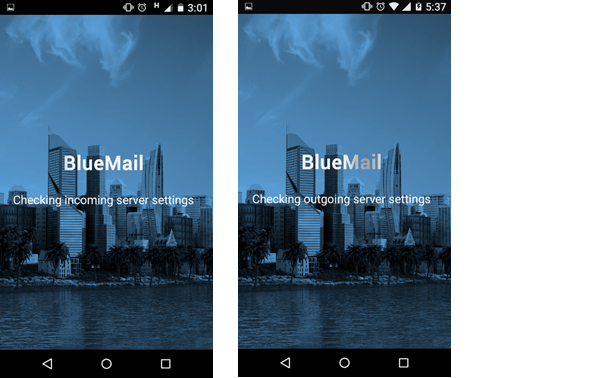
BlueMail application verifies the settings provided.

Step 6: Customize account settings and finish the configuration
-
Provide text string which will get attached to each outgoing message as your signature.
-
Give your account appropriate name which displays in the list of accounts configured on your mobile device.
-
Tap Done to proceed.

-
Customize the settings to decide the behavior of the application for incoming mails to this account.

-
Tap Done to finish the configuration.

- Application creates an account on your mobile.

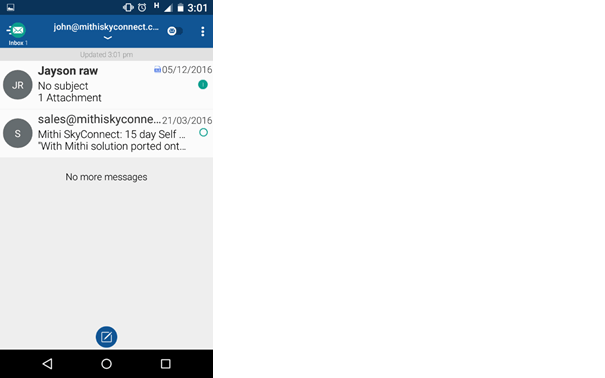
Manage your email account configured in Blue Mail
Manage your account
- Tap the account name to open Inbox screen showing mail listed in the account.
- Now you can compose your message, add attachments to the message and send it to required recipients.
- Tapping the To/Cc/Bcc field, application displays a list contacts on your mobile. Choose the required contact from the list.
- Find a copy of an email sent in the Sent folder of your device which is automatically synced to the Sent Items folder on the server. Can not find a copy of an email sent in the Sent Items folder?
- You can access all the shared/global contacts of your organization, configure an LDAP account on your android mobile
- Also, if required you can import your personal contacts to your mobile device.
Save a copy of an email sent to the server
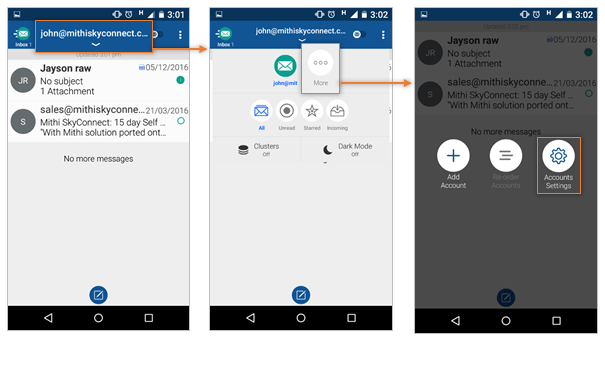
If you are using POP type of account you need to save a copy of an email sent to the Sent Items folder on the sever as given below.
-
Tap your Account.
-
Tap the More option.
-
Tap the Accounts Settings option.
-
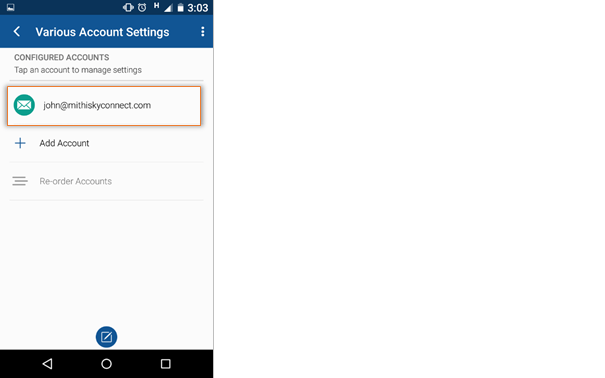
Tap to select your account.
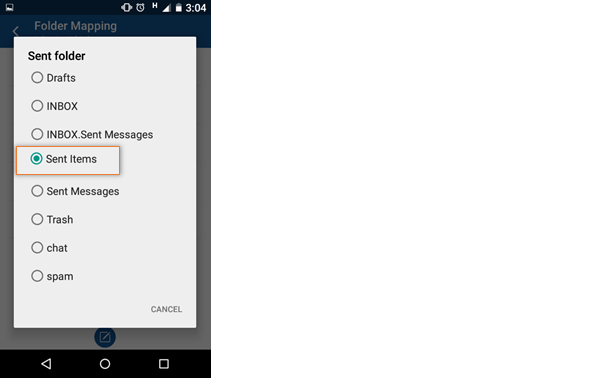
- Tap Folder Management > Folder Mapping > Sent folder


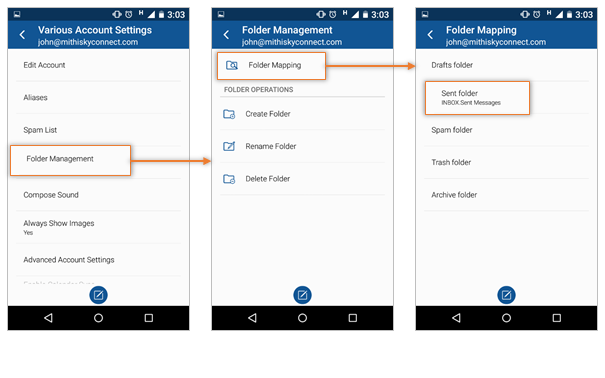
-
Tap to select the Sent Items folder on the server to save a copy of email sent from your mobile device.
Update Password of the account
-
Tap your Account.
-
Tap the More option.
-
Tap the Accounts Settings option.
-
Tap to select your account.
-
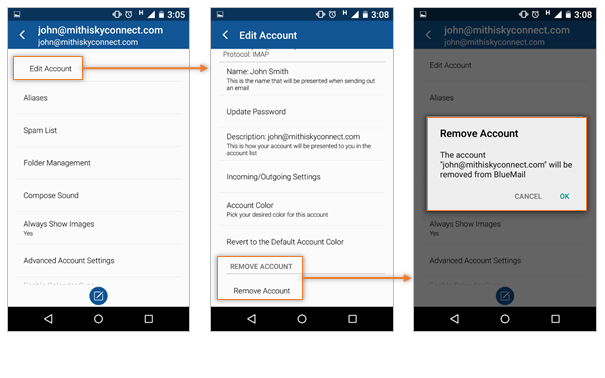
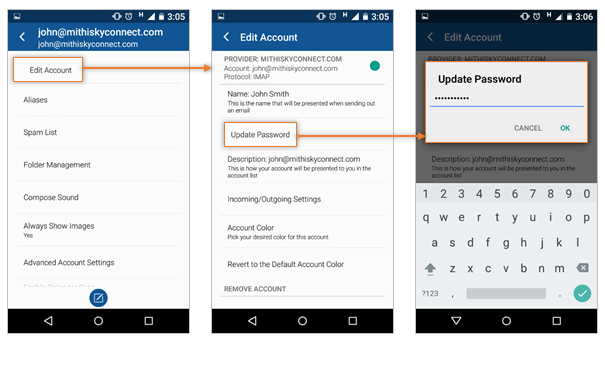
Tap Edit Account > Update Password
-
Update your account password and tap Ok to exit.
Remove your account
-
Tap your Account.
-
Tap the More option.
-
Tap the Accounts Settings option.
-
Tap to select your account.
-
Tap Edit Account > Remove Account.
-
Tap Ok to delete your account from mobile device.