Configure an IMAP email account in Outlook 2010
Step 1: Create an email account
- Start Outlook.
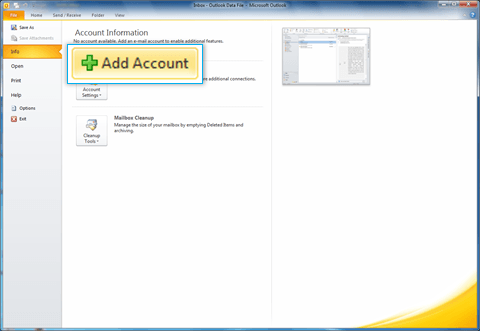
- On the File menu > Info tab, click the Add Account link.
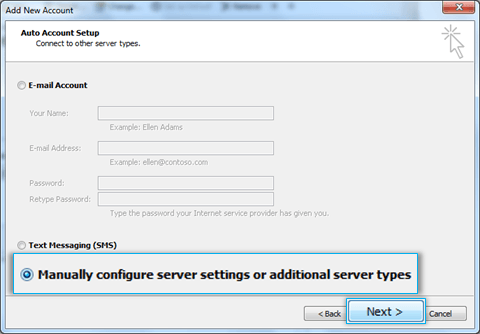
- On the Add Account dialog box,
- Click to choose the Manually configure server settings or additional server types option.
- Then click Next to continue.

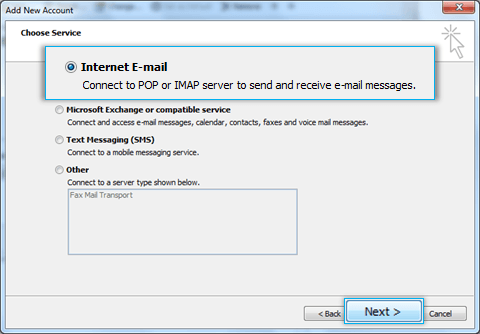
- Choose the Internet E-mail option as the type of account to be configured.


Step 2: Provide Account Details
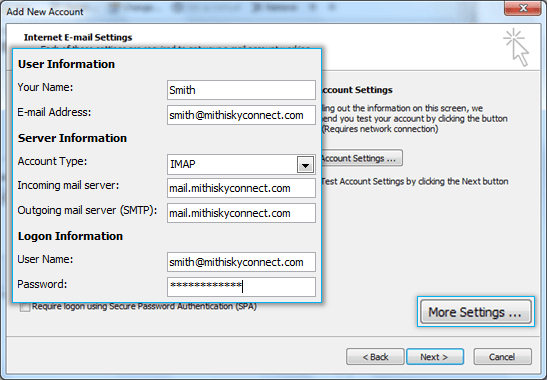
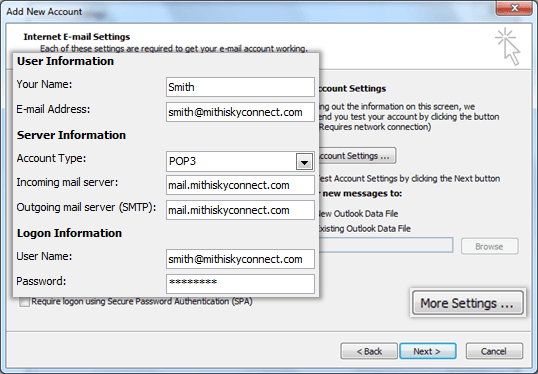
- In the User Information section, provide below details.
- In the Your Name box, enter your name exactly as you want it to appear to recipients.
- In the E-mail Address box, type your e-mail address.
- In the Server Information section,
- Select IMAP for Account Type.
- In the Incoming mail server box, type the name of your Server.
- In the Outgoing mail server (SMTP) box, type the name of your Outgoing/SMTP server.
- In the Logon Information section,
- In the User Name box, type your SkyConnect user id.
- In the Password box, type your password.
Using Mithi SkyConnect trial account? Use the User Id received in the Welcome Mail and Password provided by the Mithi team.
- Click the More Settings button.
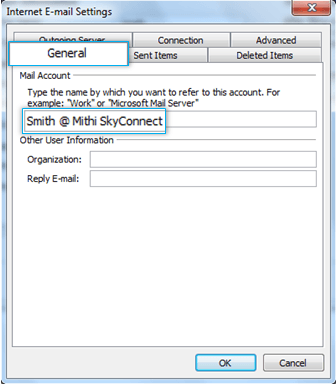
- Provide Internet email settings. On the General tab, enter name of the account for your reference.
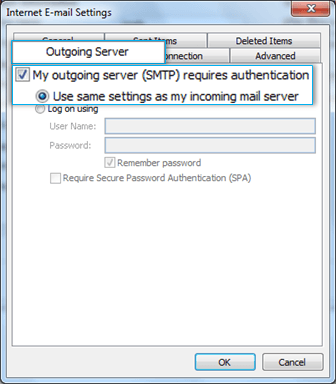
- Select the Outgoing Server tab. Enable the SMTP authentication by selecting the My outgoing server (SMTP) requires authentication check-box. Choose the option to Use the same settings as my incoming mail server.

- Select the Advanced tab. Enter Server port numbers and their type of connection to the server as given below
- Incoming Server (IMAP): 993
- Type of encrypted connection to the incoming server: SSL
- Outgoing Server (SMTP) : 465
- Type of encrypted connection to the outgoing server: SSL
- Set the Root folder path to INBOX
- On the Sent Items tab, select the option Do not save copies of sent items
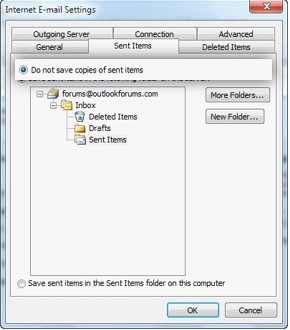
- Click OK to close the Internet Email Settings dialog box.
- On the Account Setup dialog box, click Next to proceed.
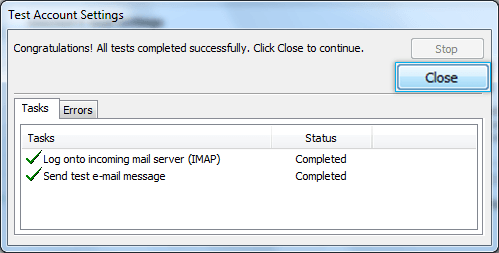
- Outlook verifies the settings provided. On completing the tests successfully, close the test status dialog box and click Next to continue.
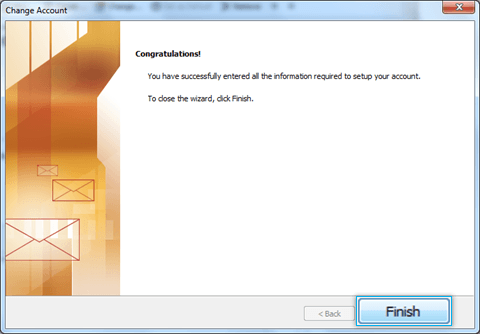
- Click Finish to complete the setup.


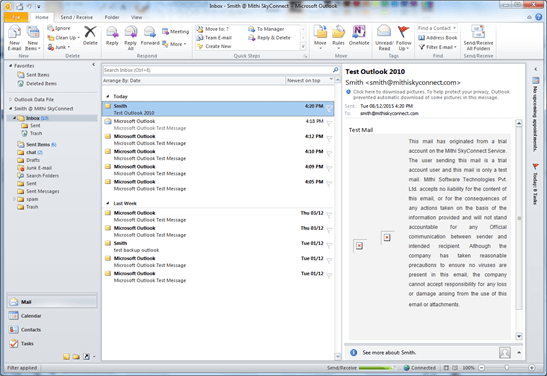
Outlook configures your account and displays the Inbox folder which holds all the mail received to your mailbox. You can find a copy of an email sent in the Sent Items folder of the desktop client which syncs automatically on the server.
Configure a POP email account in Outlook 2010
Step 1: Create an email account
- Start Outlook.
- On the File menu > Info tab, click the Add Account link.

- On the Add Account dialog box,
- Click to choose the Manually configure server settings or additional server types option.
- Then click Next to continue.


- Choose the Internet E-mail option as the type of account to be configured.

Step 2: Provide Account Details
- In the User Information section, provide below details.
- In the Your Name box, enter your name exactly as you want it to appear to recipients.
- In the E-mail Address box, type your e-mail address.
- In the Server Information section,
- Select POP3 for Account Type.
- In the Incoming mail server box, type the name of your Server.
- In the Outgoing mail server (SMTP) box, type the name of your Outgoing/SMTP server.
- In the Logon Information section,
- In the User Name box, type your SkyConnect user id.
- In the Password box, type your password.
- Click the More Settings... button.
- Provide Internet email settings. On the General tab, enter name of the account for your reference.

- Select the Outgoing Server tab. Enable the SMTP authentication by selecting the My outgoing server (SMTP) requires authentication check-box. Choose the option to Use the same settings as my incoming mail server.
- Select the Advanced tab. Enter Server port numbers and their type of connection to the server as given below
- Incoming Server (POP3) : 995
- Type of encrypted connection to the incoming server : SSL
- Outgoing Server (SMTP) : 465
- Type of encrypted connection to the outgoing server : SSL
- Click OK to close the Internet Email Settings dialog box.
- On the Account Setup dialog box, click Next to proceed.
- Outlook verifies the settings provided. On completing the tests successfully, close the test status dialog box and click Next to continue.

- Click Finish to complete the setup.

- Outlook configures your account and displays the Inbox folder which holds all the mail received to your mailbox. You can find a copy of an email sent in the Sent Items folder of the desktop client which syncs automatically on the server.


Manage your email account configured in 2010
Subscribe your IMAP folders
If you have configured an IMAP account, you can subscribe to access the IMAP folders on the server.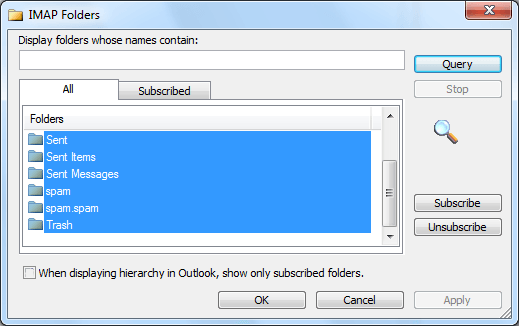
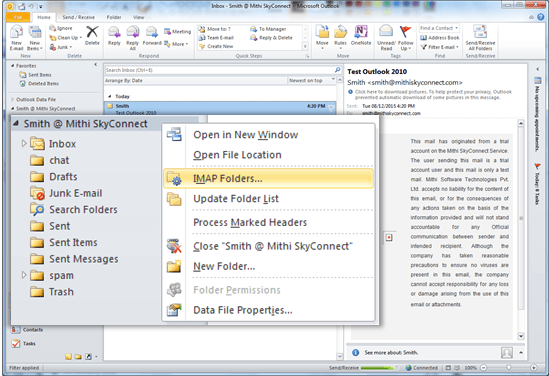
- Right-click the account name in the left pane and select IMAP Folders option.
- Subscribe folders
- Click the Query button to list the folders available on the server.
- Select all the folders and click the Subscribe button.
- Uncheck the box When displaying hierarchy in Outlook, show only the subscribed folders.
- Click OK


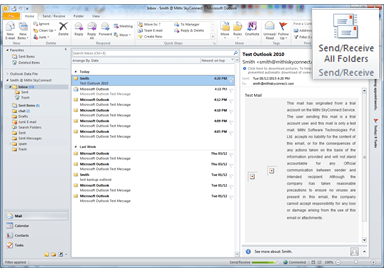
- Click the Send/Receive button to synchronize emails in all the folders.

Take backup of your mailbox
It is a good practice to take a back up of your mailbox. Also, before converting your POP account to IMAP, it is recommended to take backup of your mailbox or only important folders like Sent Items. Advantages of taking backup, You will always have a copy of all the important messages if something goes wrong while converting your account to IMAP. By keeping the backup of the data file on your desktop, you will minimize the storage required on the server. To have backup of your mail account in Outlook, you can export your email and mail folders from Outlook as a .pst file. Import this .pst file in one go onto a different computer or into another mail profile. The .pst file can only be opened within Outlook; other programs will not be able to open a .pst file.
- Launch Outlook on your desktop.
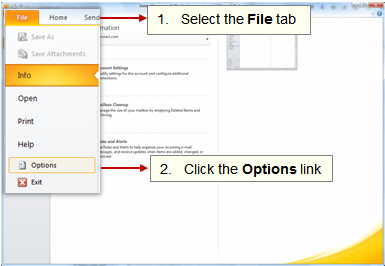
- Select the File tab and choose Options.
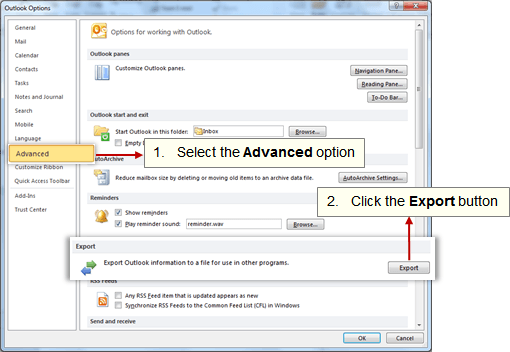
- Select the Advanced option and click the Export button.
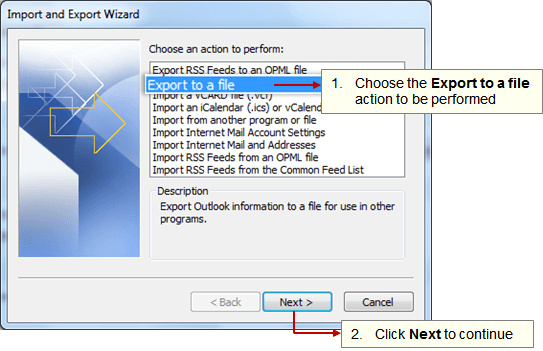
- On the Import Export Wizard box, choose the Export to a file option.

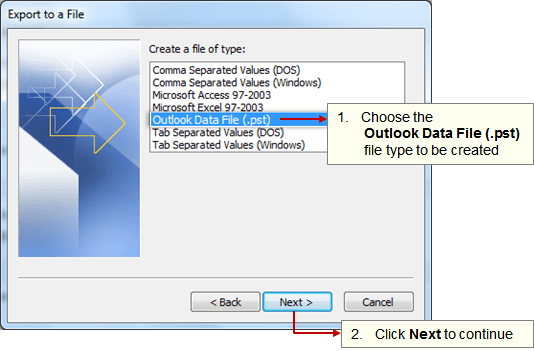
- On the Export to a file box, choose the Outlook Data File (.pst) option.
- Choose the mail account to be exported into a .pst file.
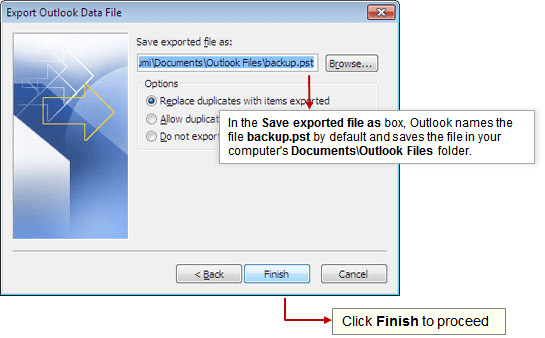
- In the Save exported file as box, Outlook names the file backup.pst by default and saves the file in your computer's Documents\Outlook Files folder.
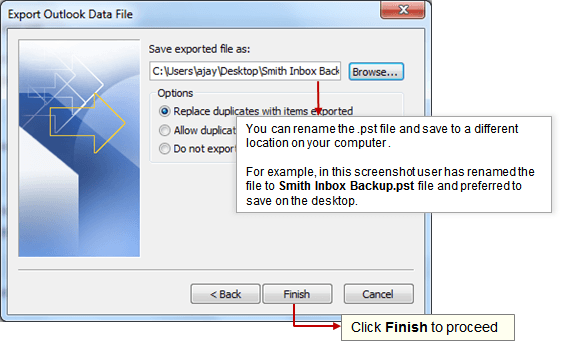
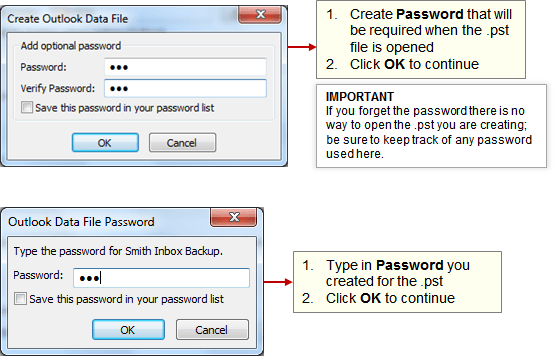
- You can rename the .pst file and save to a different location on your computer .It recommended to save the .pst file at safe location on your machine. For example, in this screenshot user has renamed the file to Smith Inbox Backup.pst file and preferred to save on the desktop.
- Set passowrd for the .pst file that will be required when the .pst file is opened.Important note: If you forget the password there is no way to open the .pst you are creating; be sure to keep track of any password used here.Click OK to continue.
- No notification message will appear to indicate that the back up is done. Go to the location you have chosen to store the backup file and verify if the backup file is created.If you have not changed the default location and name of the backup file, check the folder Documents\Outlook Files for Backup.pst file when Outlook has finished. If you have changed the location and/or name of the file, look for the appropriate file name/location. You can Import the PST file in your outlook if you need for reference in future.


Import .pst file in Outlook 2010
You can import the .pst file to create a separate list of folders in Outlook. Refer the steps to {{Export PST file from Outlook as backup of your account.}}
- Open the Outlook application on your desktop. Select the File tab.
- Choose the Account Settings option to manage the accounts created in Outlook.

- Select the Data File tab.
- Click the Add link.

- Browse to the .pst file on your computer that you would like to open, select it and click OK.
- Click the Close button to exit the Account Settings window and return to Outlook.

- The data file items will appear in the left Navigation pane of Outlook. Click the + or - sign to expand or collapse the list.

Import EML files into Outlook / O365
Since there is no direct method to import EML to office 365 accounts, we can use a workaround that involves two processes. First one is convert all EML files to PST and then second is import that PST file to Office 365. To achieve you will need two different tool which are EML to PST Converter and Office 365 Restore.
- Convert EML file to Outlook PSTThere are various free or paid third party applications available over the internet which convert the EML file to PST format. You can choose the suitable application for the conversion. You can try out from the list of applications mentioned below. If you choose free applications, it may come with few limitations or you may need additional add-on to be installed on your machine. By using of the commercial software you are guaranteed that your data is protected from use by the third parties, you are able to get technical help in case if you need it.
- Or you can search over internet to find suitable software for you. This document provides steps to convert EML file to PST using SysTools EML to PST converter for example. Convert EML file to PST using SysTools EML to PST converter application
- Download and install the third party converter. In this document, we are using the SysTools EML to PST converter.
- Launch the application. Select the Folder and click the Export button from the top pane ORSelect the required email messages from the list and right-click to choose the Export option.

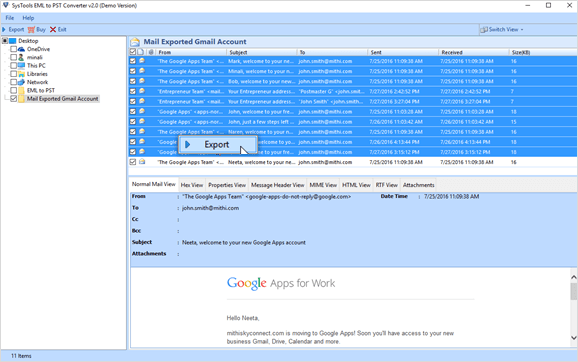
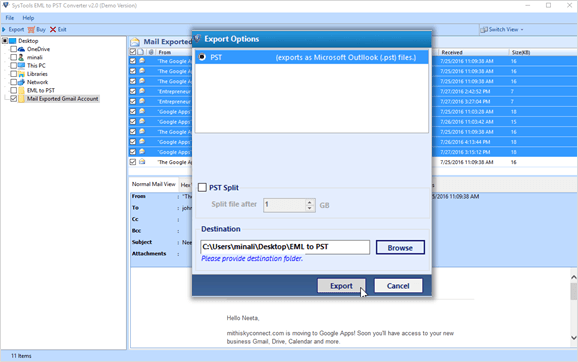
- Browse to choose the location where you want to save the PST file on your machine.
- Export the messages to your machine.
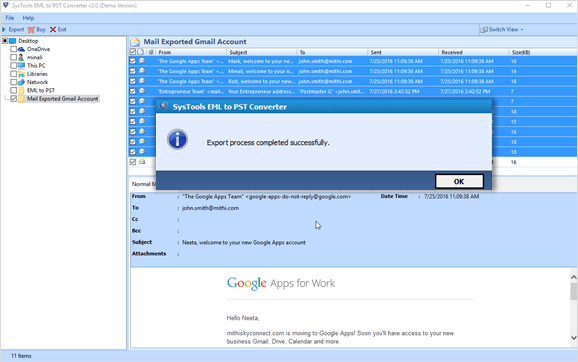
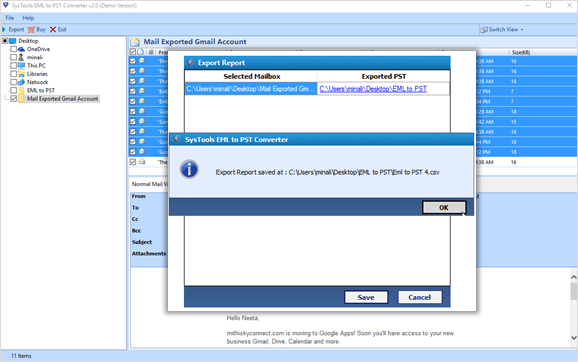
- On successful conversion, click OK to finish the process.

- Save the export report generated by the application. Click OK to exit the process.
- You can import this PST file to your Outlook or other desktop clients. Refer the link to Import PST file in Outlook
- Import PST file to Outlook After the conversion of EML files to Outlook PST, we can proceed further by importing the same PST file to Outlook account as per steps mentioned in the topic How to import PST file in Outlook


