Overview
Configure Microsoft 365 or Office 365 send connector (SMTP connector) to archive emails to Vaultastic. If you already have this send connector set up, you can skip this step.
Repeat this step for each of your Microsoft 365 or Office 365 email domains for archiving emails to Vaultastic. The Microsoft 365 or Office 365 send connector (SMTP connector) for each domain will have to be configured using the journal id of the corresponding Vaultastic domain.
Steps to configure an Office 365 send connector (SMTP connector)
Log in to the Microsoft 365 or Office 365 admin interface using valid admin credentials.
Search for and navigate to the Admin Center
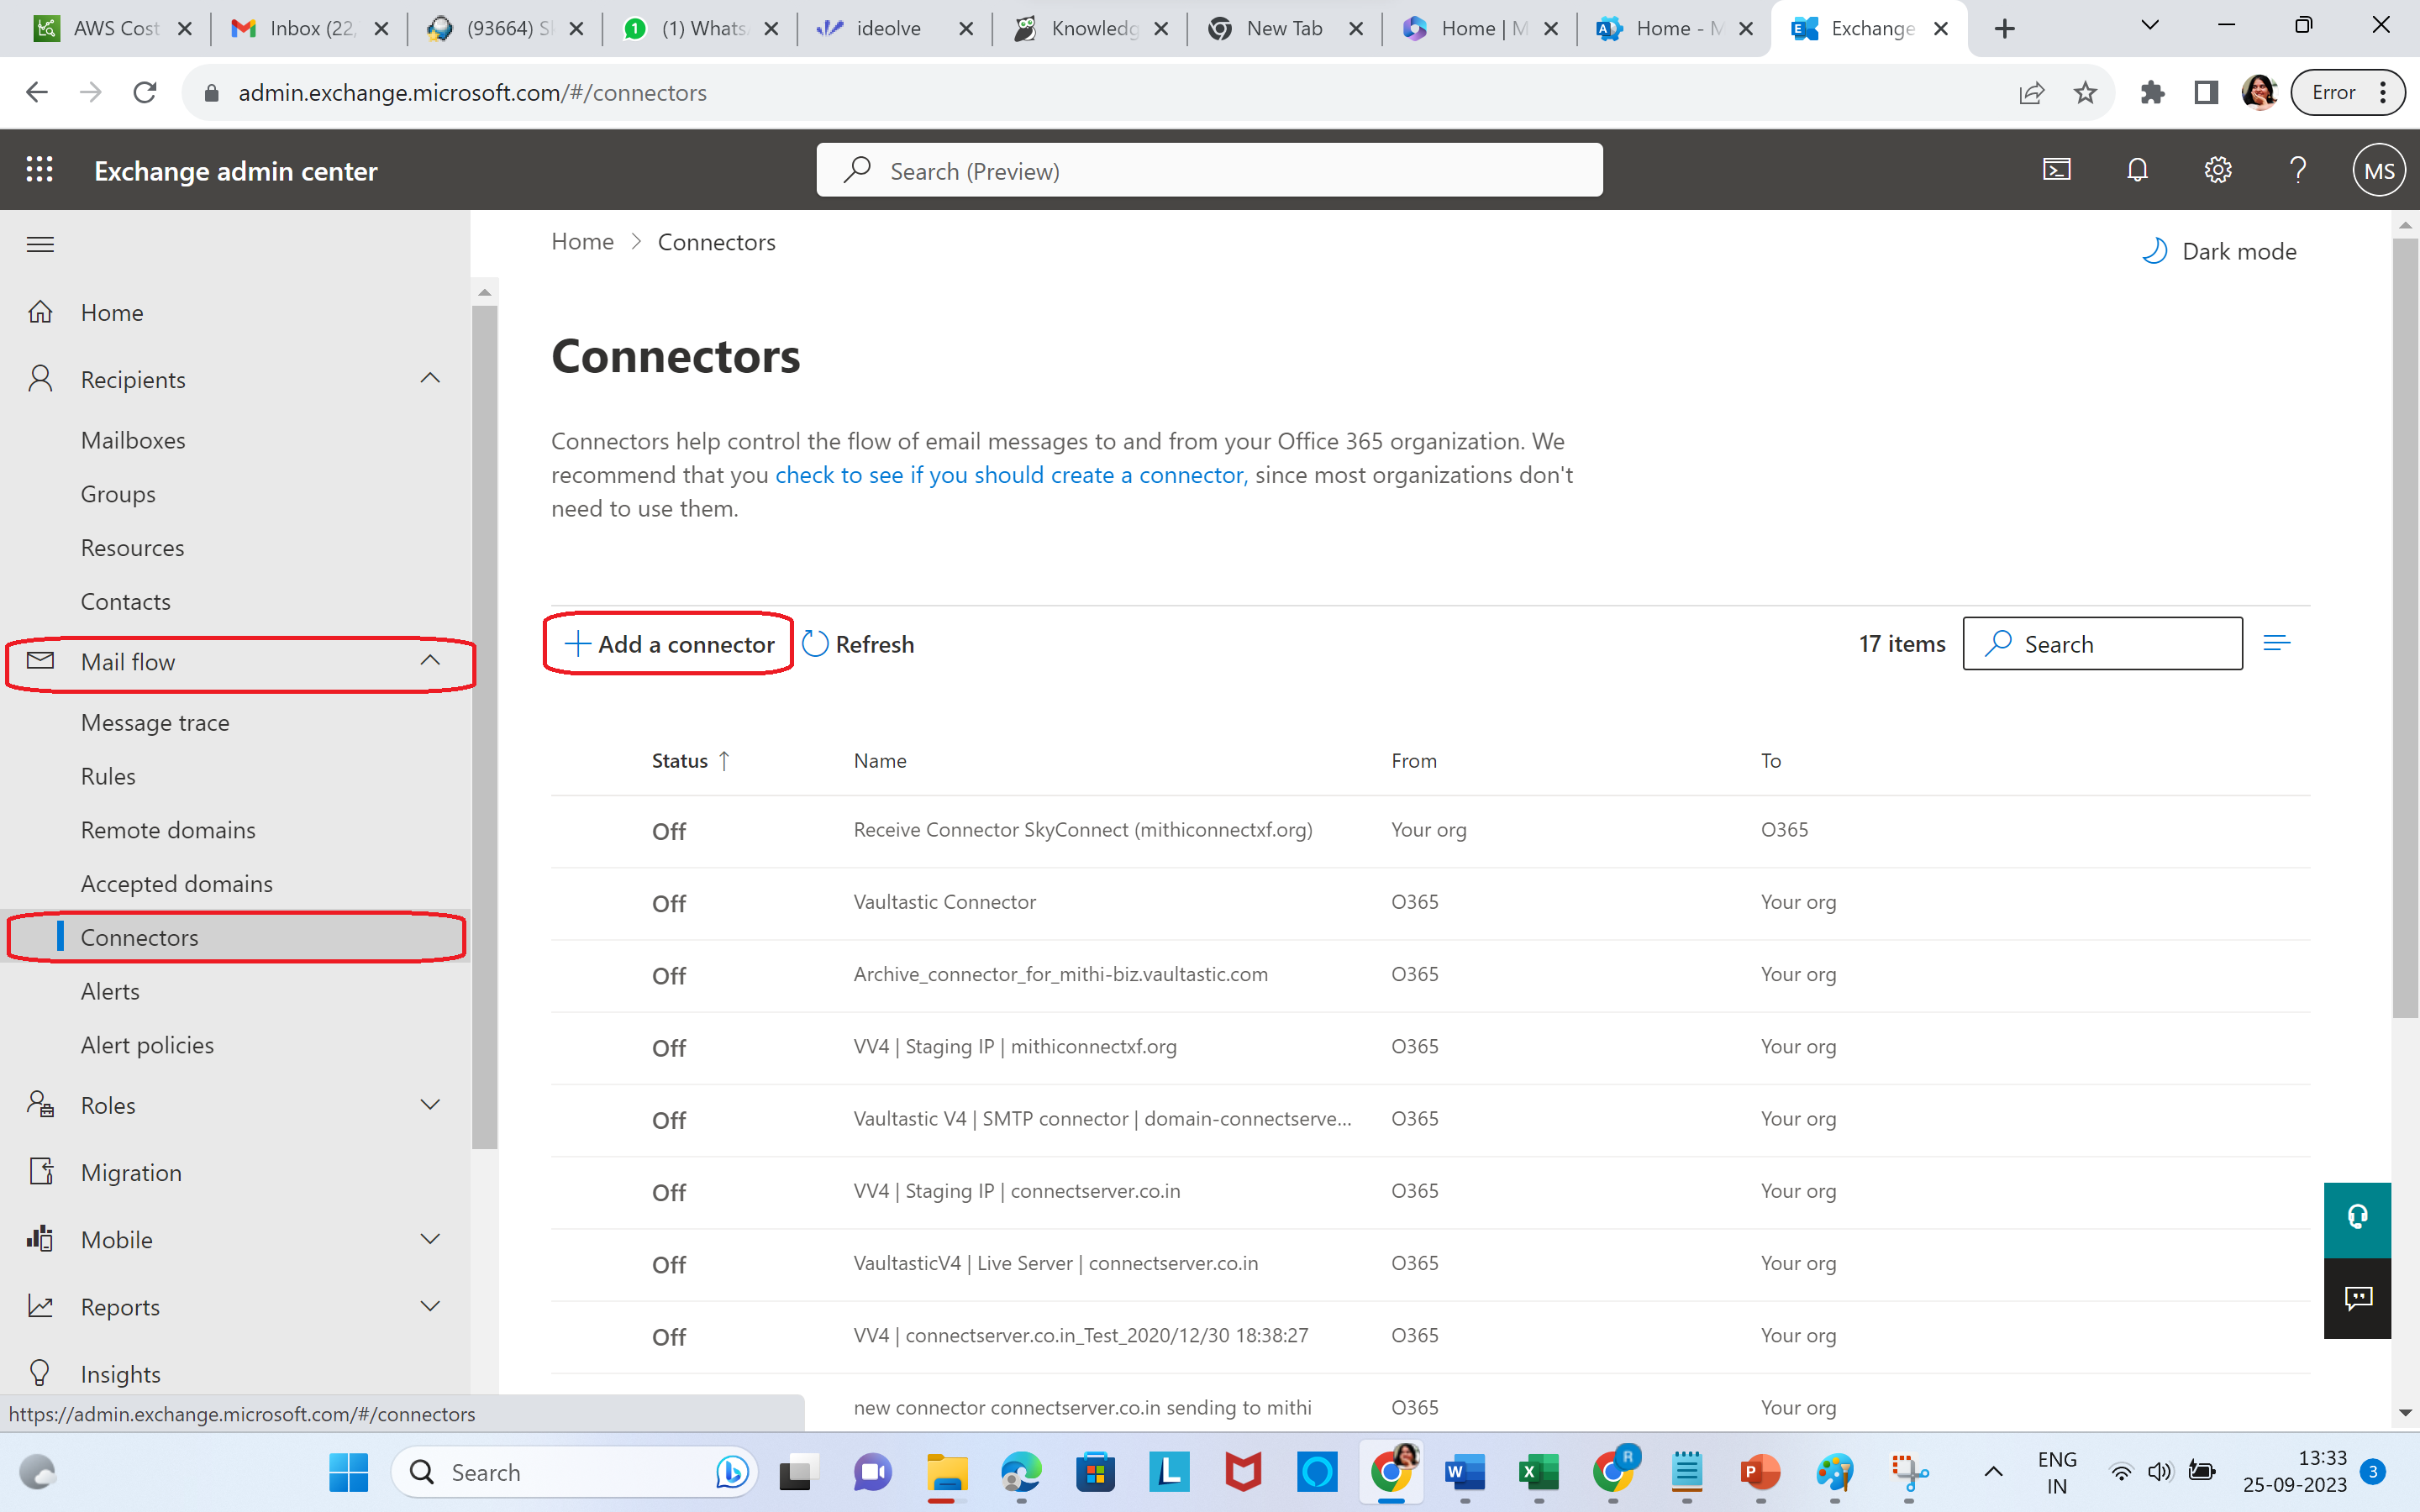
Access the Exchange Admin Center

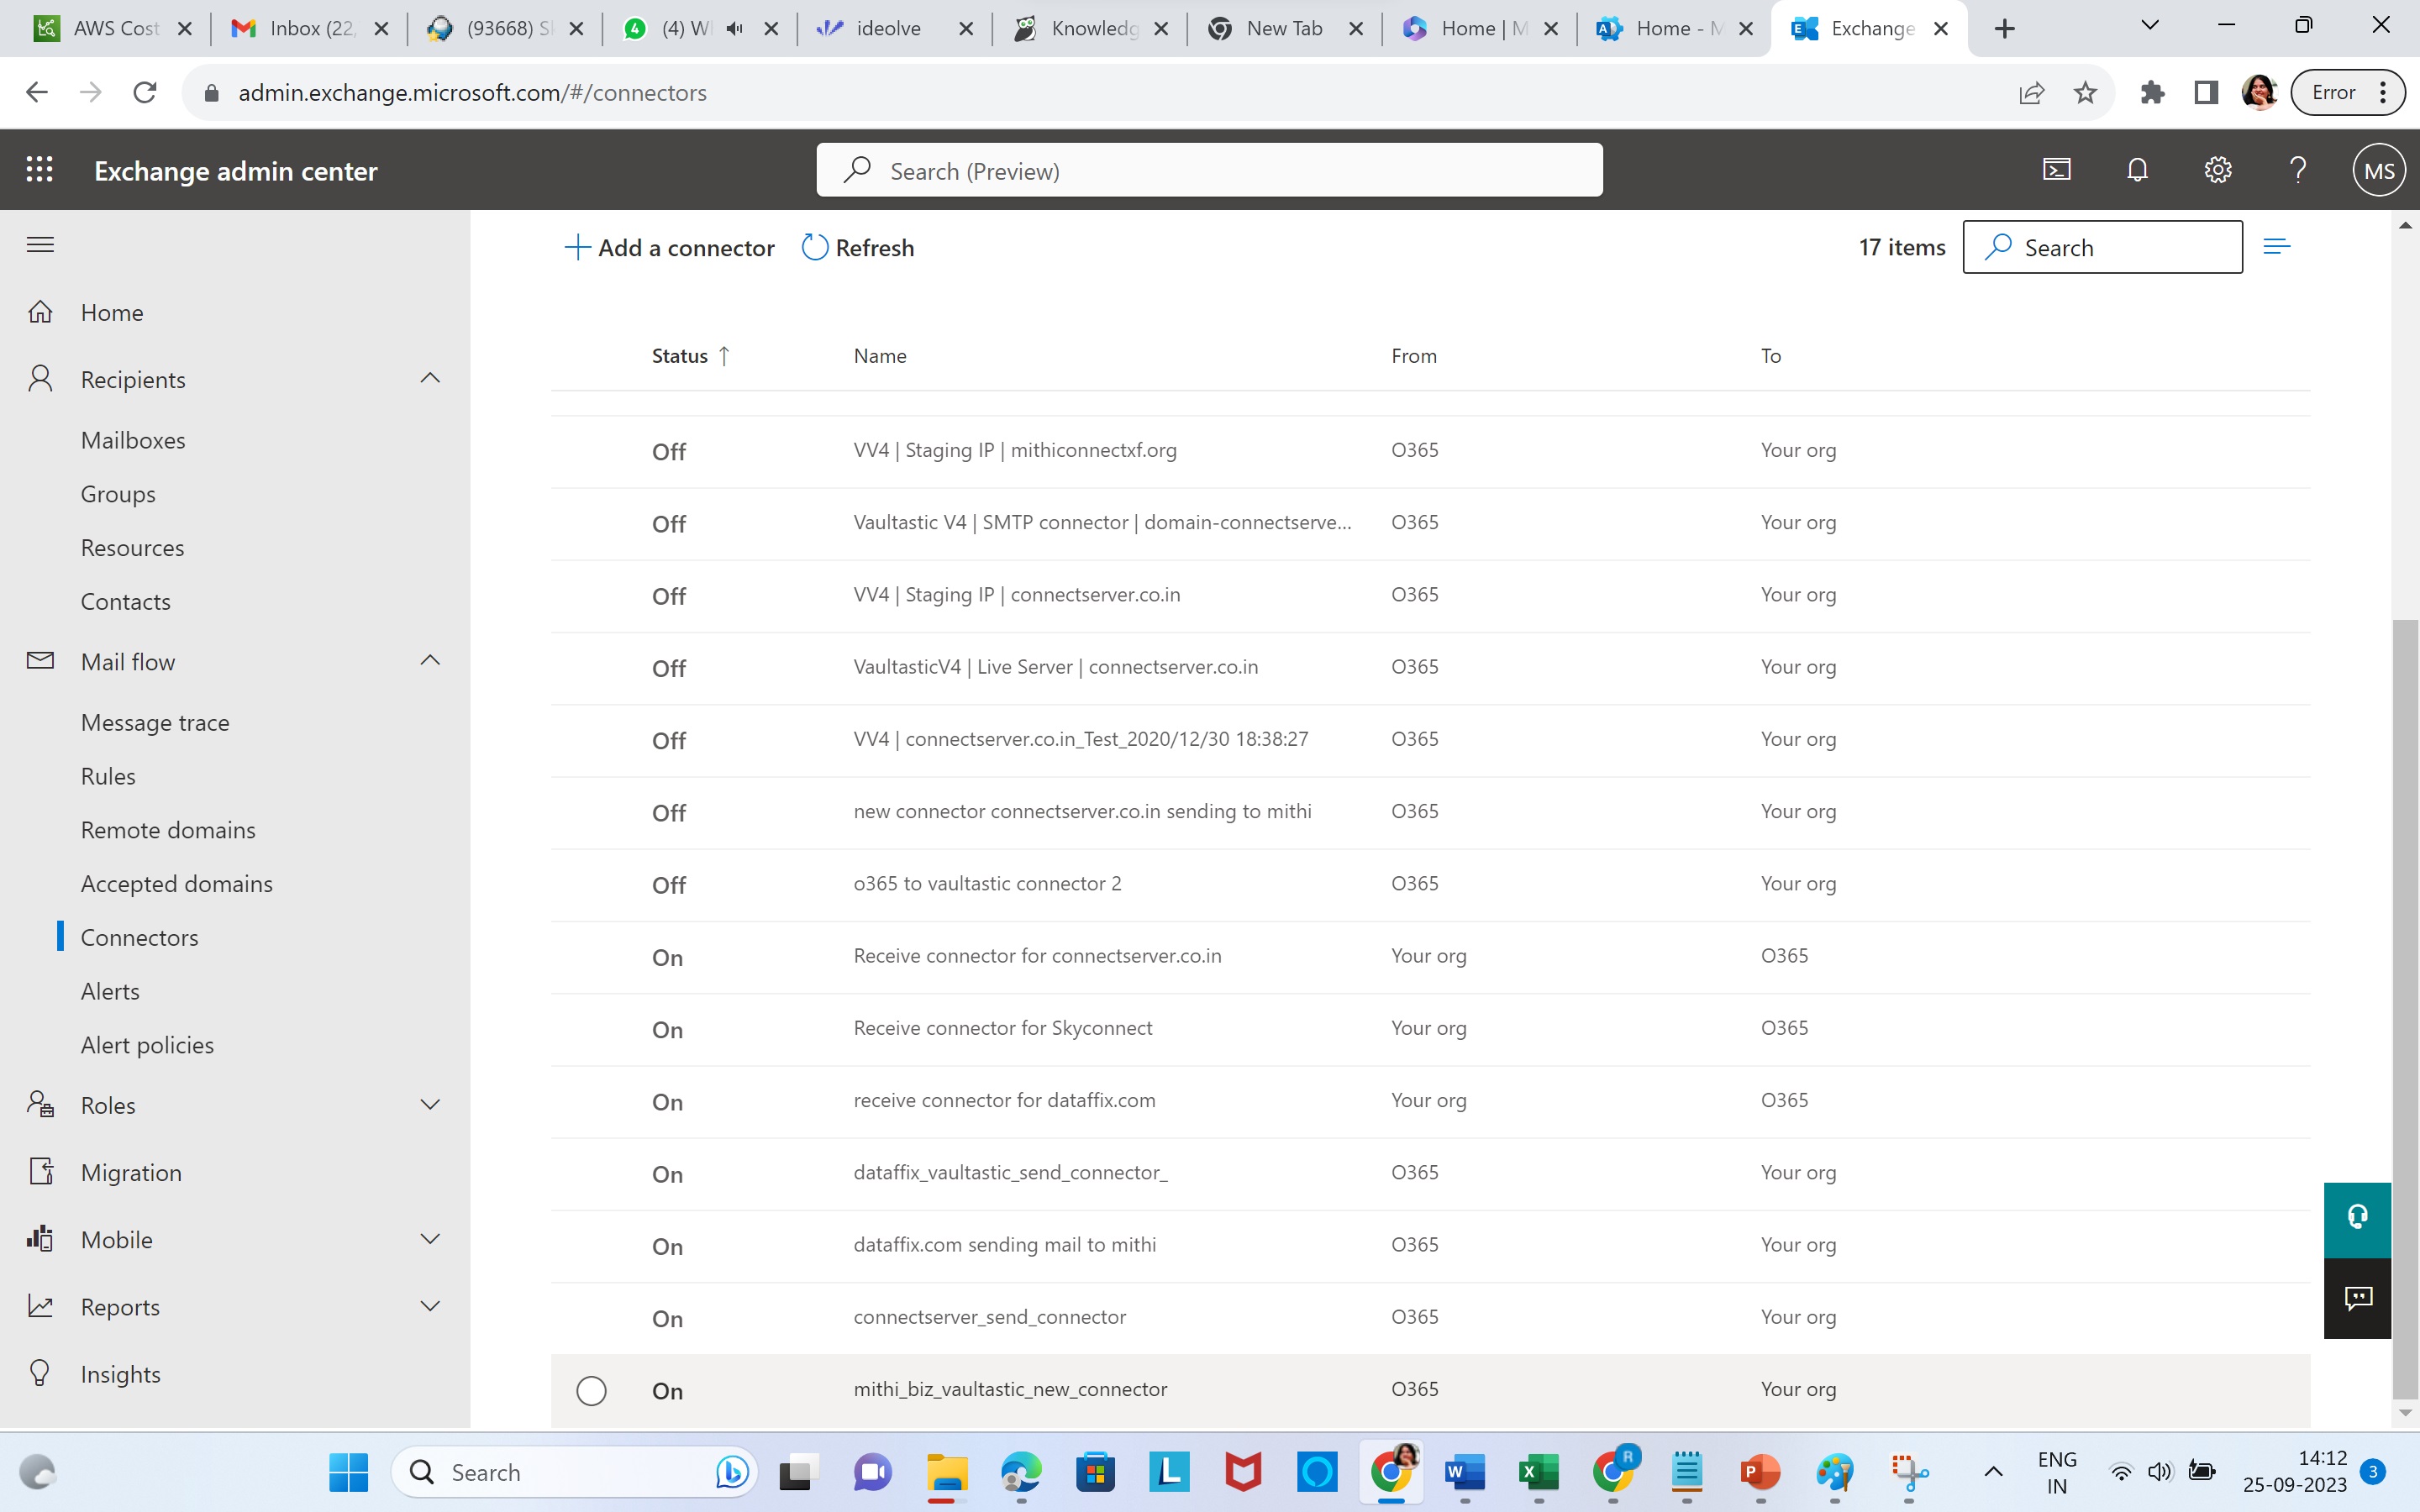
In the Mail flow section, select Connectors
Click on Add a Connector
The connector is used to deliver mail from O365 to Vaultastic. Therefore,
- the Connection From has to be Office 365
- and the Connection To has to be Your Organization's email server

Give an appropriate name and description to the connector
- Enter Name
- Enter Description.
- In the What do you want to do after connector is saved,
- Select Turn it on
- Select Retain internal Exchange email headers
- Click Next

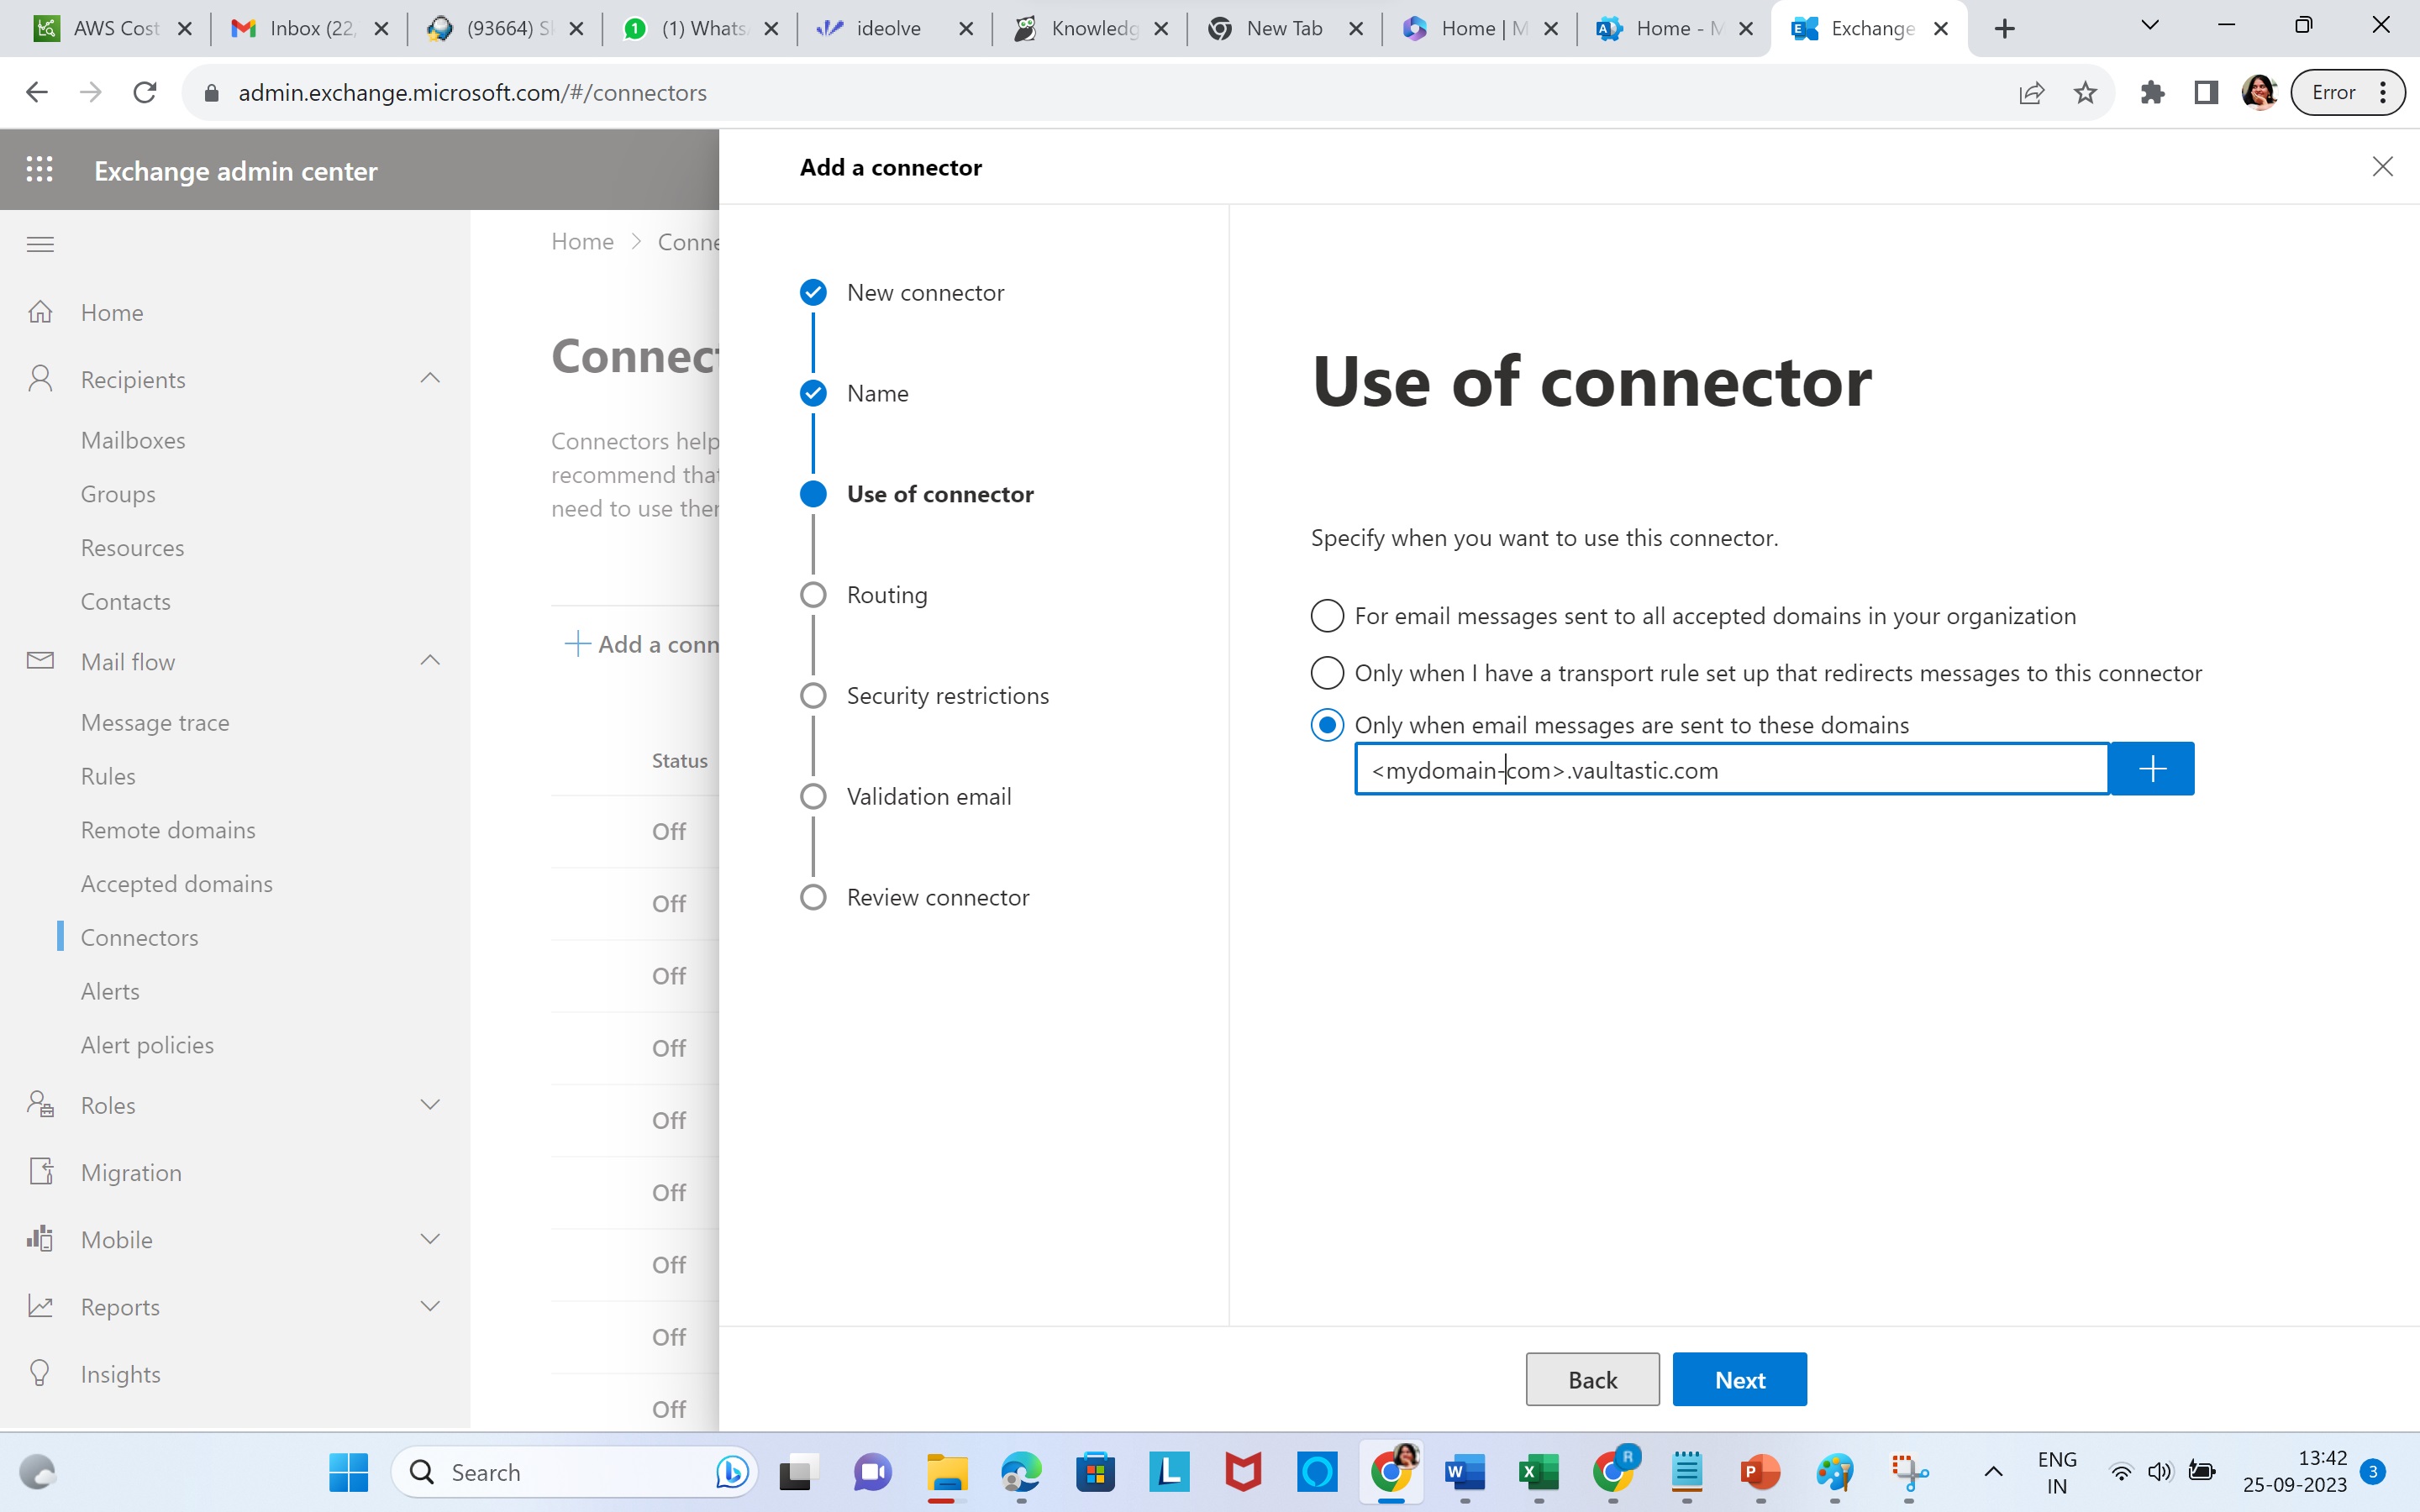
We want to route only the mail meant for the Vaultastic domain via this connector. To configure,
- Select Only when email messages are sent to these domains.
- In the edit box below, enter the name of your Vaultastic domain.
- Click on the +
- Click Next
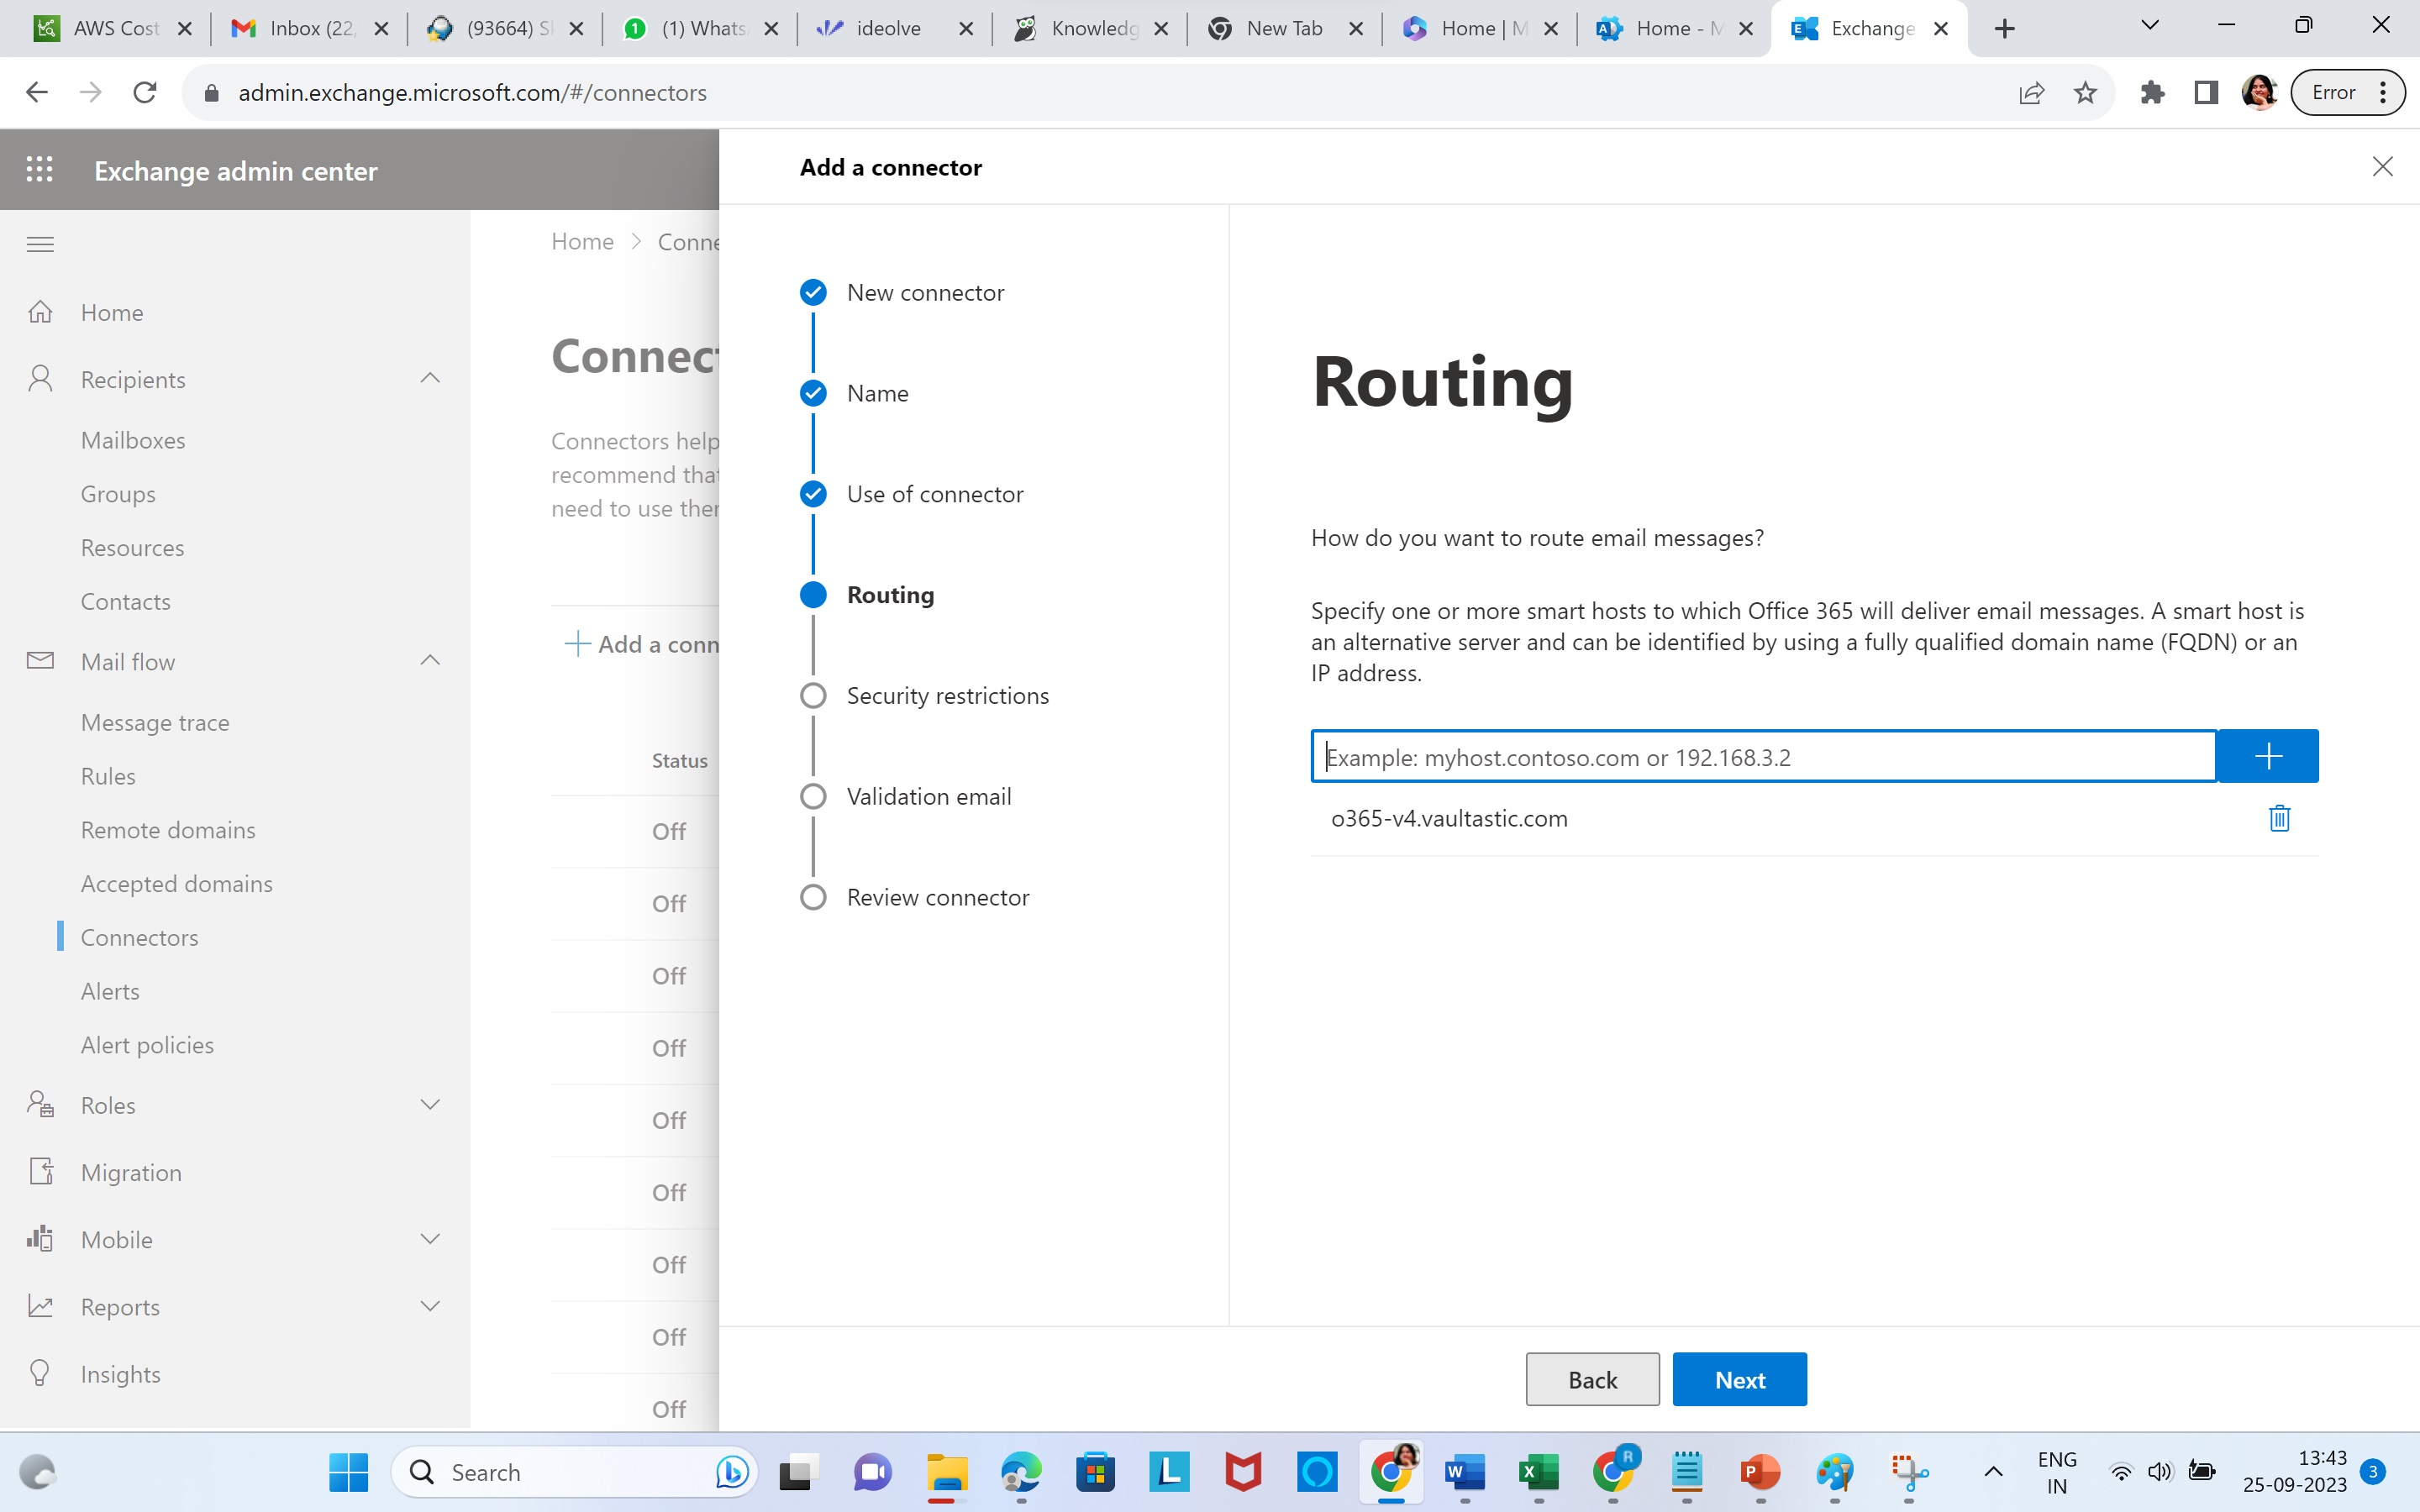
Route all the mails to o365-v4.vaultastic.com
- Enter o365-v4.vaultastic.com in the edit box
- Click on +
- Click Next
Define the Security restrictions for the connector. Always use the secure Transport Layer
- Check the Always use Transport Layer Security (TLS) to secure the connector
- Foe certificate, choose Any digital certificate, including self-signed certificates.
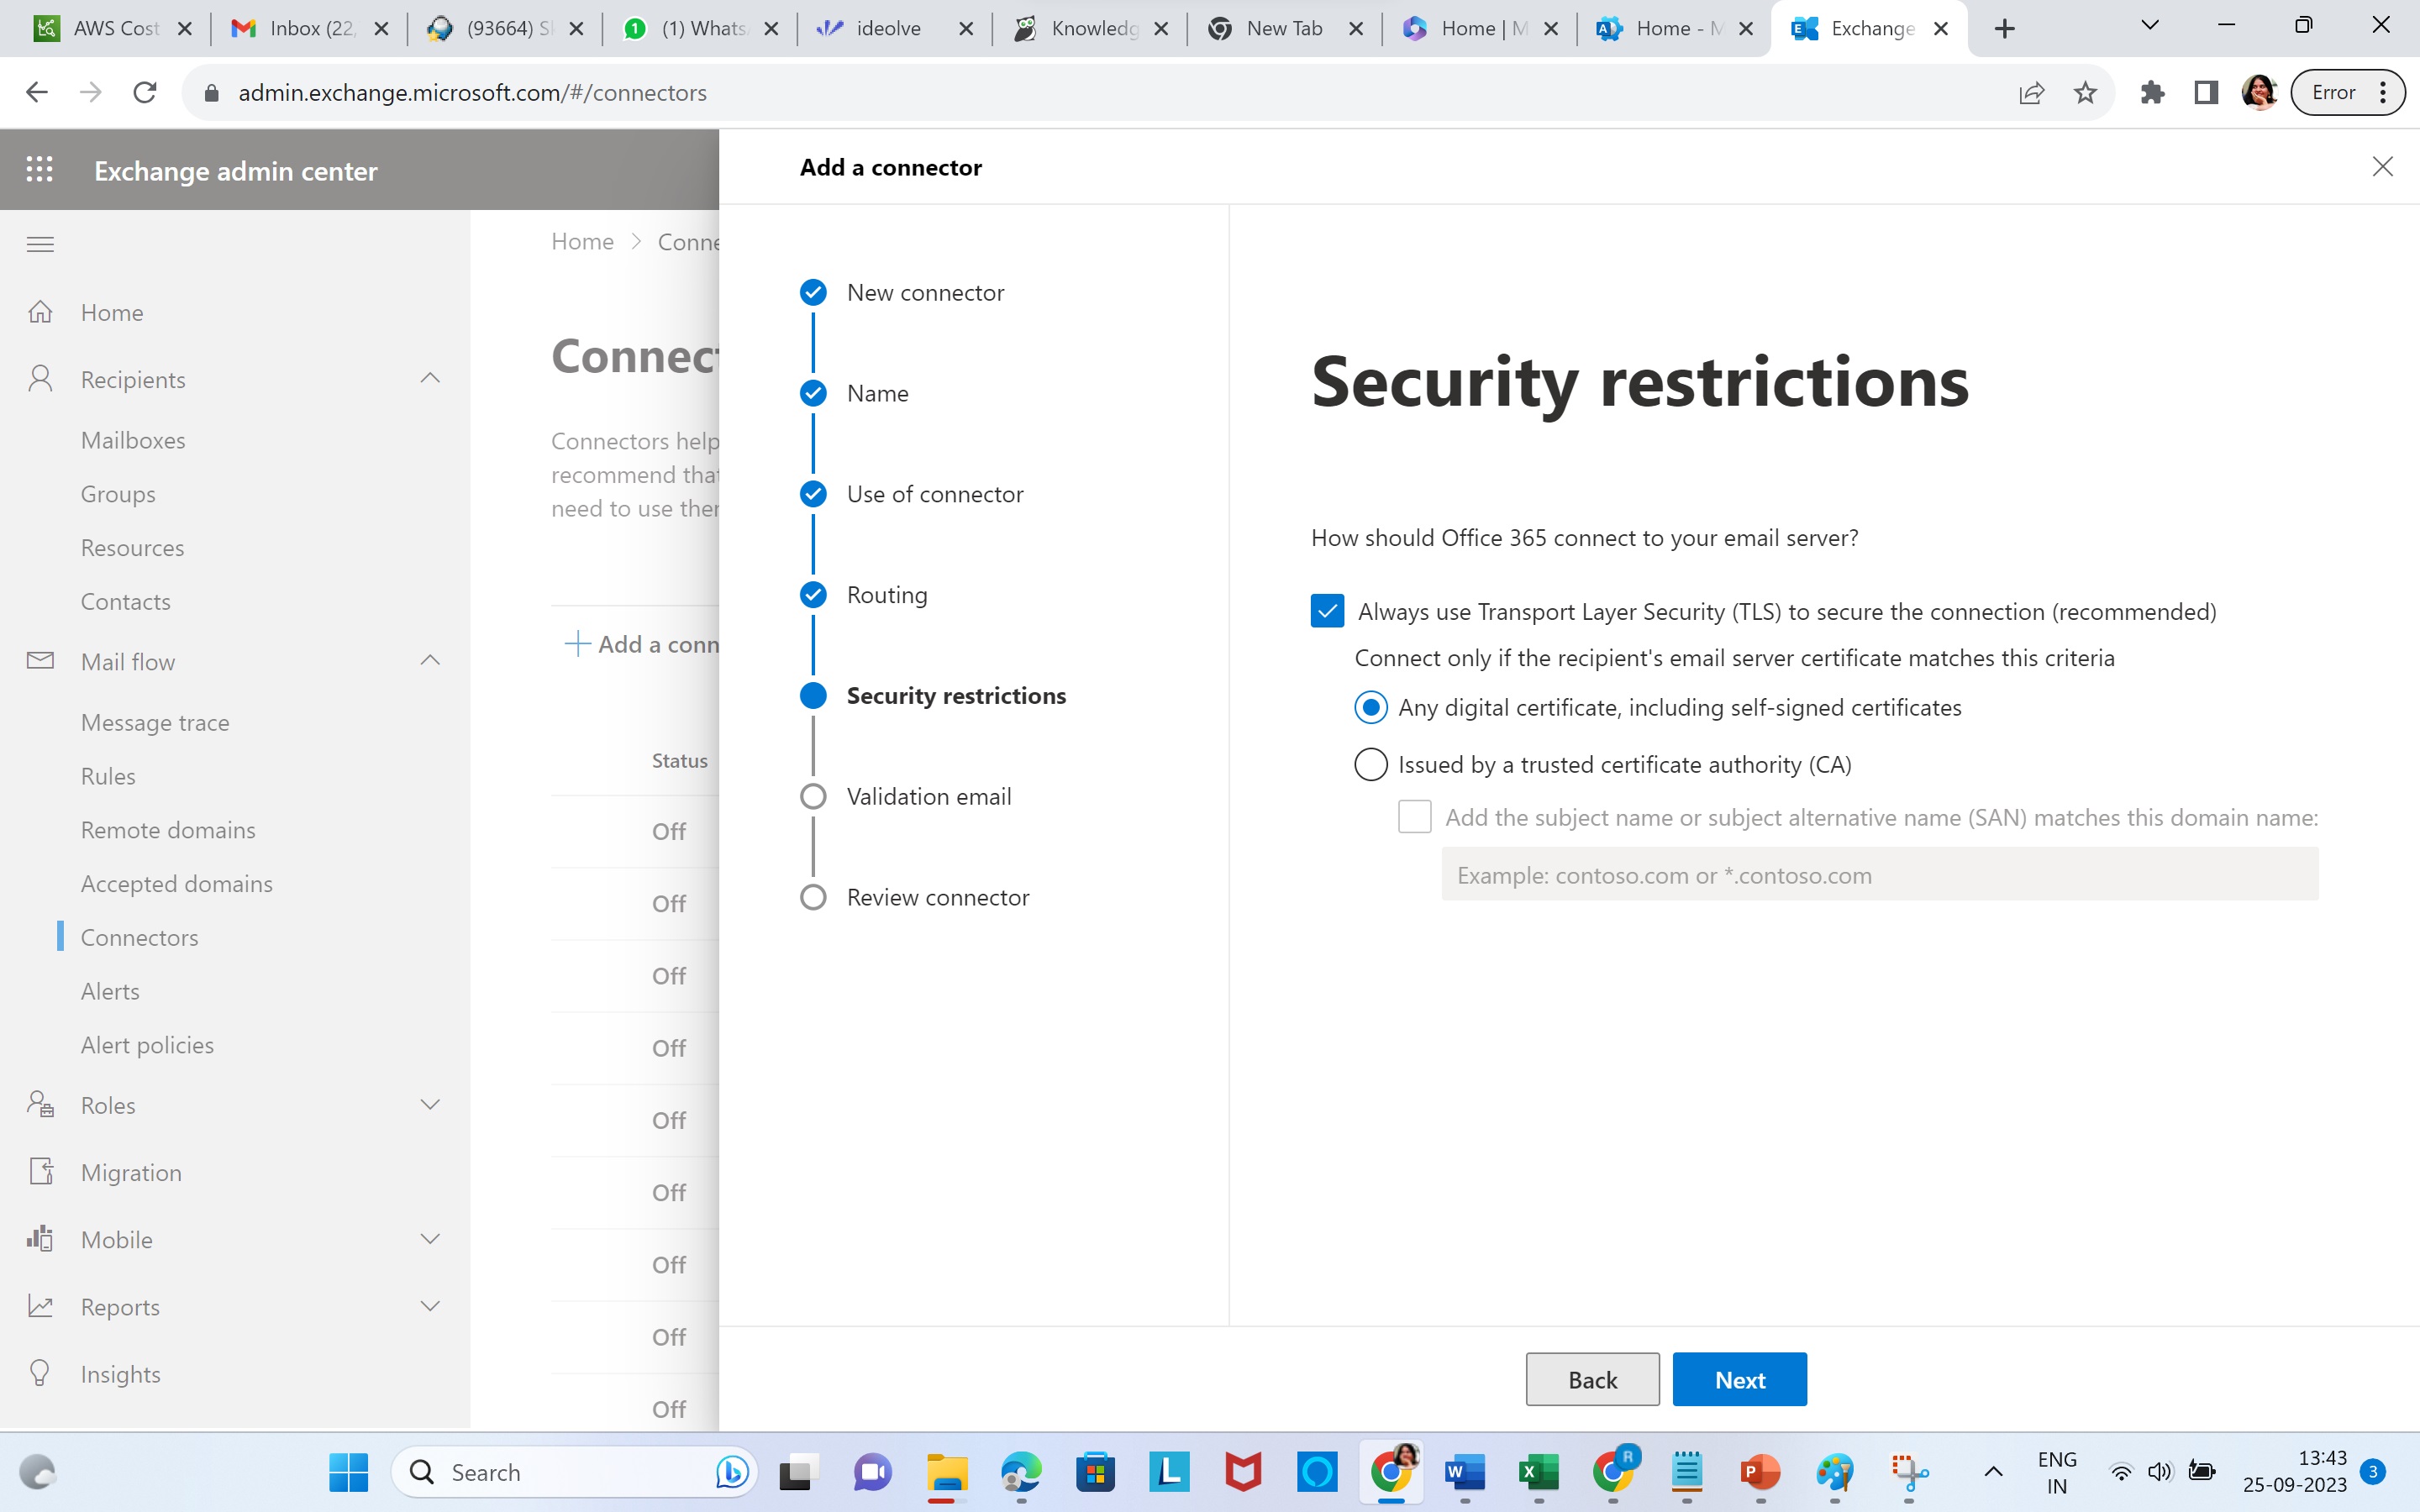
- Enter the journal@<your vaultastic domain> in the edit box
- Click +
- Click Validate
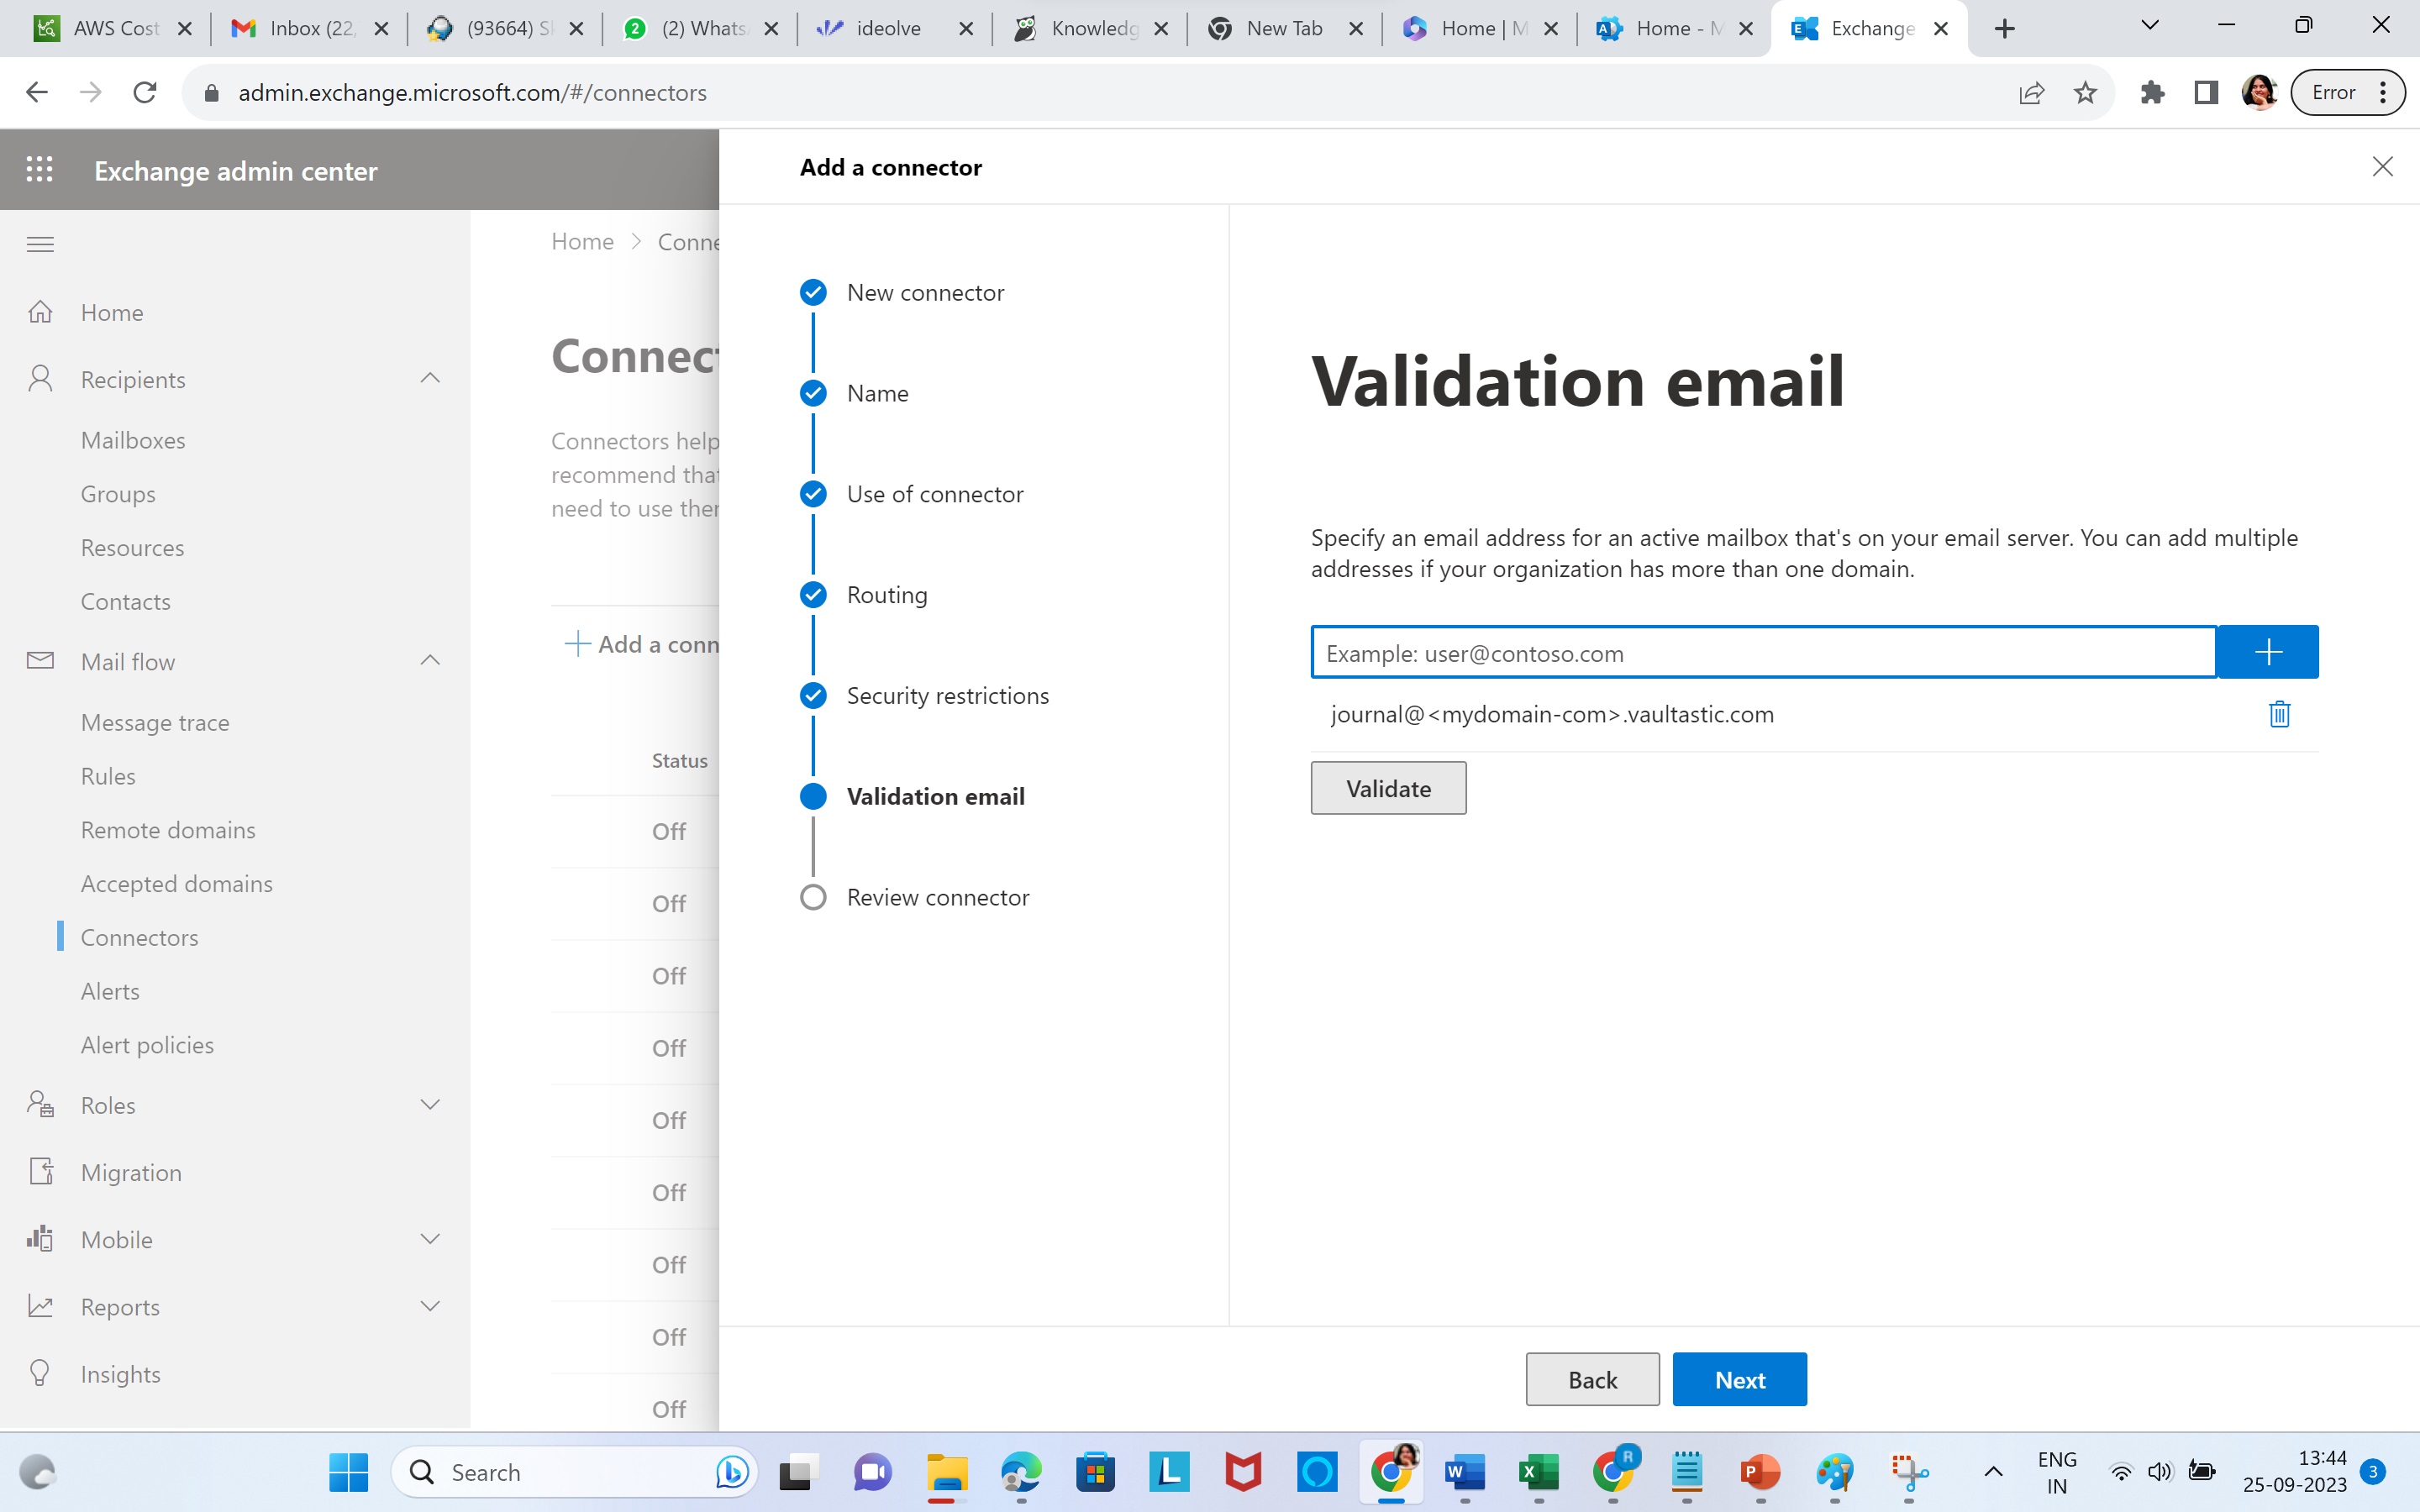
On Validation, click Next.
You will be taken to the last stage to Review the connector.
Review the settings and select Save.
You will see the defined connector in the list of connectors.