Configure your account
Pidgin is a chat program which lets you log in to accounts on multiple chat networks simultaneously. Pidgin is compatible with the Jabber/XMPP chat network. You need to download and install the Pidgin application on your desktop.
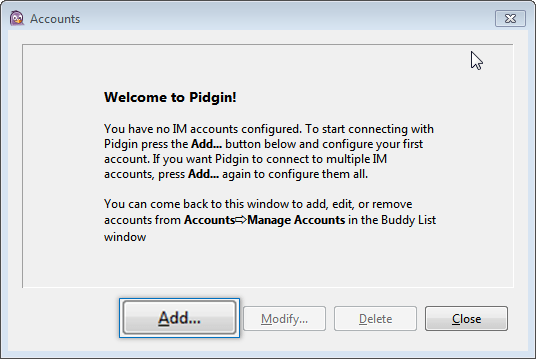
1. If you are using Pidgin for the first time after installation, a Welcome screen displays. Click the Add button which opens Add Account dialog.
2. On the Basic tab provide Login options.
- Click the Protocol list box to select XMPP protocol.
- In the Username box, enter username of your account.
- In the Domain box, enter domain name of your chat server.
- In the Password box, provide password associated with your account.

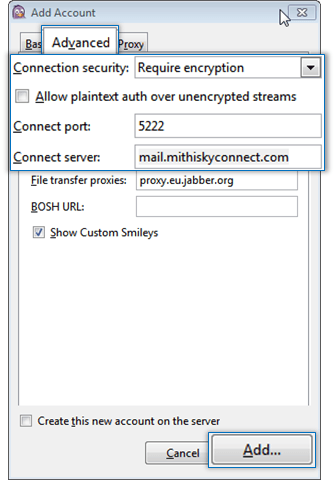
3. Click to select the Advanced tab and provide following details.
i) Click the Connection security list box to select
- Choose the Use encryption if available option
- Click to select the Allow plaintext auth over unencrypted streams check-box.
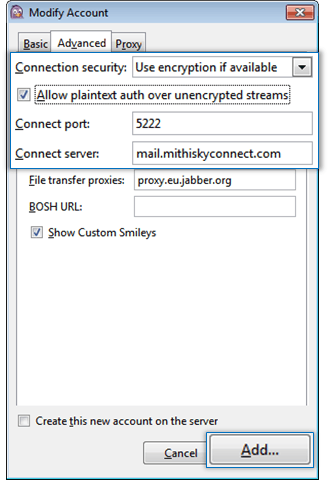
ii) In the Connect port box, make sure the port number is 5222.
iii) In the Connect server box, enter server name.
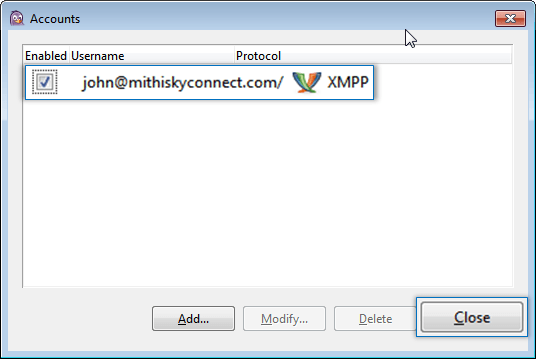
iv) Click the Add button which displays Accounts screen showing list of IM accounts configured.
v) On the Accounts screen, click the Close button.
This way, you can configure your account. Now, you can add buddies and chat with them.
Using Pidgin
To start chatting with your friends using Pidgin, you need to add them to your contact list. Also, you can create various groups to organize these contacts group wise.
Adding a contact
Adding a contact to the contact list is a simple procedure. Follow the steps mentioned below to add a contact to your list.
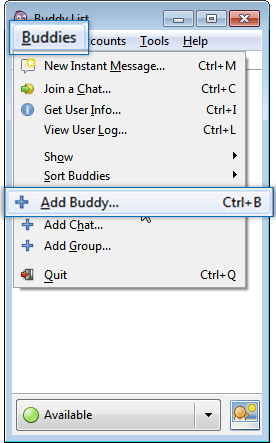
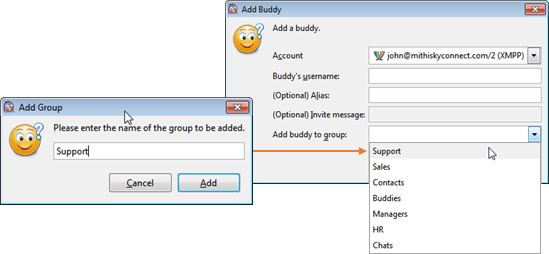
i. Click the Buddies menu and select Add Buddy which opens Add Buddy dialog.
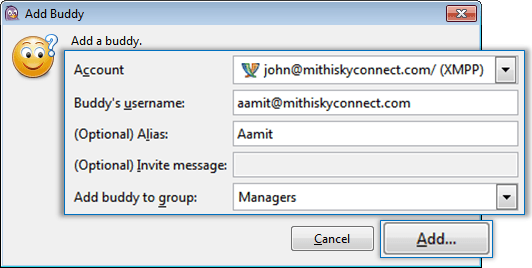
ii. On the Add Buddy dialog, provide
- In the Account list box, make sure your account is selected.
- In the Buddy's username box, enter complete Jabber ID of a person whom you want to chat with.
- In the Alias box, enter the name to be displayed in the buddy list.
- Click the Add buddy to group list box and select a group from the list.
OR
- Enter a name for a group you wish to create.
- Click the Add button.
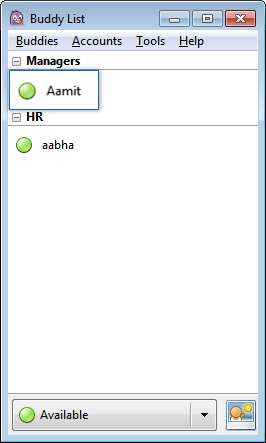
The added contact displays under Buddies group or under the specified group.
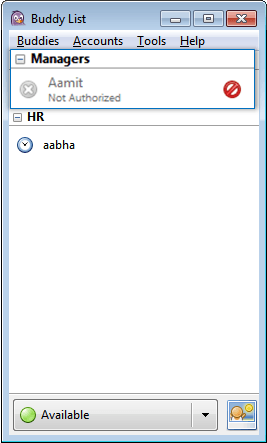
Once the user confirms and accepts your invitation, you will receive a notification to authorize the same user.
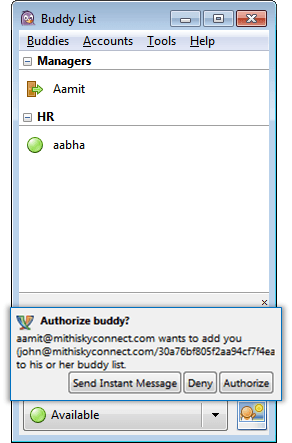
As you authorize the user, you can view the presence status of the user and you can send text messages to the user.
Adding a group
You can organize the contact list by creating various groups and sorting the contacts as per groups.
1. While adding a contact to the contact list, specify a name for the group to be added in the Add buddy to group box.

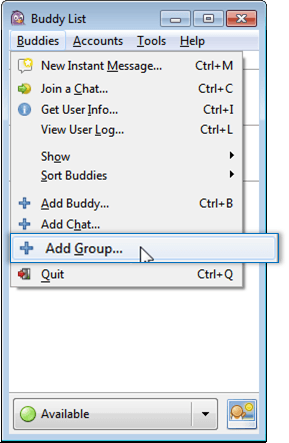
OR Click the Buddies menu and then select Add a Group menu item which displays Add Group dialog.
2. On the Add Group dialog, enter a name for a group you wish to create.
3. Click the Add button to create the specified group.
This newly added group displays in the Add buddy to group list box present on the Add Buddy dialog.
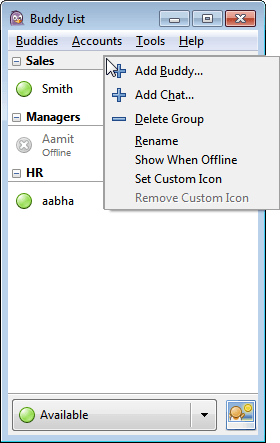
You can right-click a required group from the Buddy list and perform various actions on that group.