Log in to the Exchange Admin Center using the credentials of your Microsoft 365 admin account.
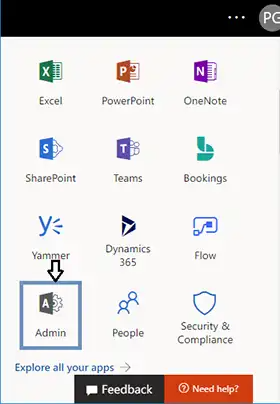
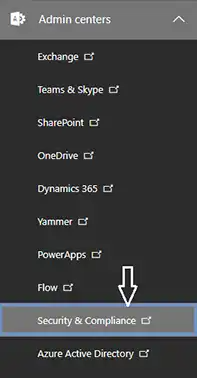
Navigate to Admin Centers and select Security and Compliance .
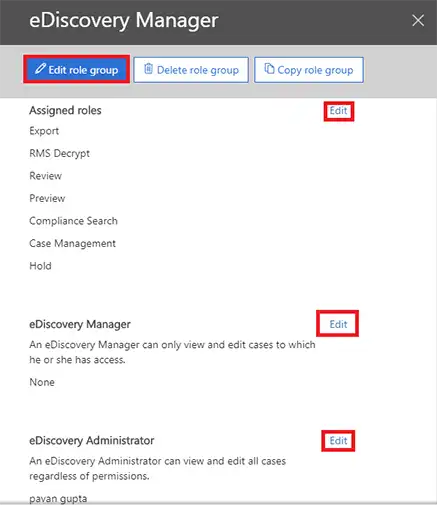
Now navigate to Permissions and click on eDiscovery Manager.
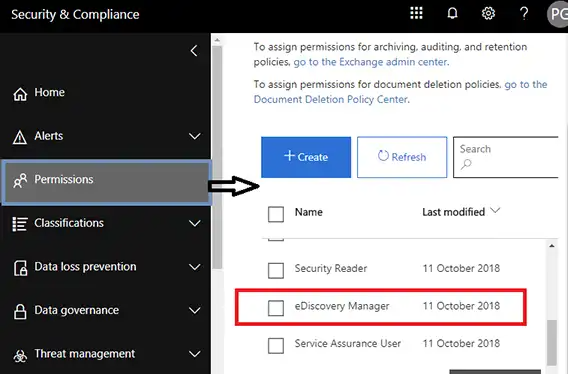
Note: You must be a member of the eDiscovery Manager Role Group to get access to several other functionalities.
Click the Edit icon
By default, the role groups have some pre-assigned roles. If you do not find the Export role, then add it to the role.
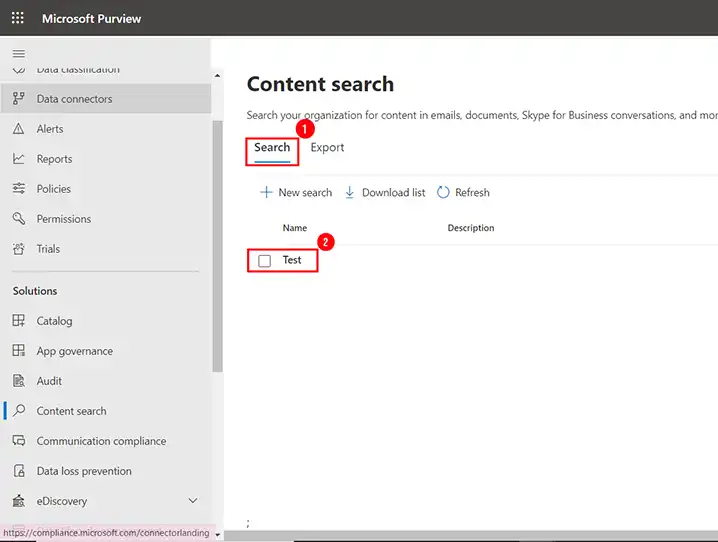
Now navigate to More Resources and click on it. It will open all the Microsoft resources on a panel. Go to Microsoft Purview Compliance Portal and open it. Then find the Content Search option from the left panel and click on New Search .
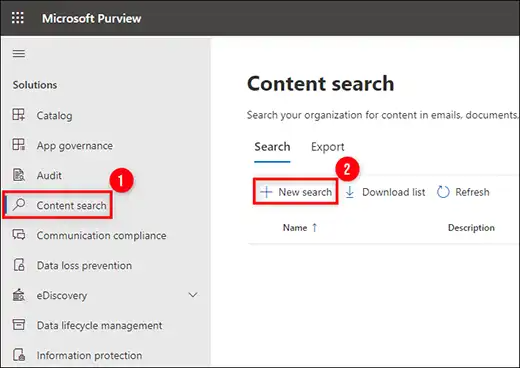
- Note: If the Content Search option is missing then you need to recheck the eDiscovery Permissions. Changing these permissions can take up to 24 hours to be visible.
A window will open allowing you to customize all elements of that Content Search. Create a separate search for every user whose mail you want to export. You can also assign a name and description to the Content Search.
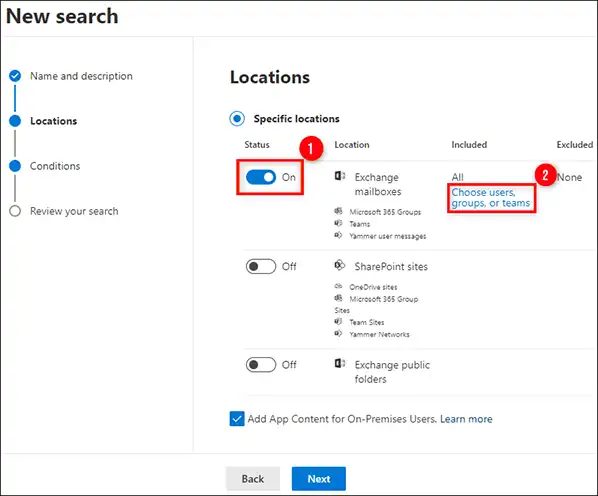
- Note: Here you must be aware that selecting all the locations including SharePoint Online and Public Folders Database can delay the eDiscovery process of exporting pst files from the Office 365 account.
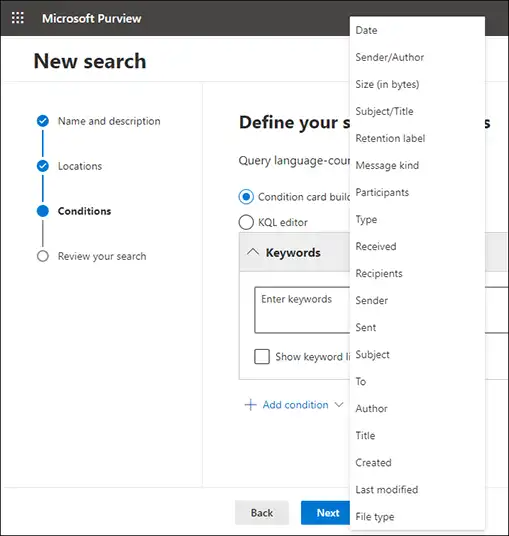
In the Conditions tab, select the date range for which you want to export data
Once, you have done with all the required customization, click on Submit and then Done to start.
This will start the eDiscovery search in the background, meanwhile, you can track the process by selecting the Search tab.
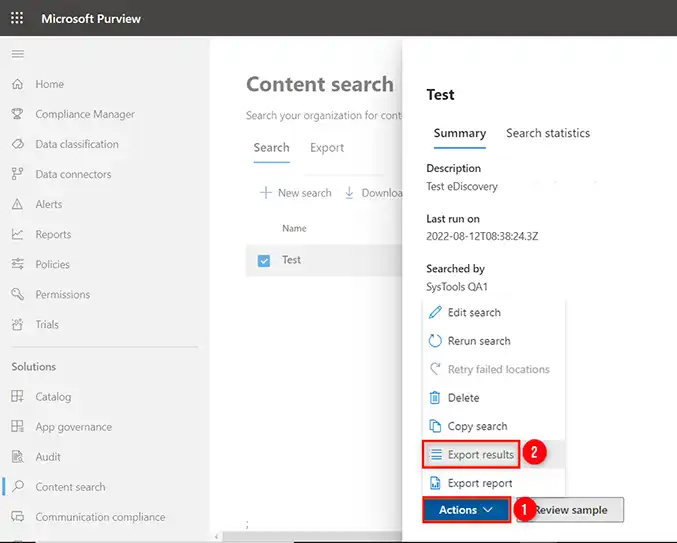
Here you can see the status of eDiscovery Search such as in-process or complete. Once, it gets completed then select the Action tab and opt for Export Results.
Now in the below window, you get different settings that you can choose for specific conditions such as; if you need to export encrypted files then include this option. Moreover, you can also customize the entire exported results before downloading it. However, if you do not have any idea about these settings then the recommendation is to export this data with default settings.
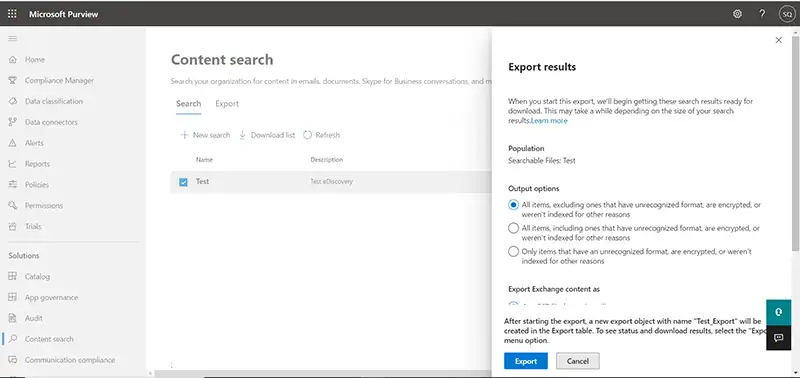
- Note: Make sure not to set Enable Deduplication option, if you need to Export the search results in a single PST file.
Click Export. Goto the Export tab and reselect your search and track the status of this process.

After successful completion of the process, click on the Close button.
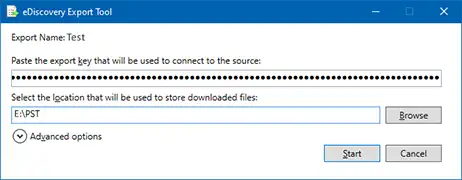
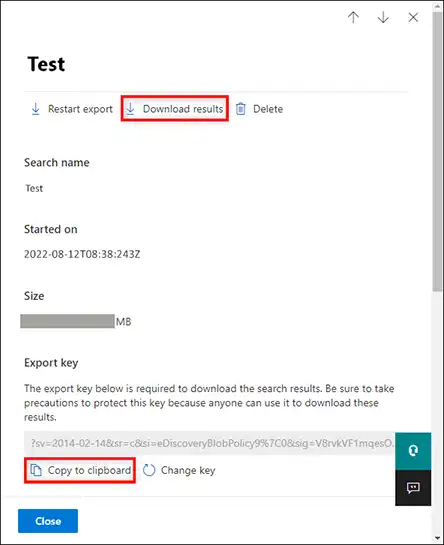
Once, the process is complete, click the Download Results button. Also, make sure to copy the unique Export Key. You need to use this key in the ClickOnce extension when it will pop up the Export Tool.
Now a pop-up will come and it will start the eDiscovery PST Export Tool. Now paste the copied Export Key and Define the destination path where the exported PST files will be saved. Click the Start button to export mailboxes data to PST files.