Creating a Service Account to access bucket
Create a Service Account:
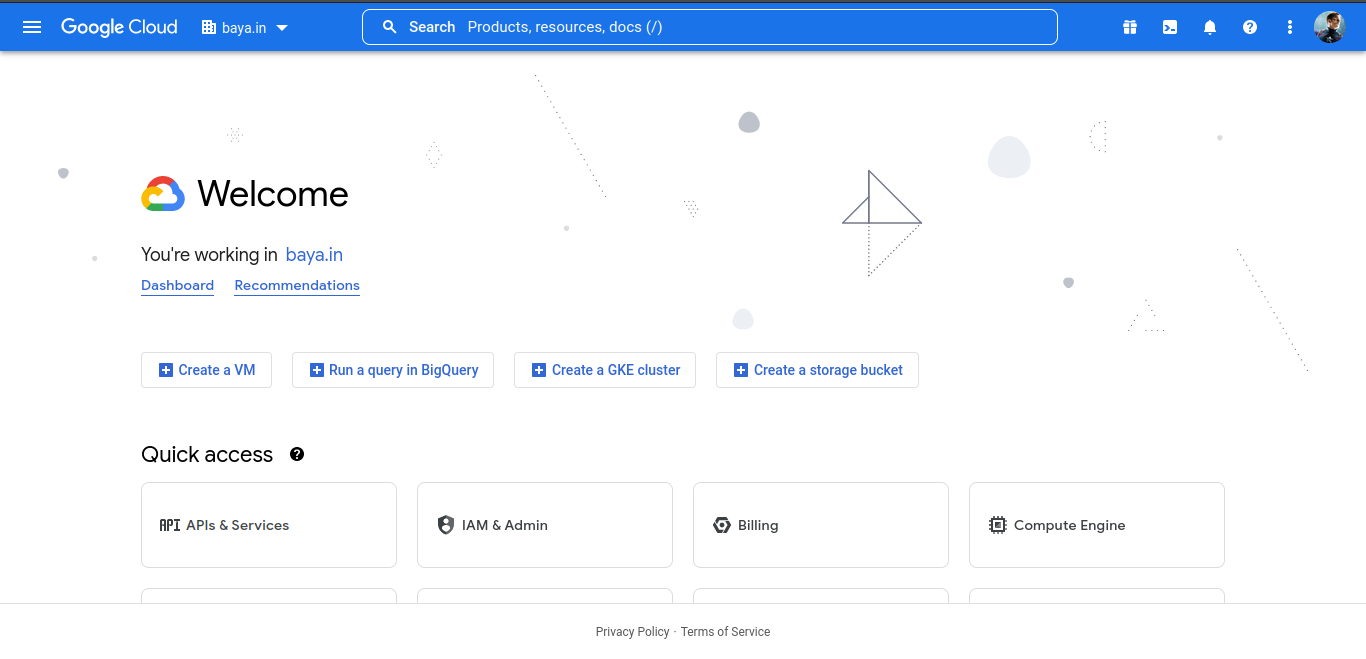
1. Login to G-suite Admin account and navigate to Google Developers Console(https://console.developers.google.com/)
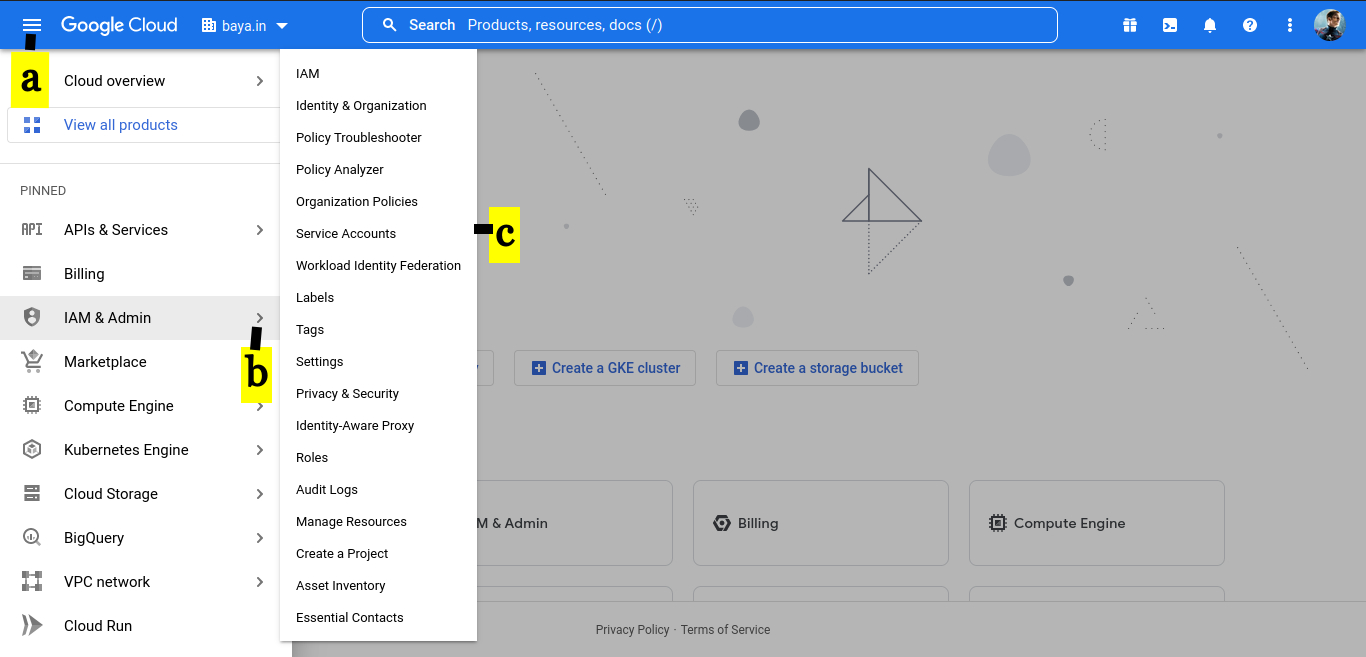
a. Select hamburger menu in top left corner.
b. Select IAM & Admin.
c. Select Service Accounts.
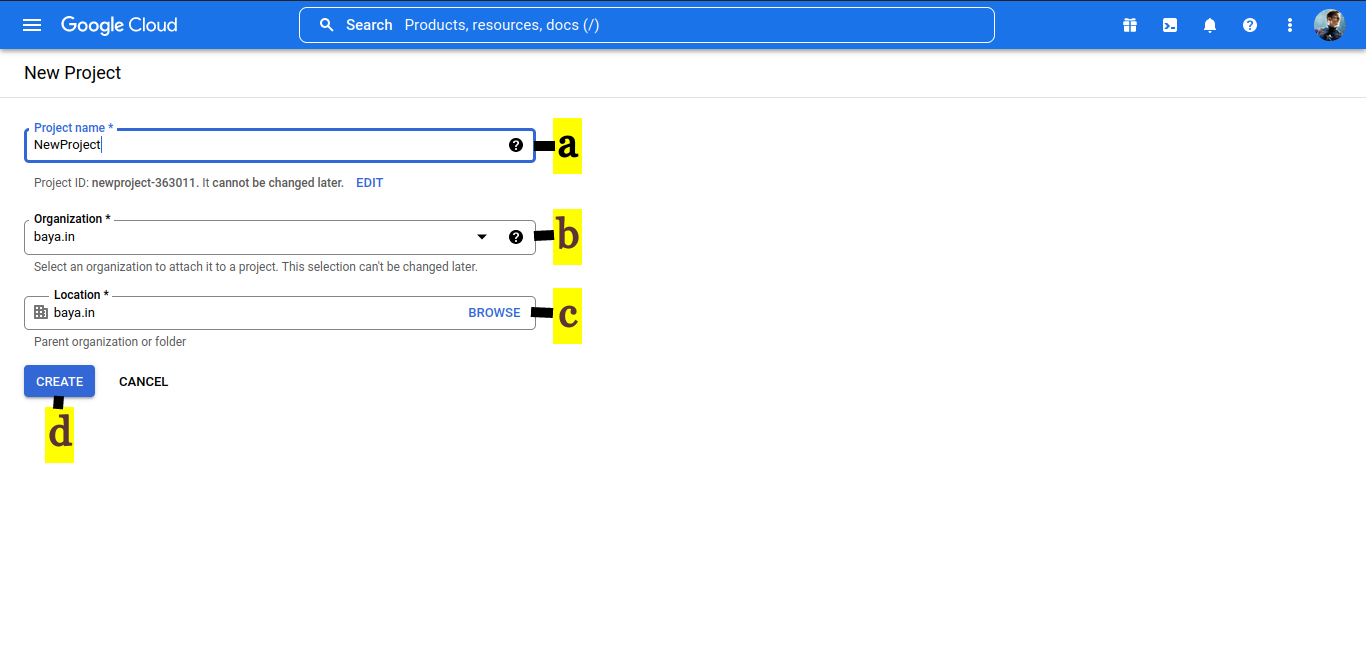
2. CREATE A PROJECT
a. Provide Project name
b. Specify the Organization
c. Select the Location
d. Click CREATE
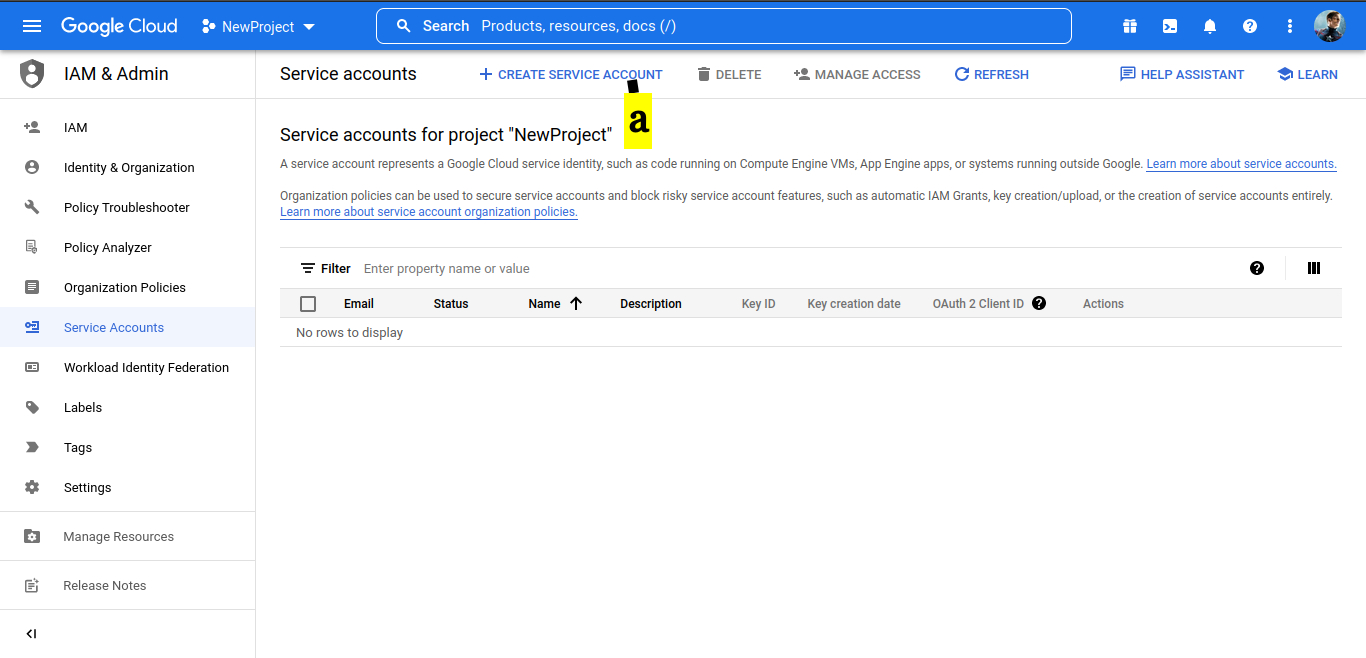
3. Create a service account
a. Click CREATE SERVICE ACCOUNT.
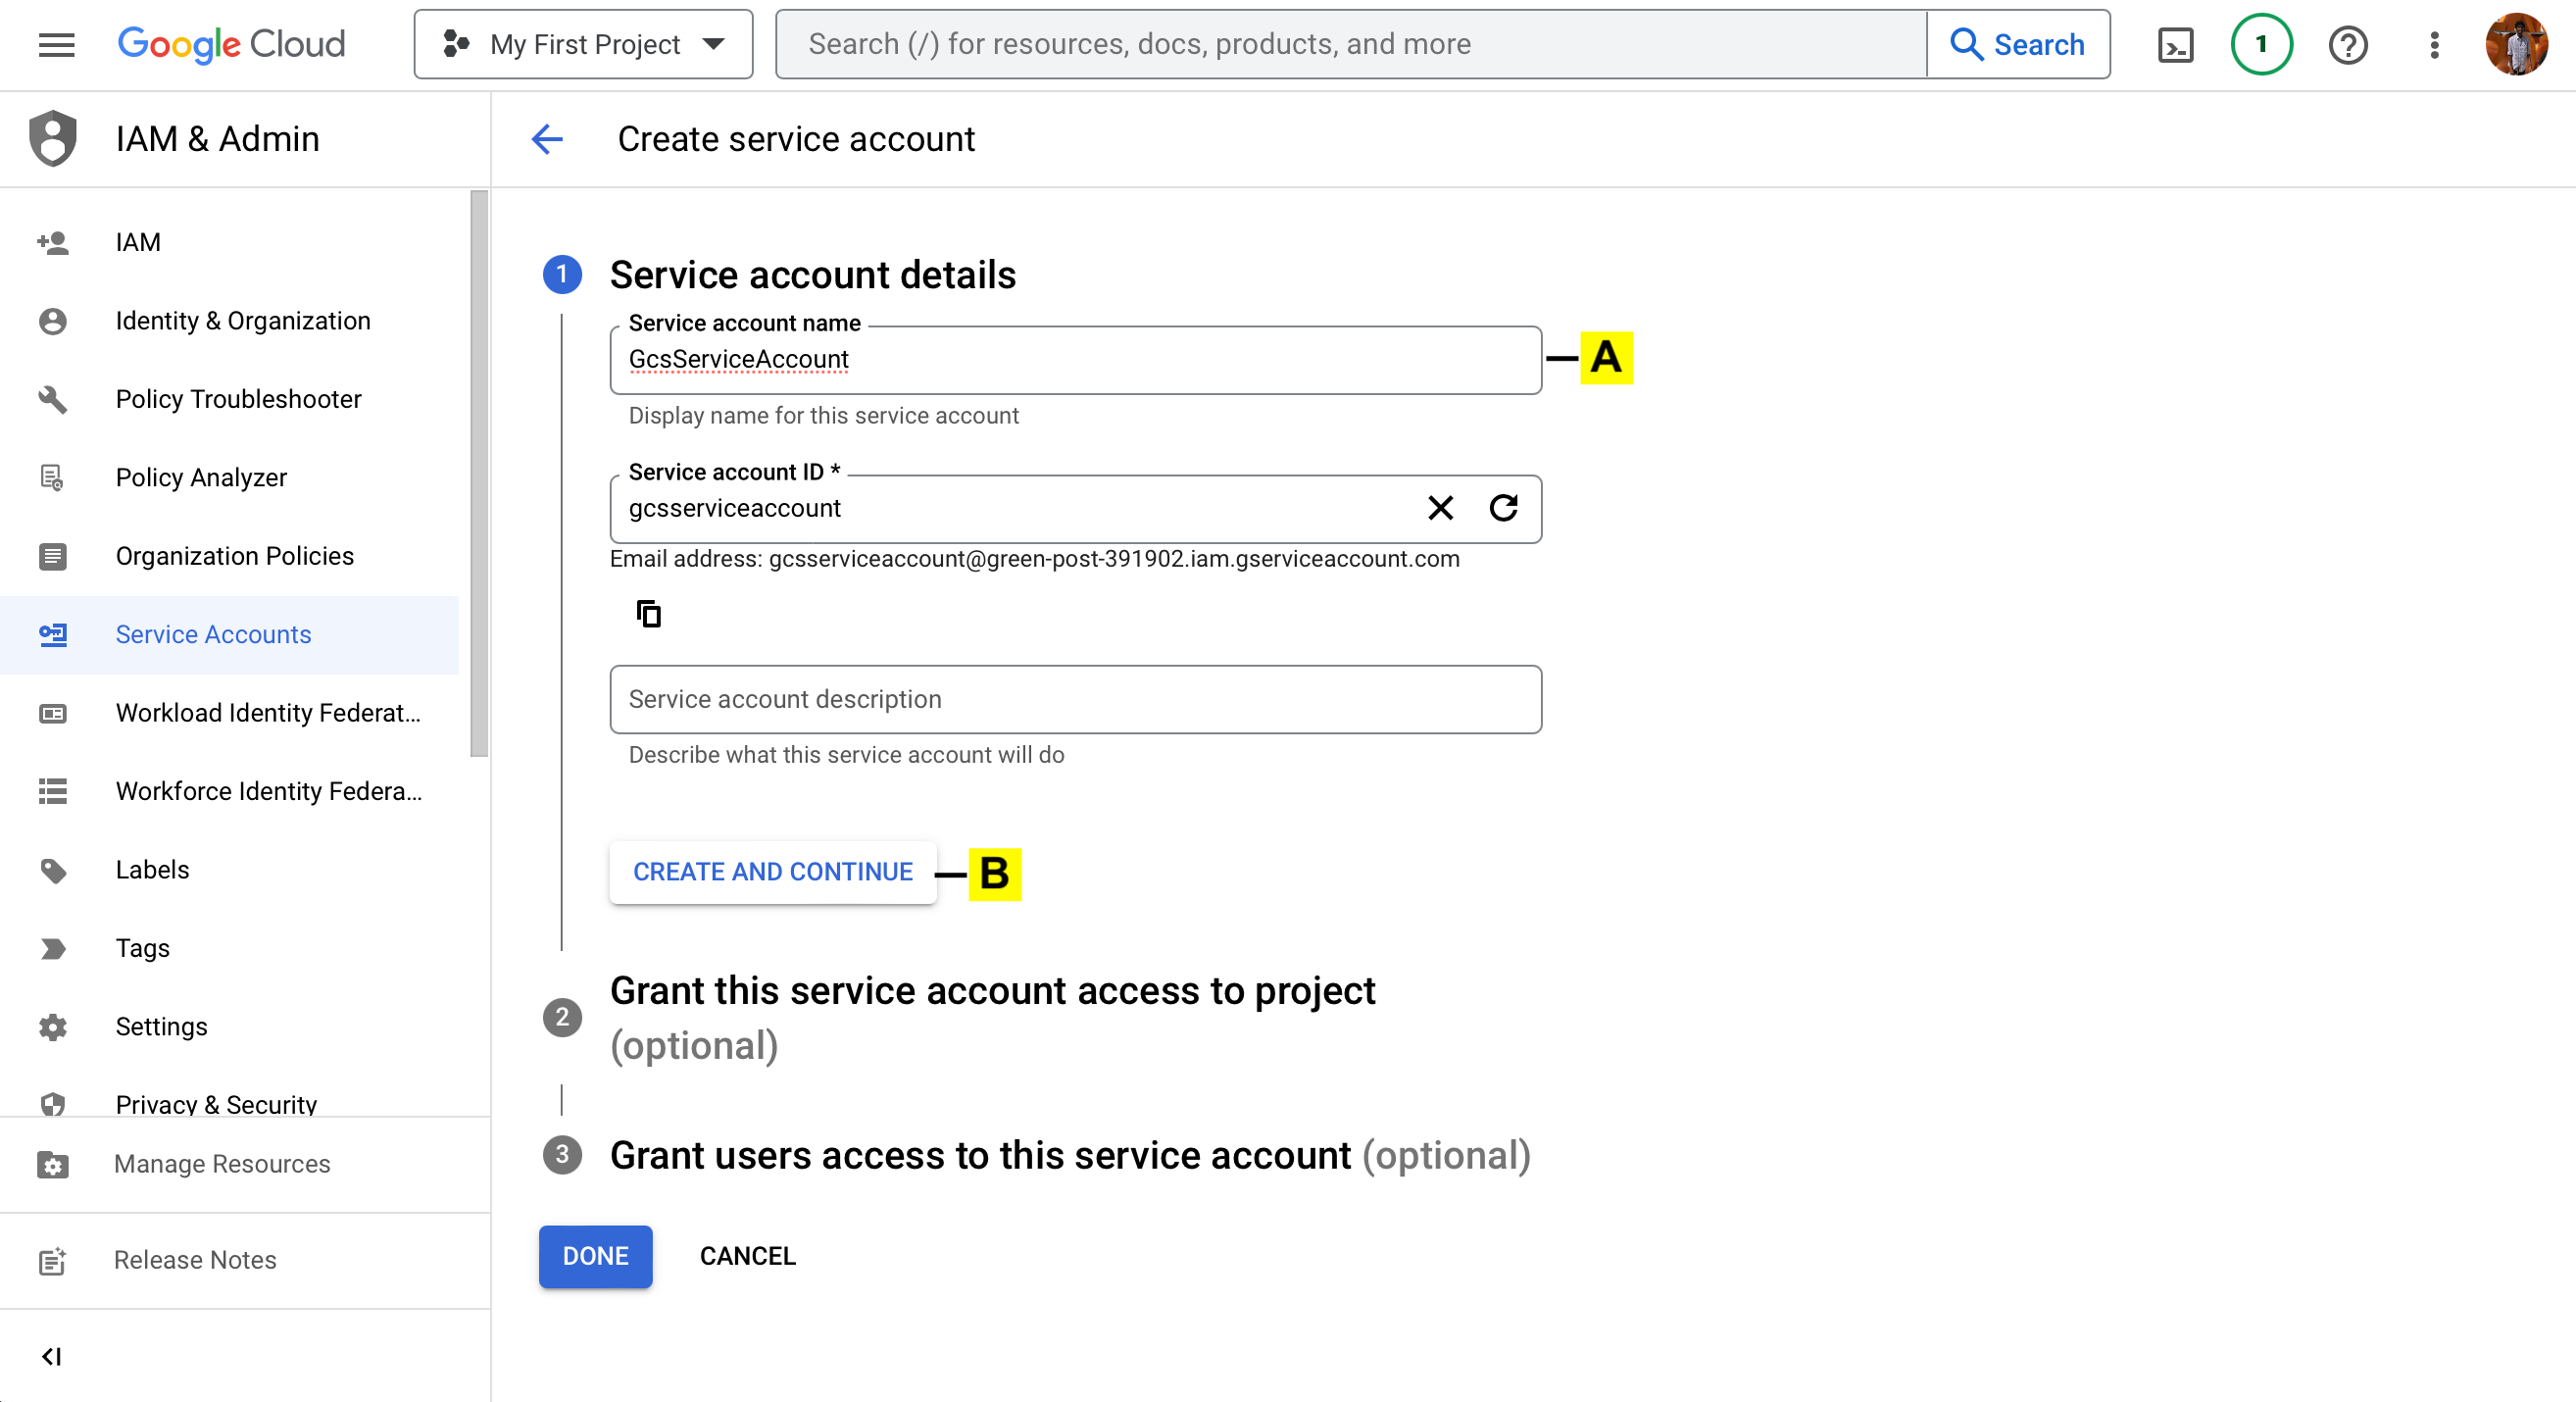
4. On the service account details window.
A. Provide Service account name
B. Click CREATE AND CONTINUE
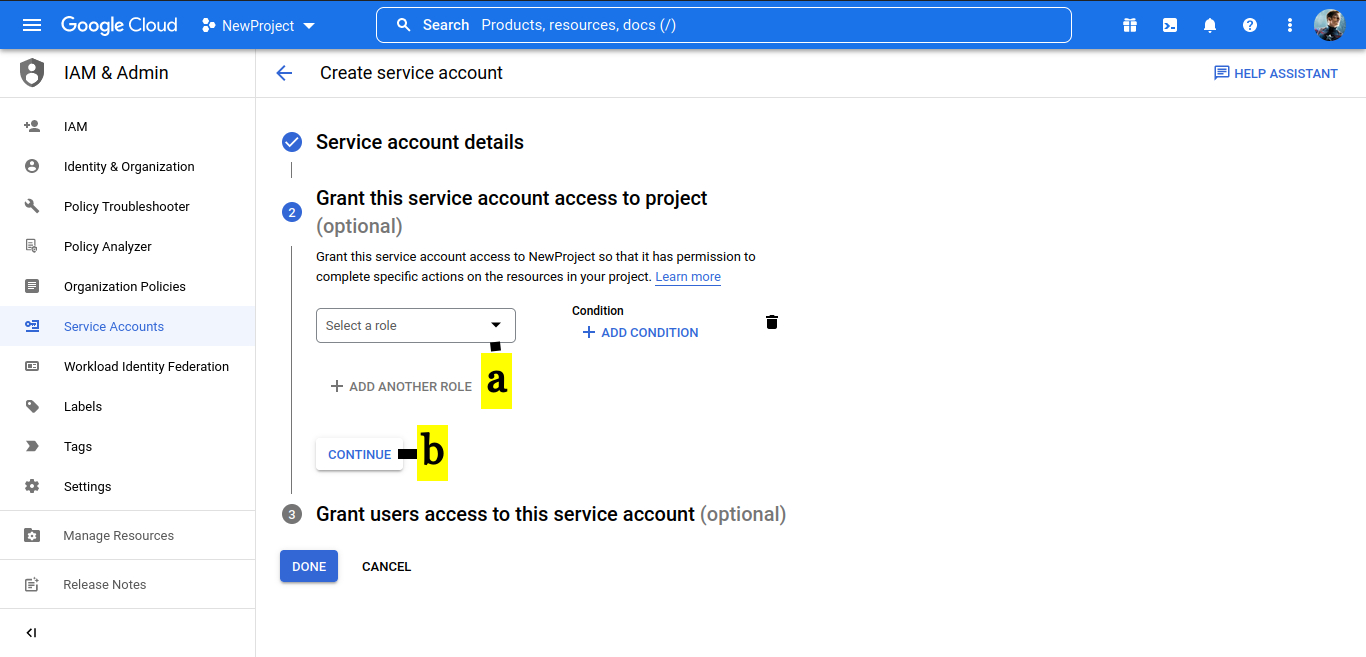
5. Grant this service account access to project.
a. Leave this empty
b. Click CONTINUE
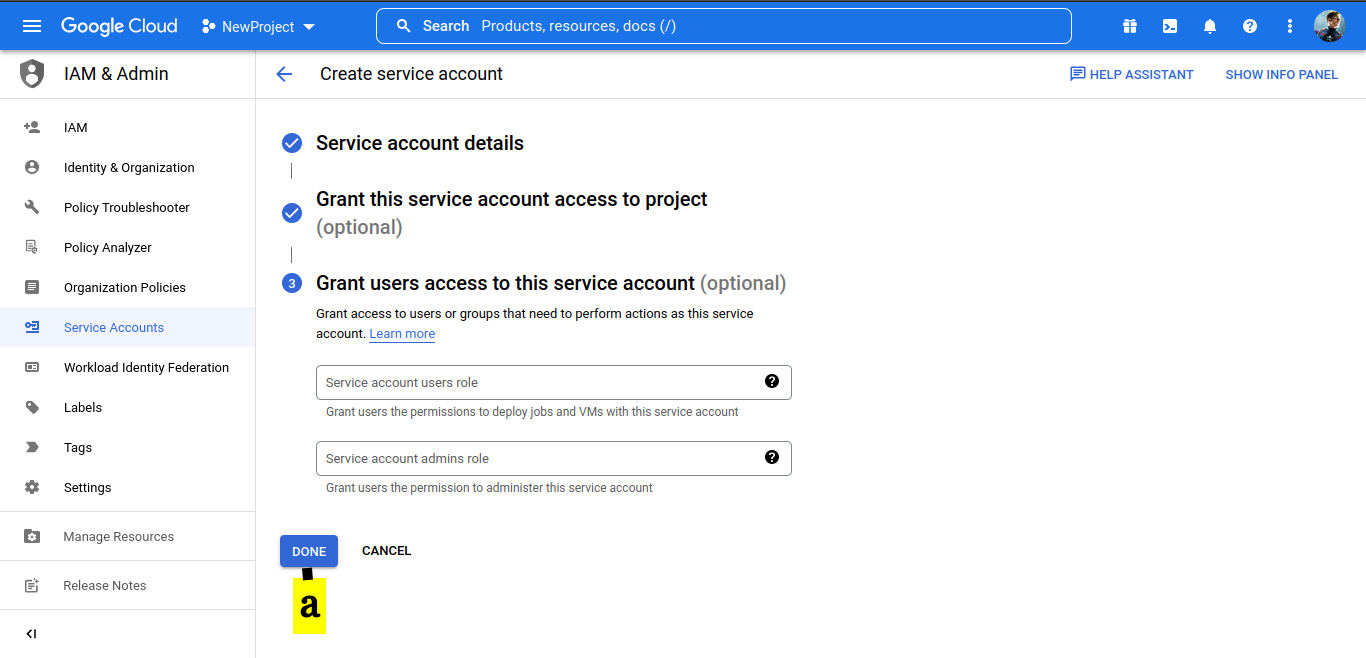
6. Grant users access to this service account (optional)
a. Click DONE
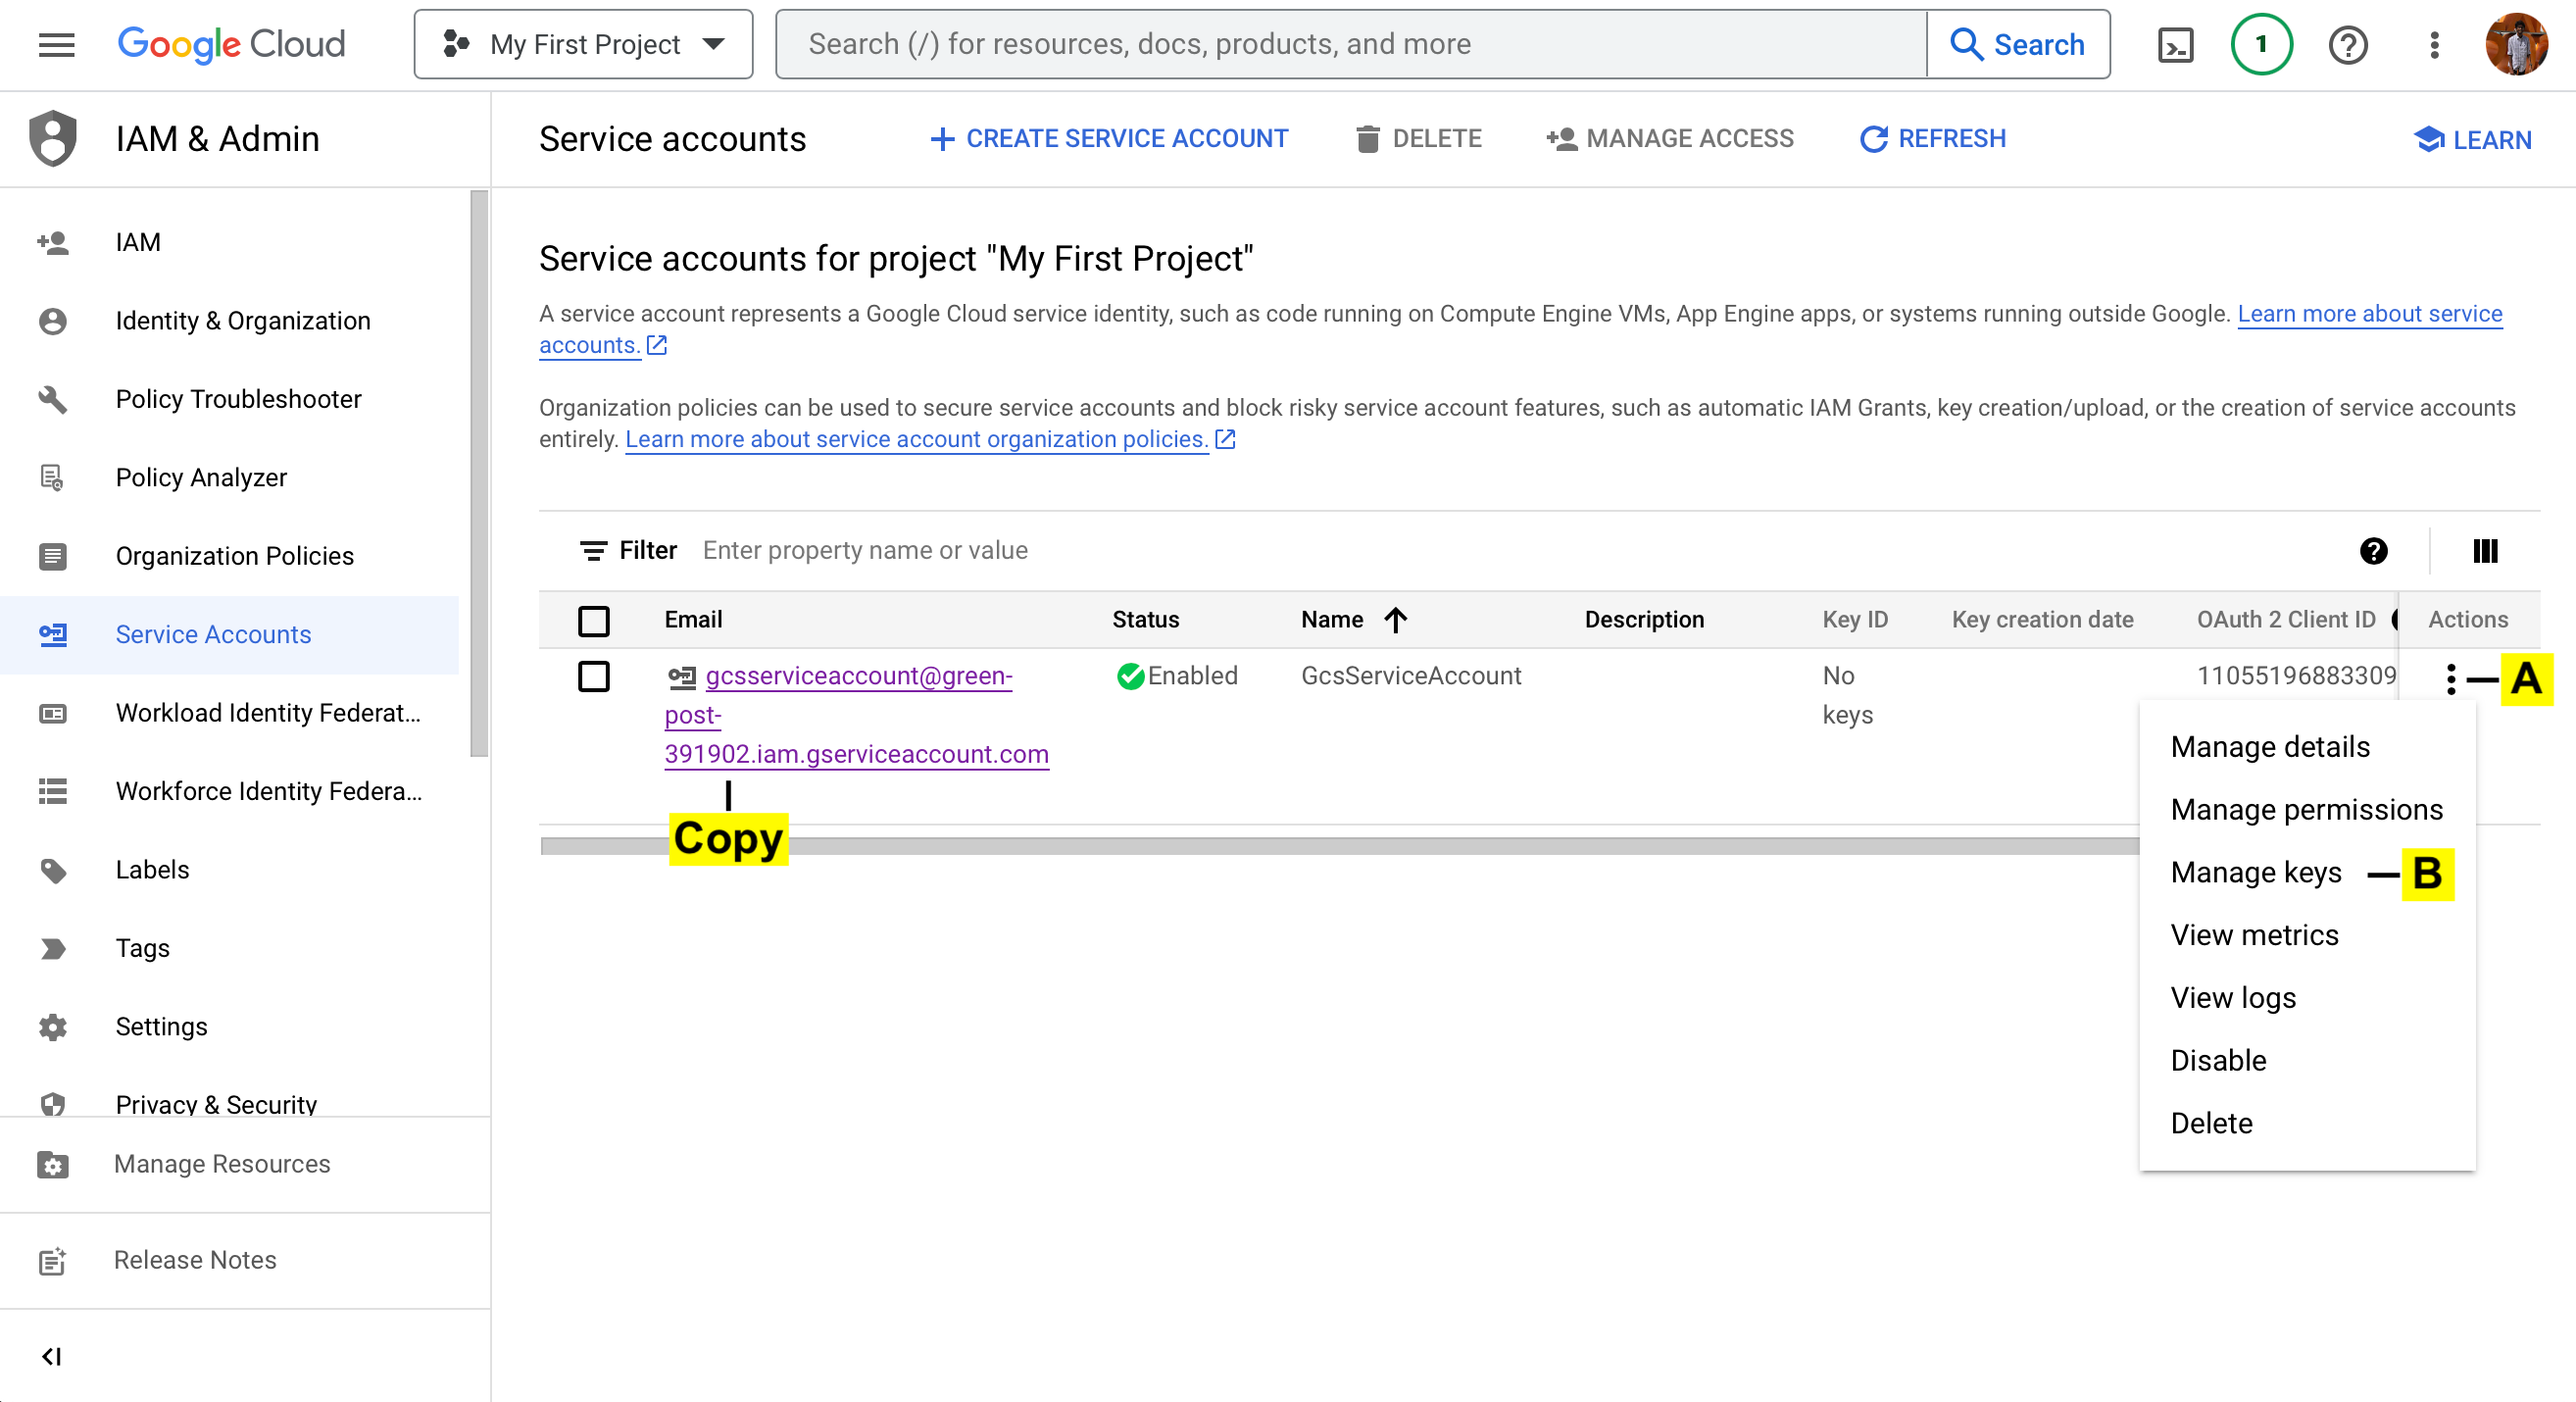
7. On service account window.
A. Click on Action button denoted by three dots
B. Select Manage Keys
COPY. Copy the email id (This id should be copied at this stage as it will not be visible later. This id will be used for Assigning Permissions)
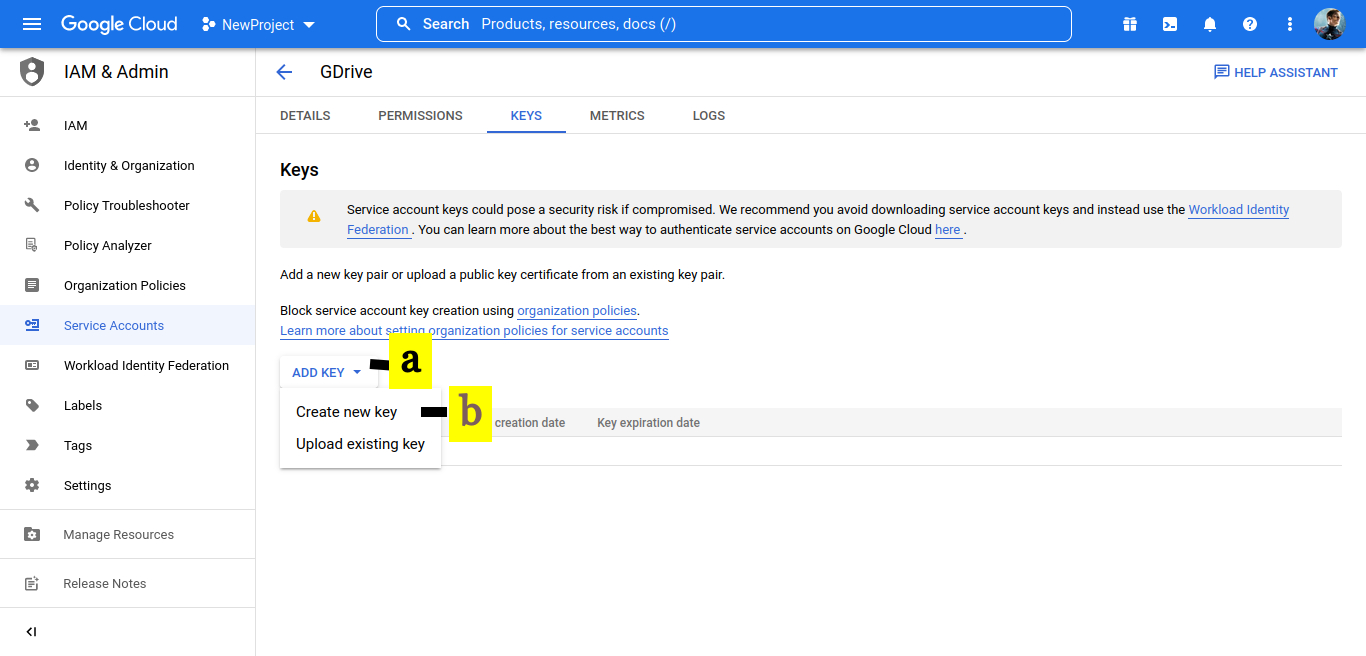
8. Create a key
a. ADD KEY
b. Create new key
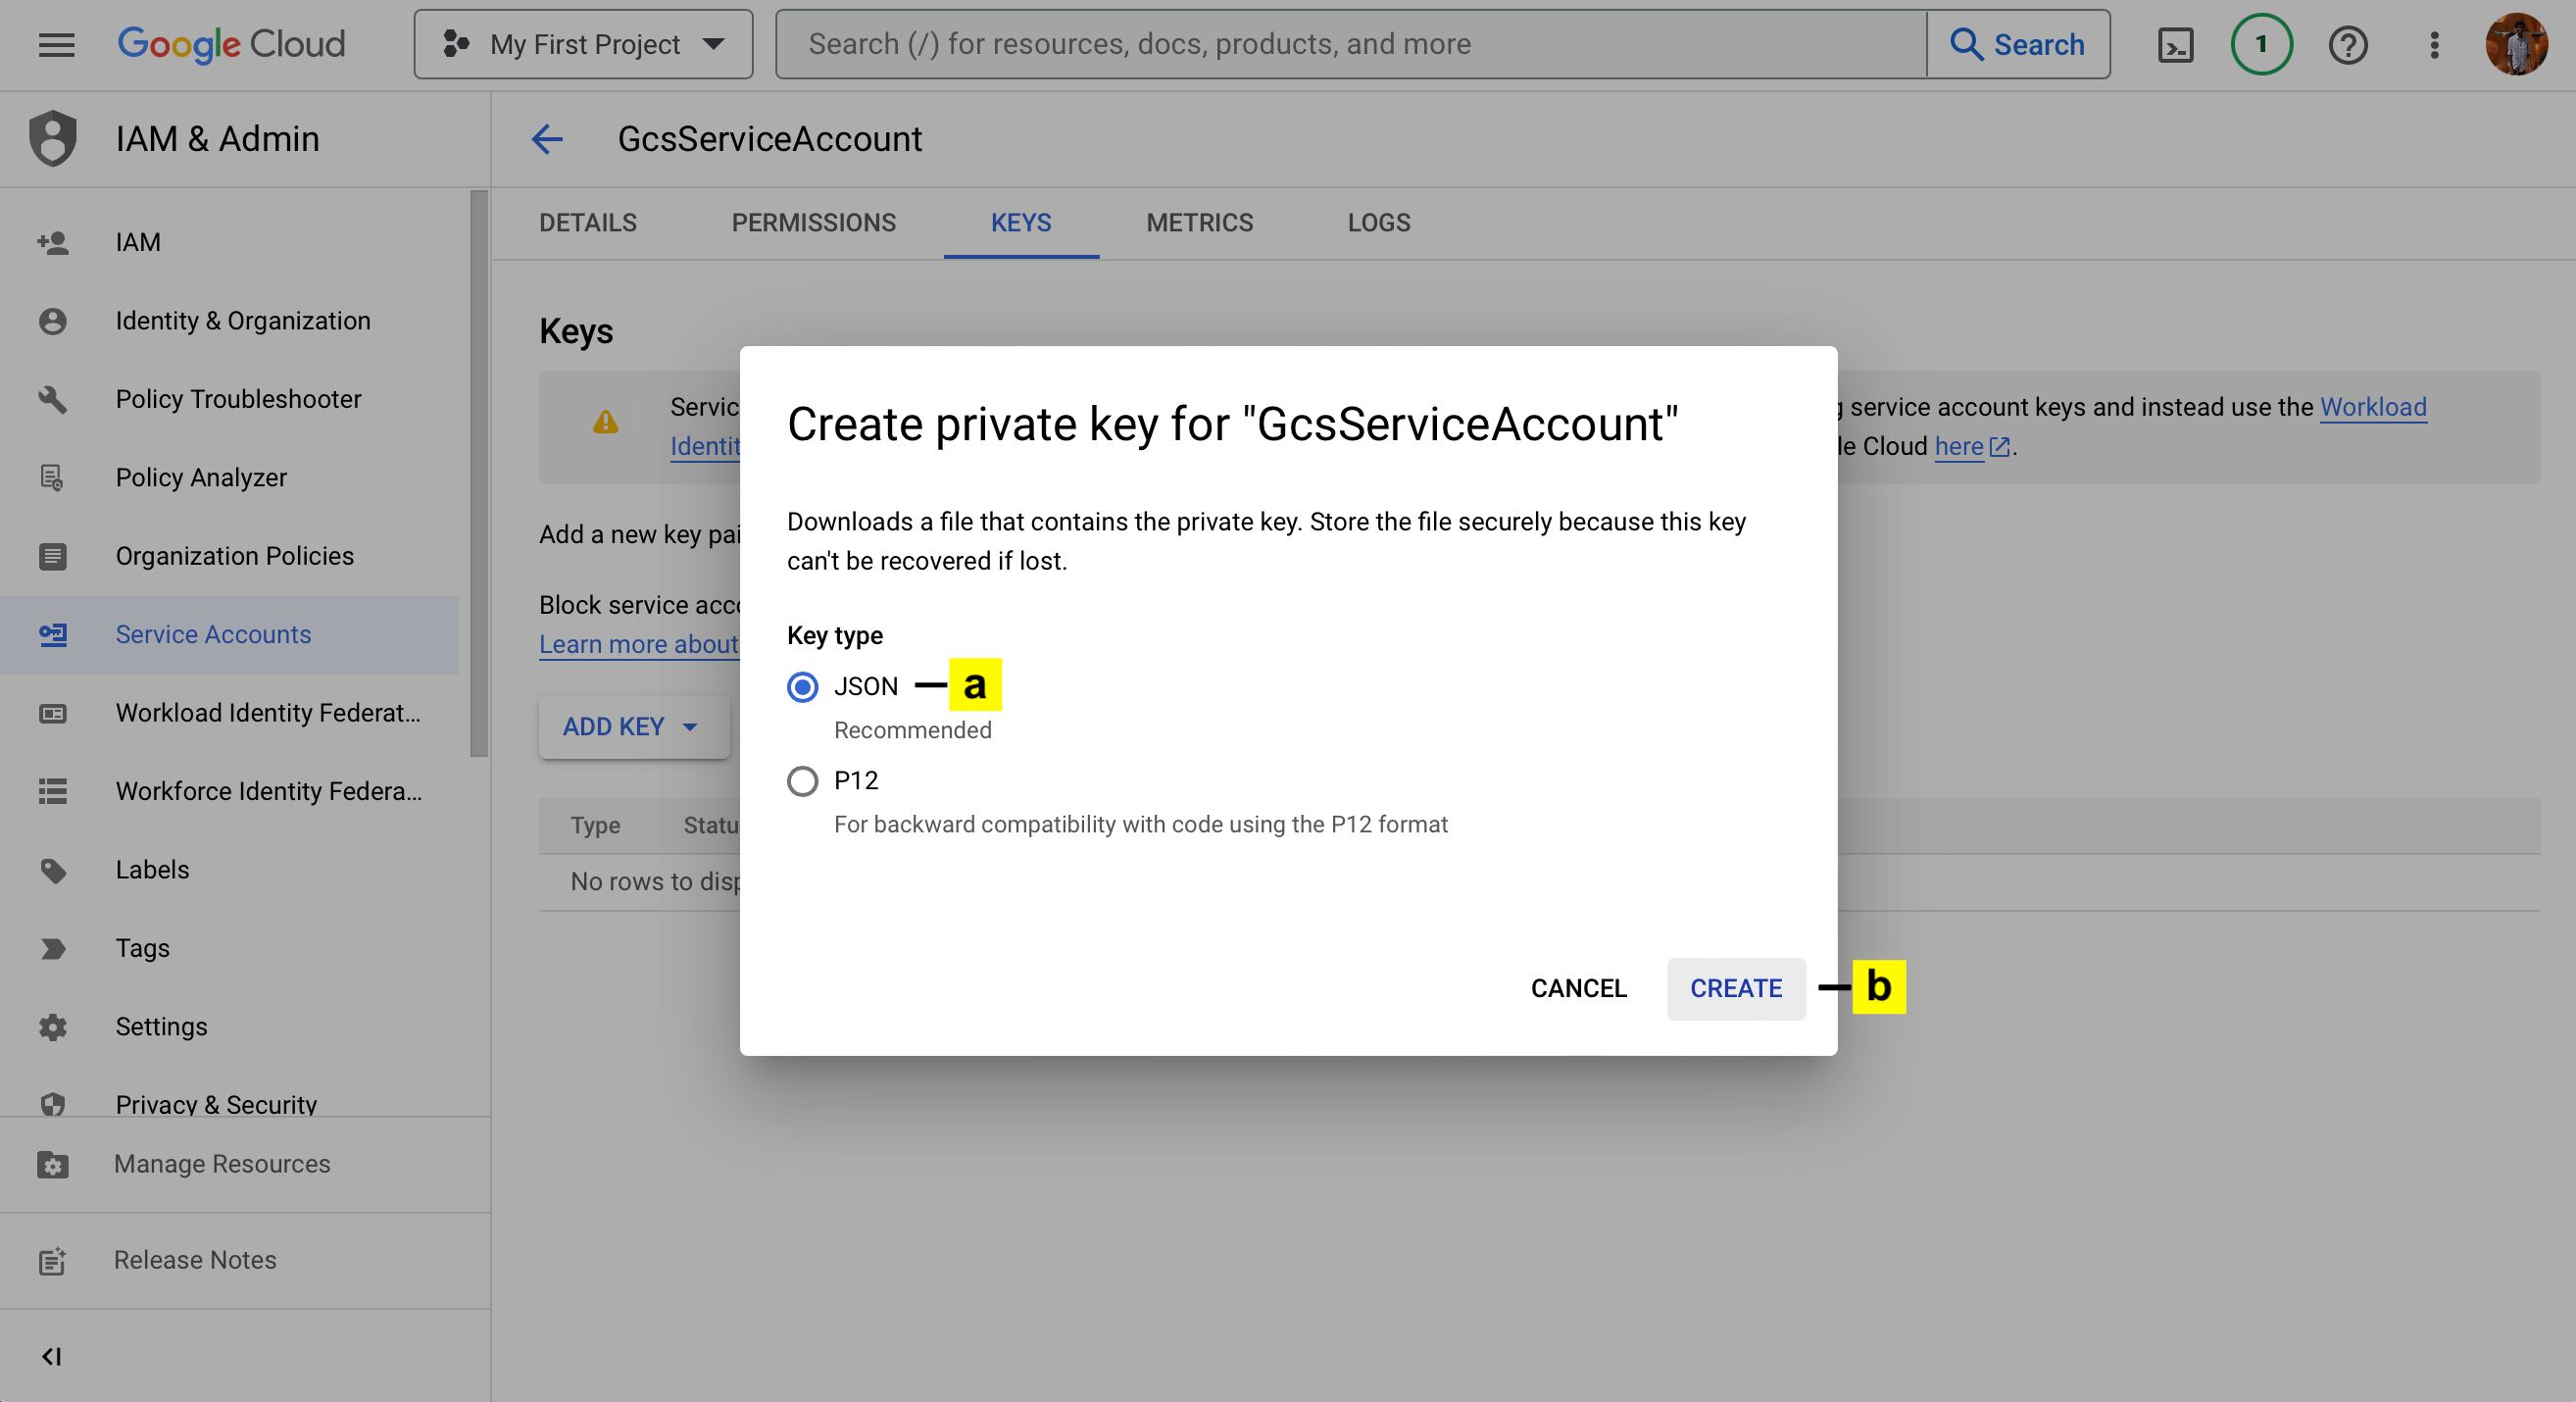
9. Create private key.
a. Click on JSON
b. Click on CREATE. On creation, the key will be downloaded to your desktop. Save this JSON file as you will need it when registering the bucket with LegacyFlo.
Give access to the bucket via the service account
By default, a newly created service account won't have any permissions. To limit access to a single bucket, you need to grant it the necessary permissions for that bucket only. Here's how:
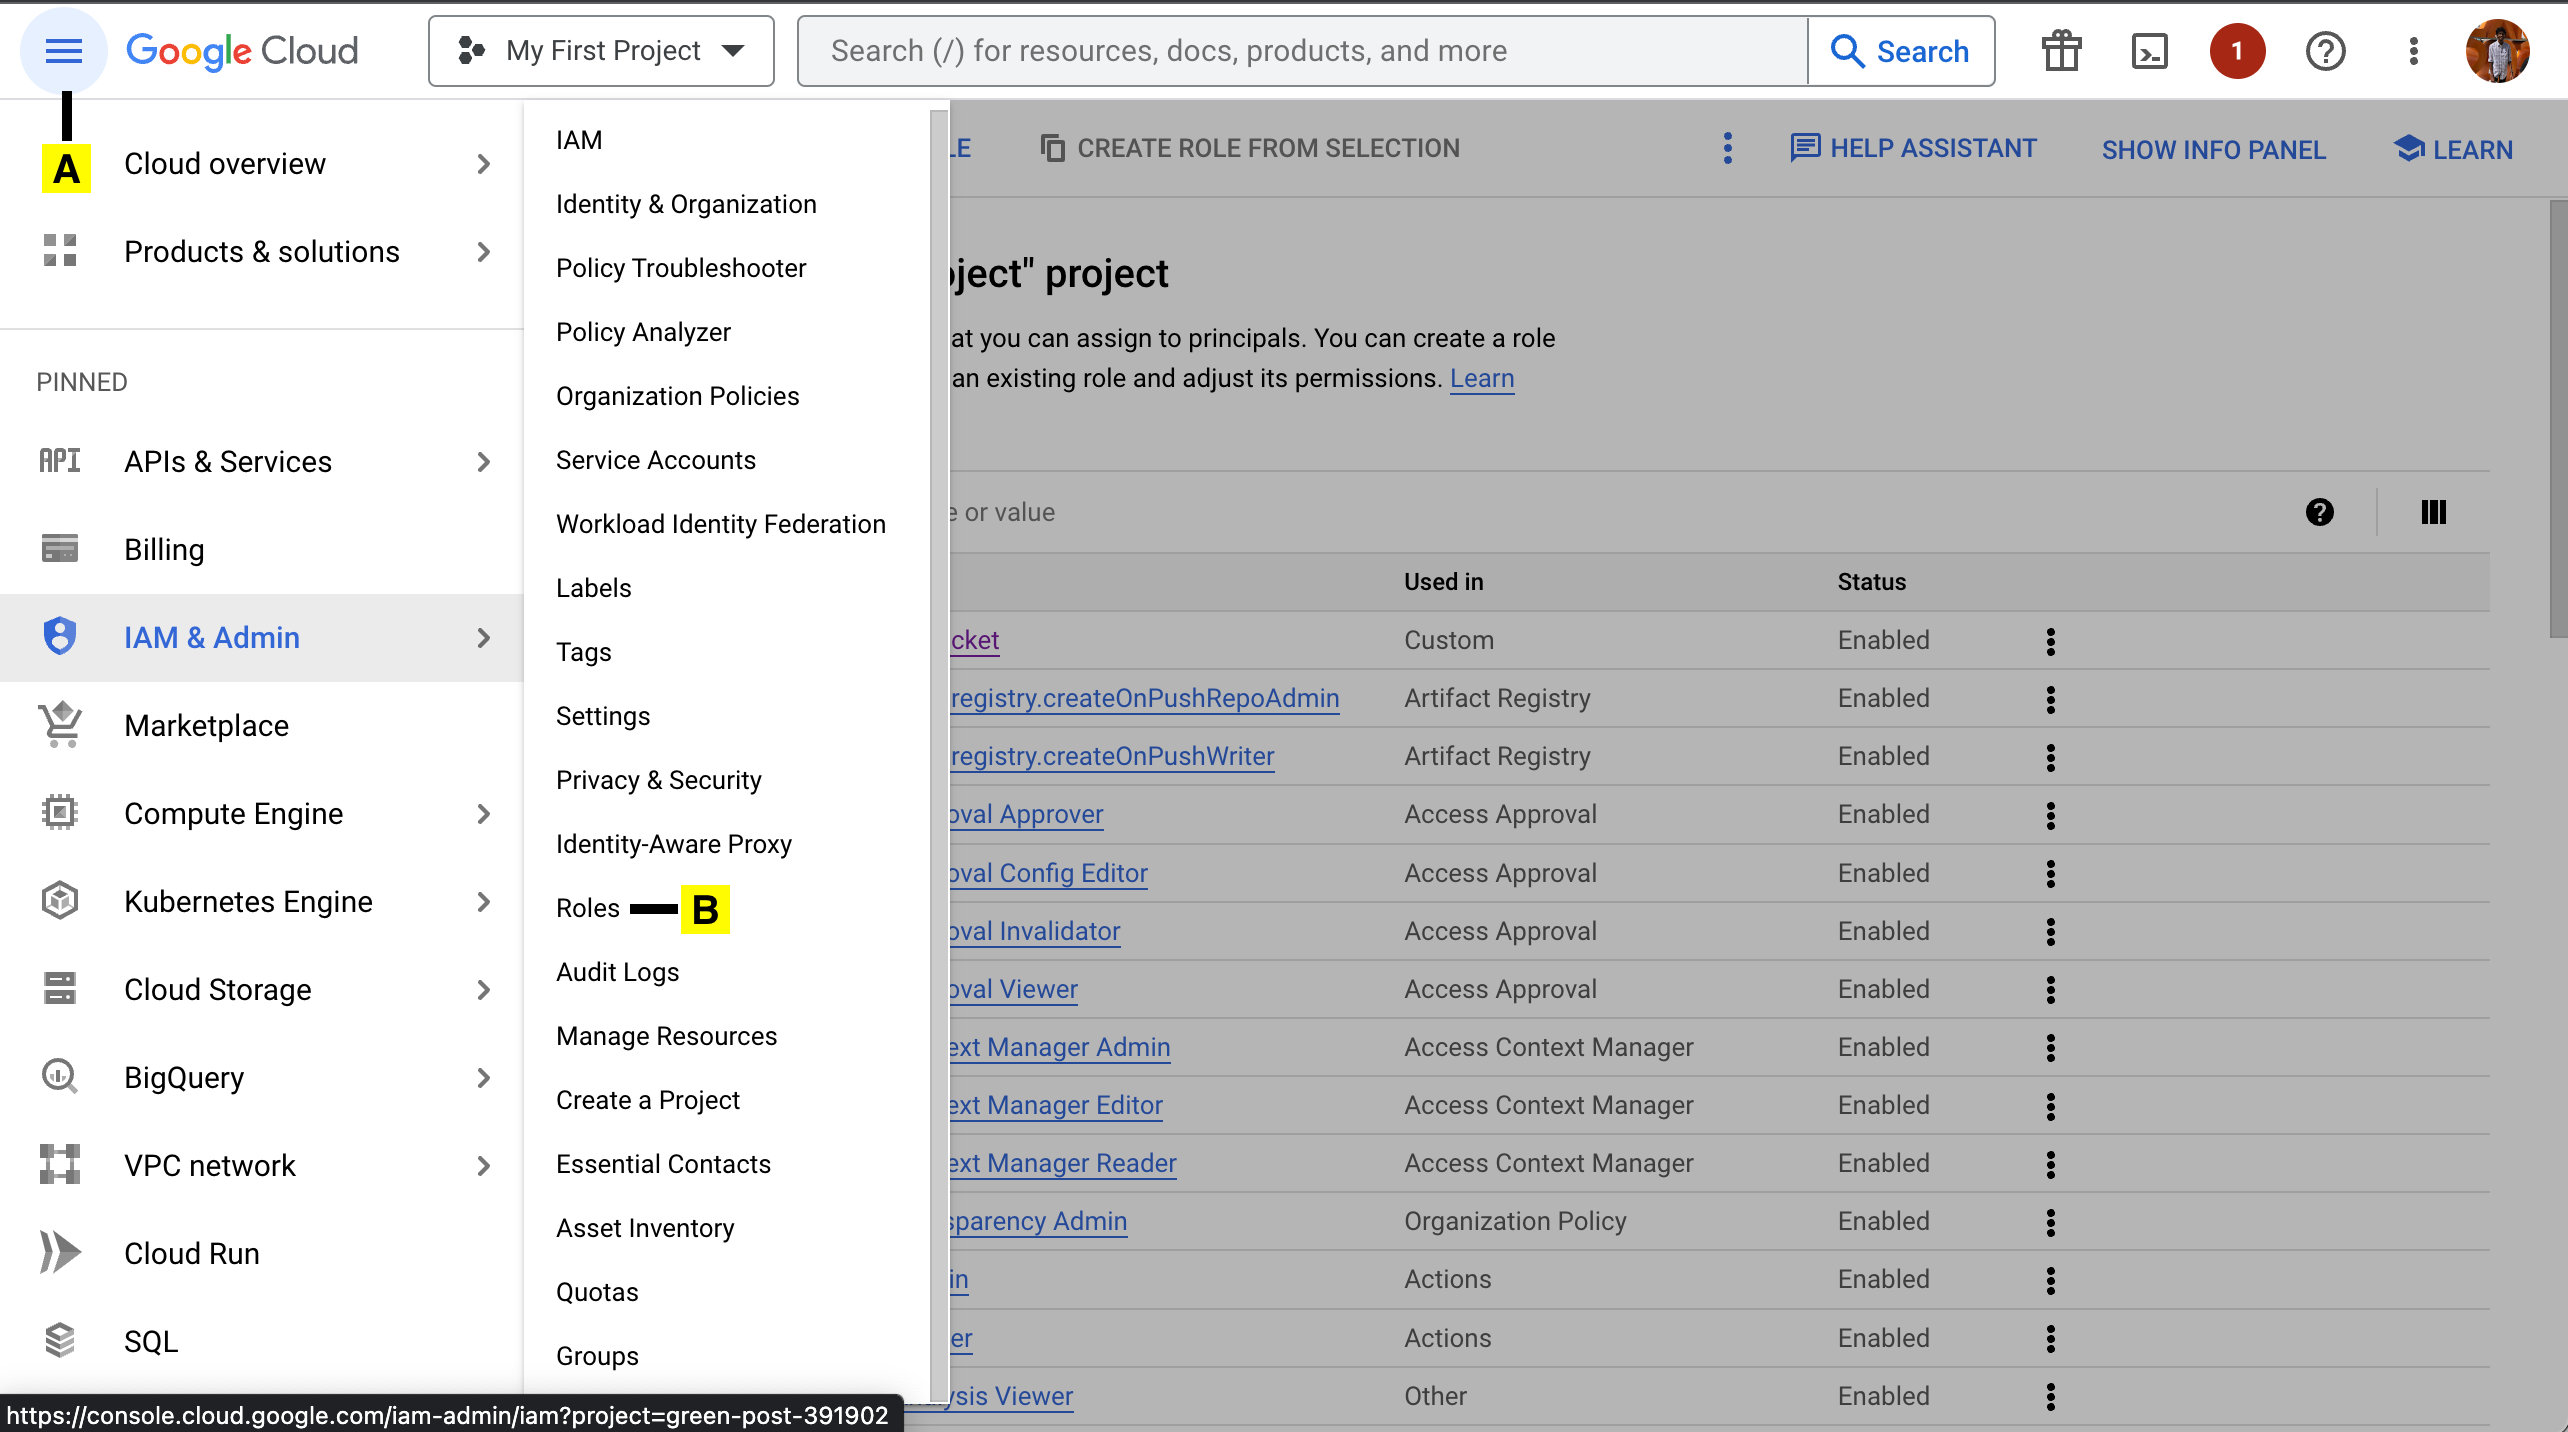
10. First Create an IAM role with minimal permissions.
A. Go to the Console Menu
B. Choose Roles under IAM & Admin.
C. Click on Create Role
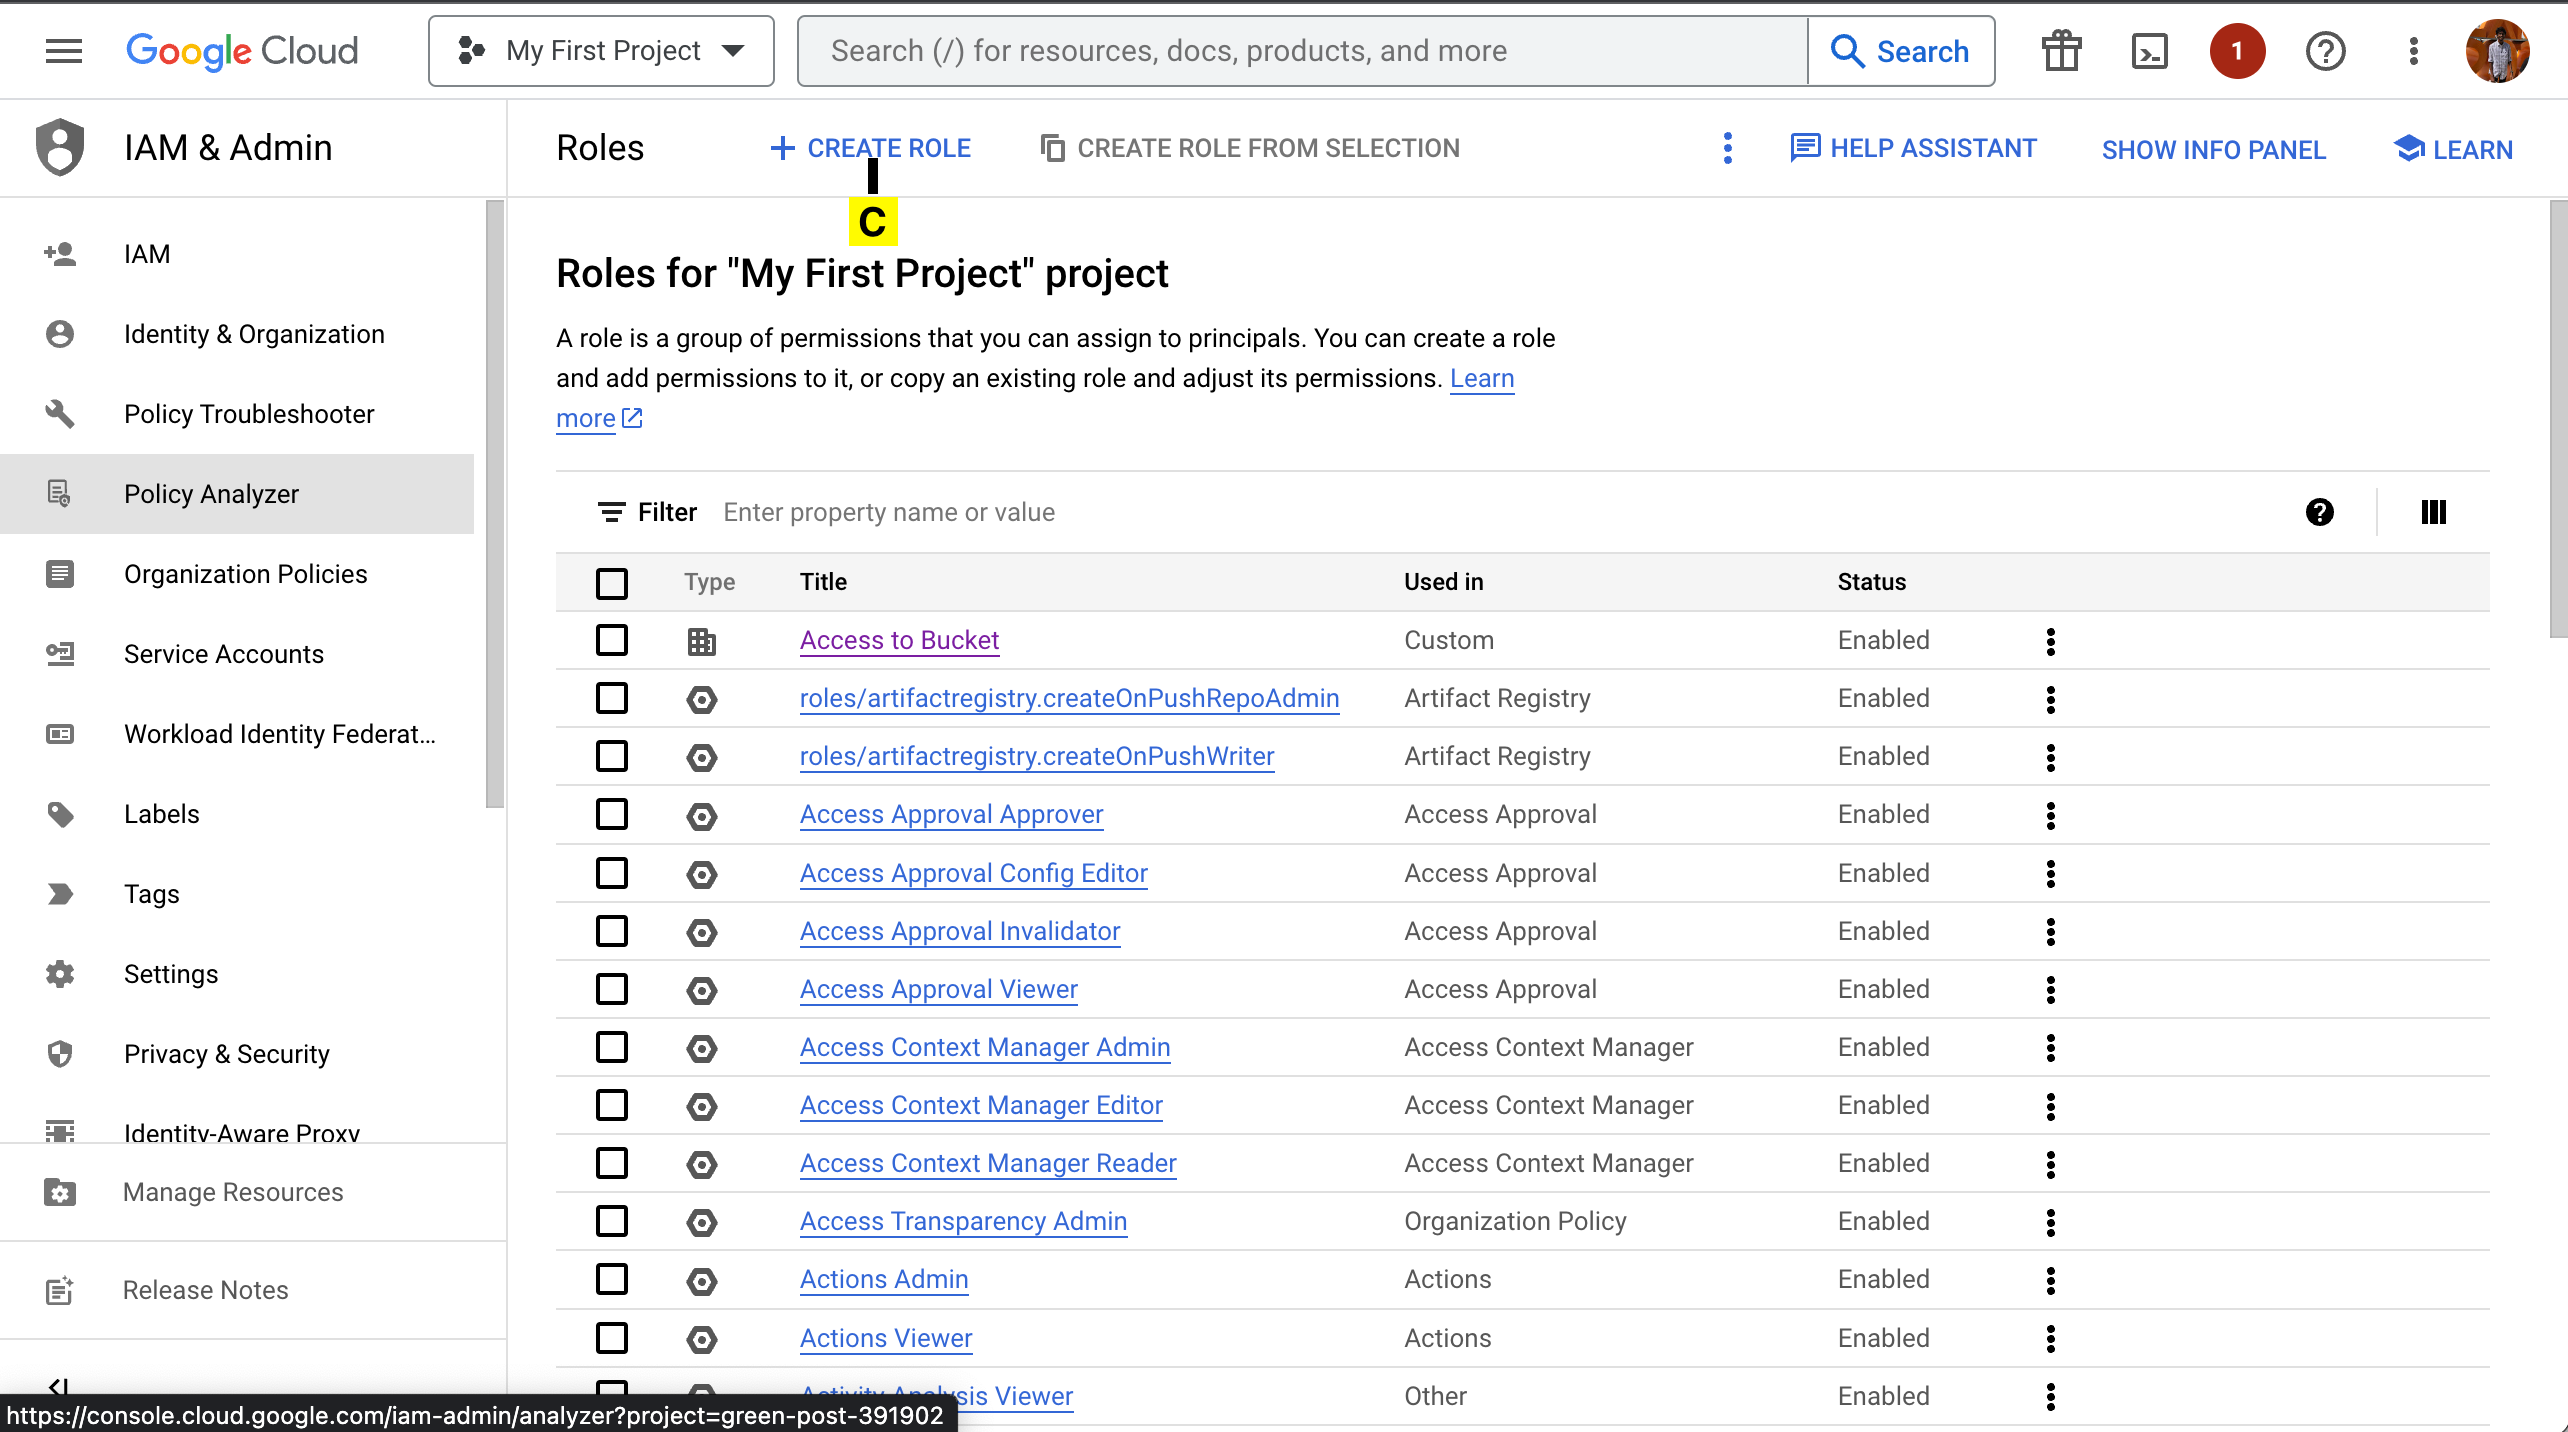
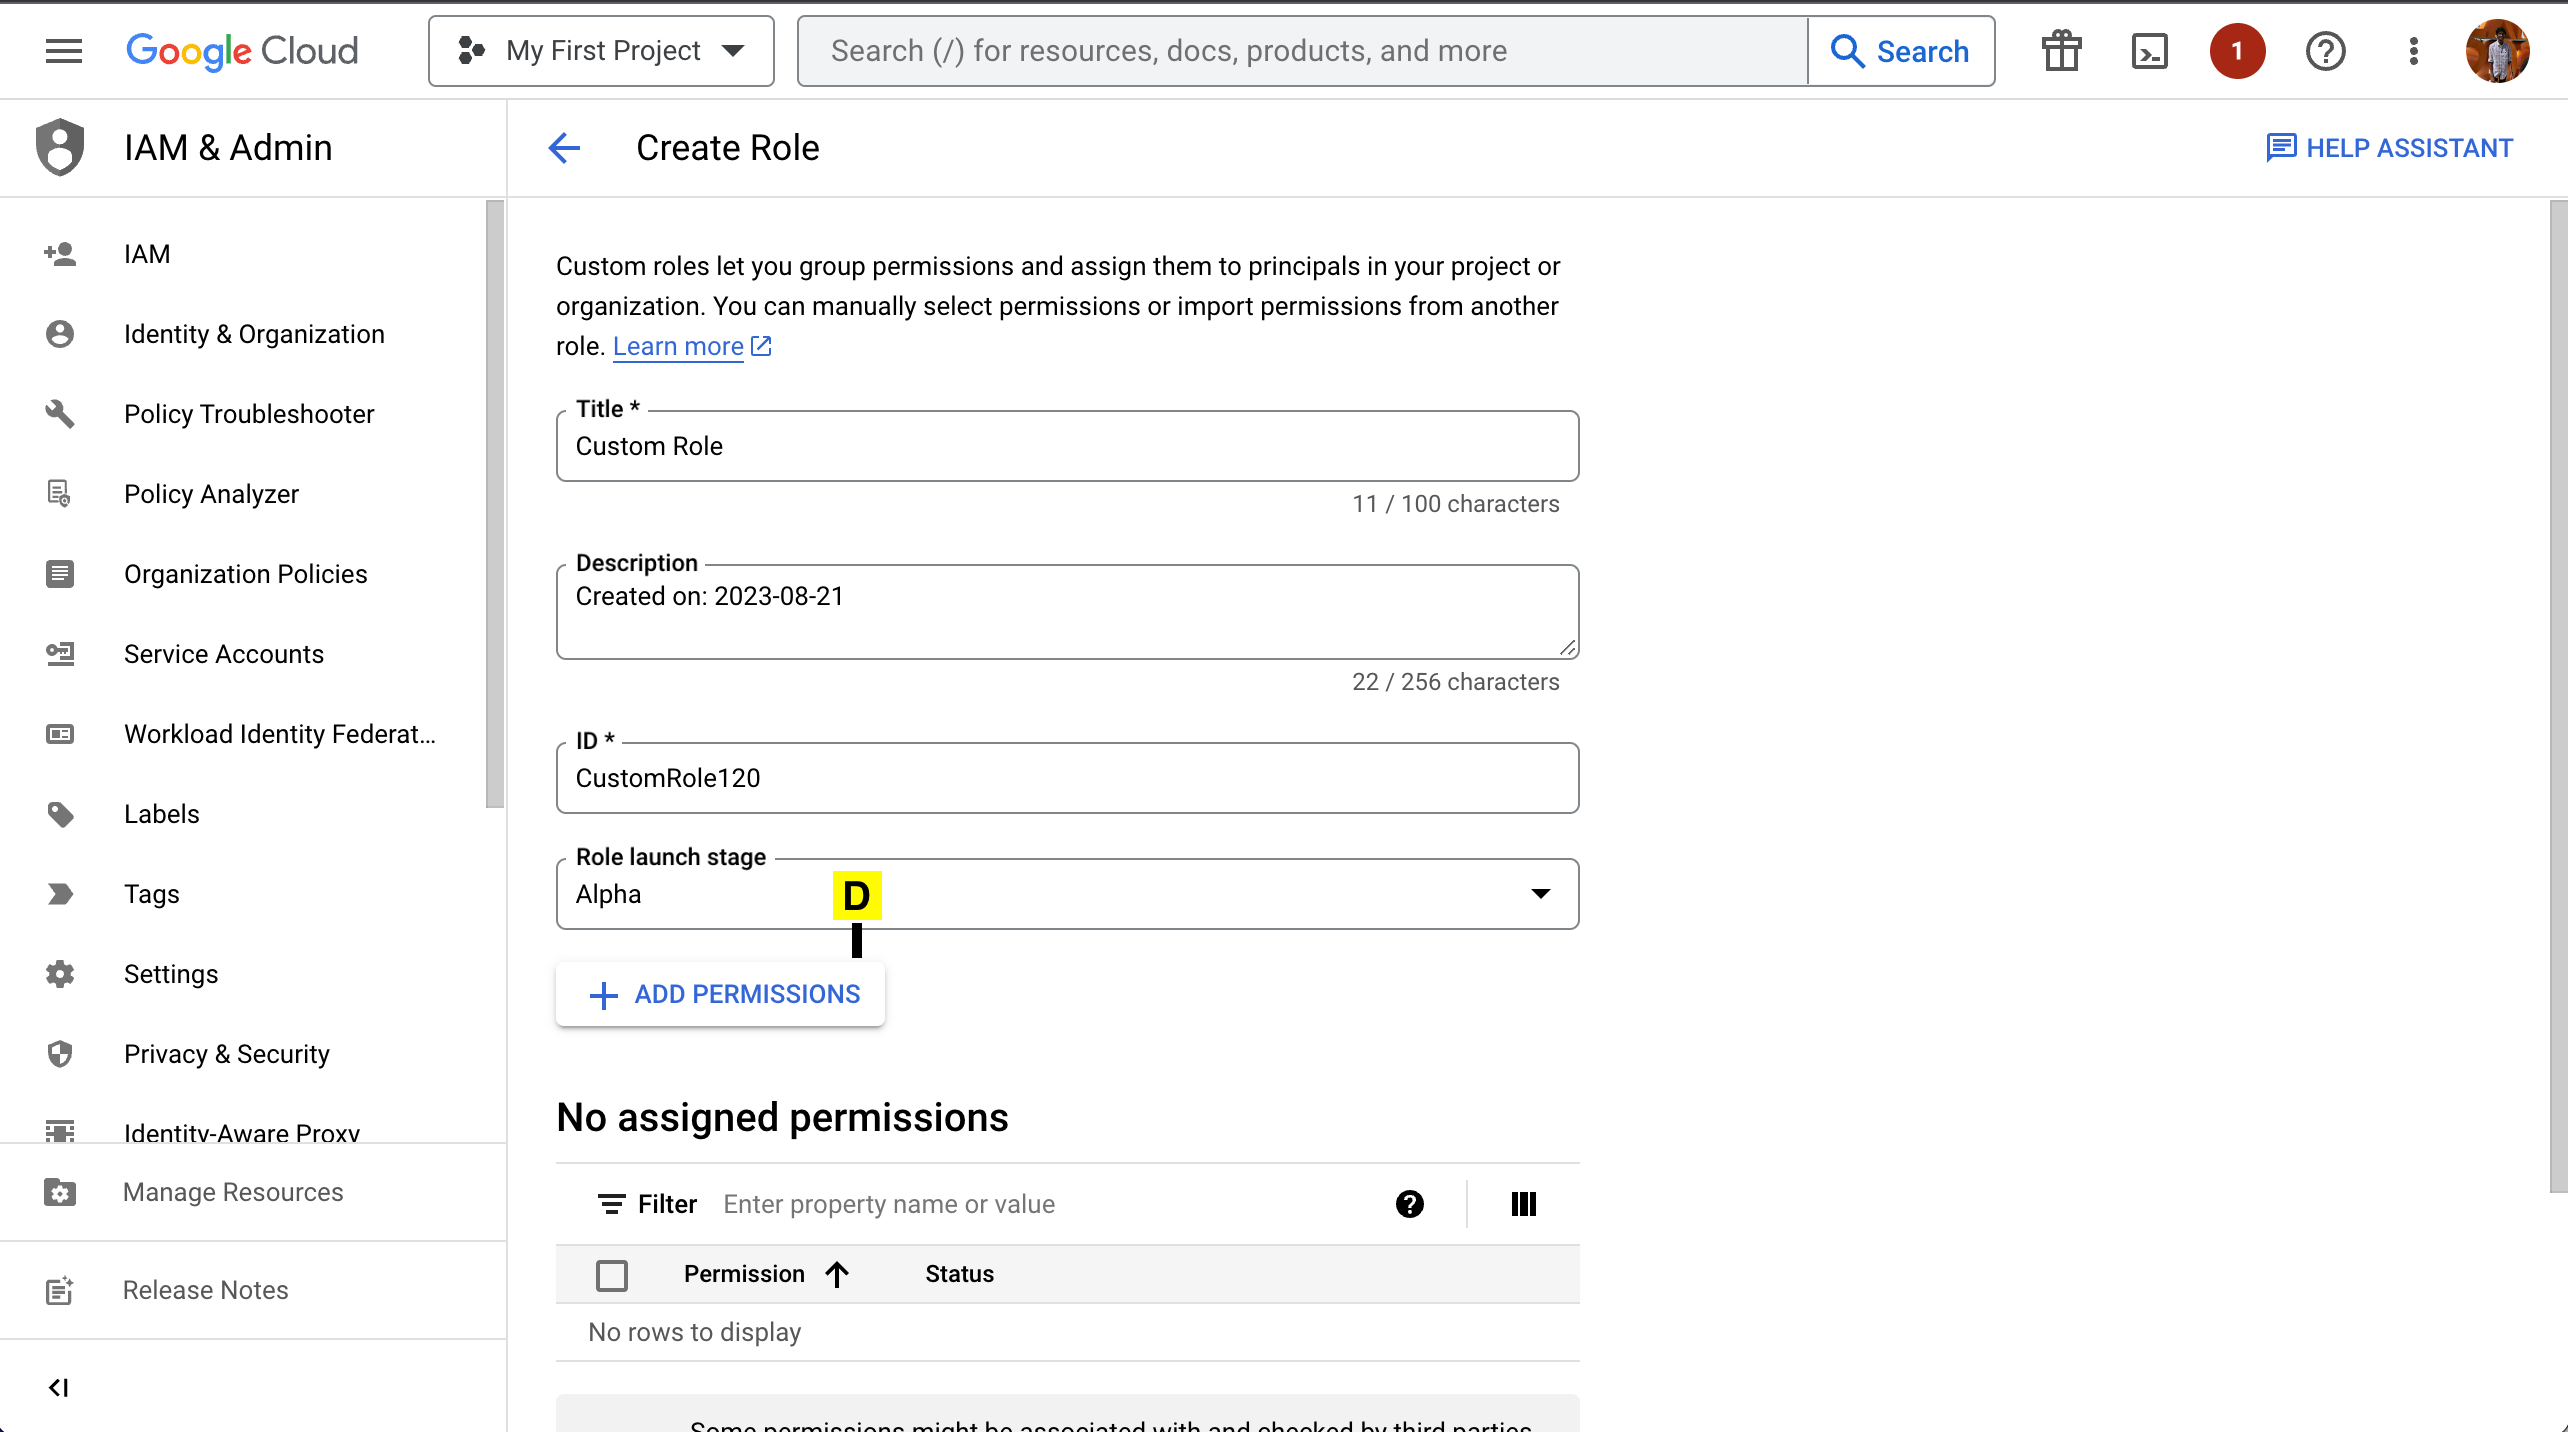
Fill the Title and Create a Custom ID
D. Click on Add Permissions
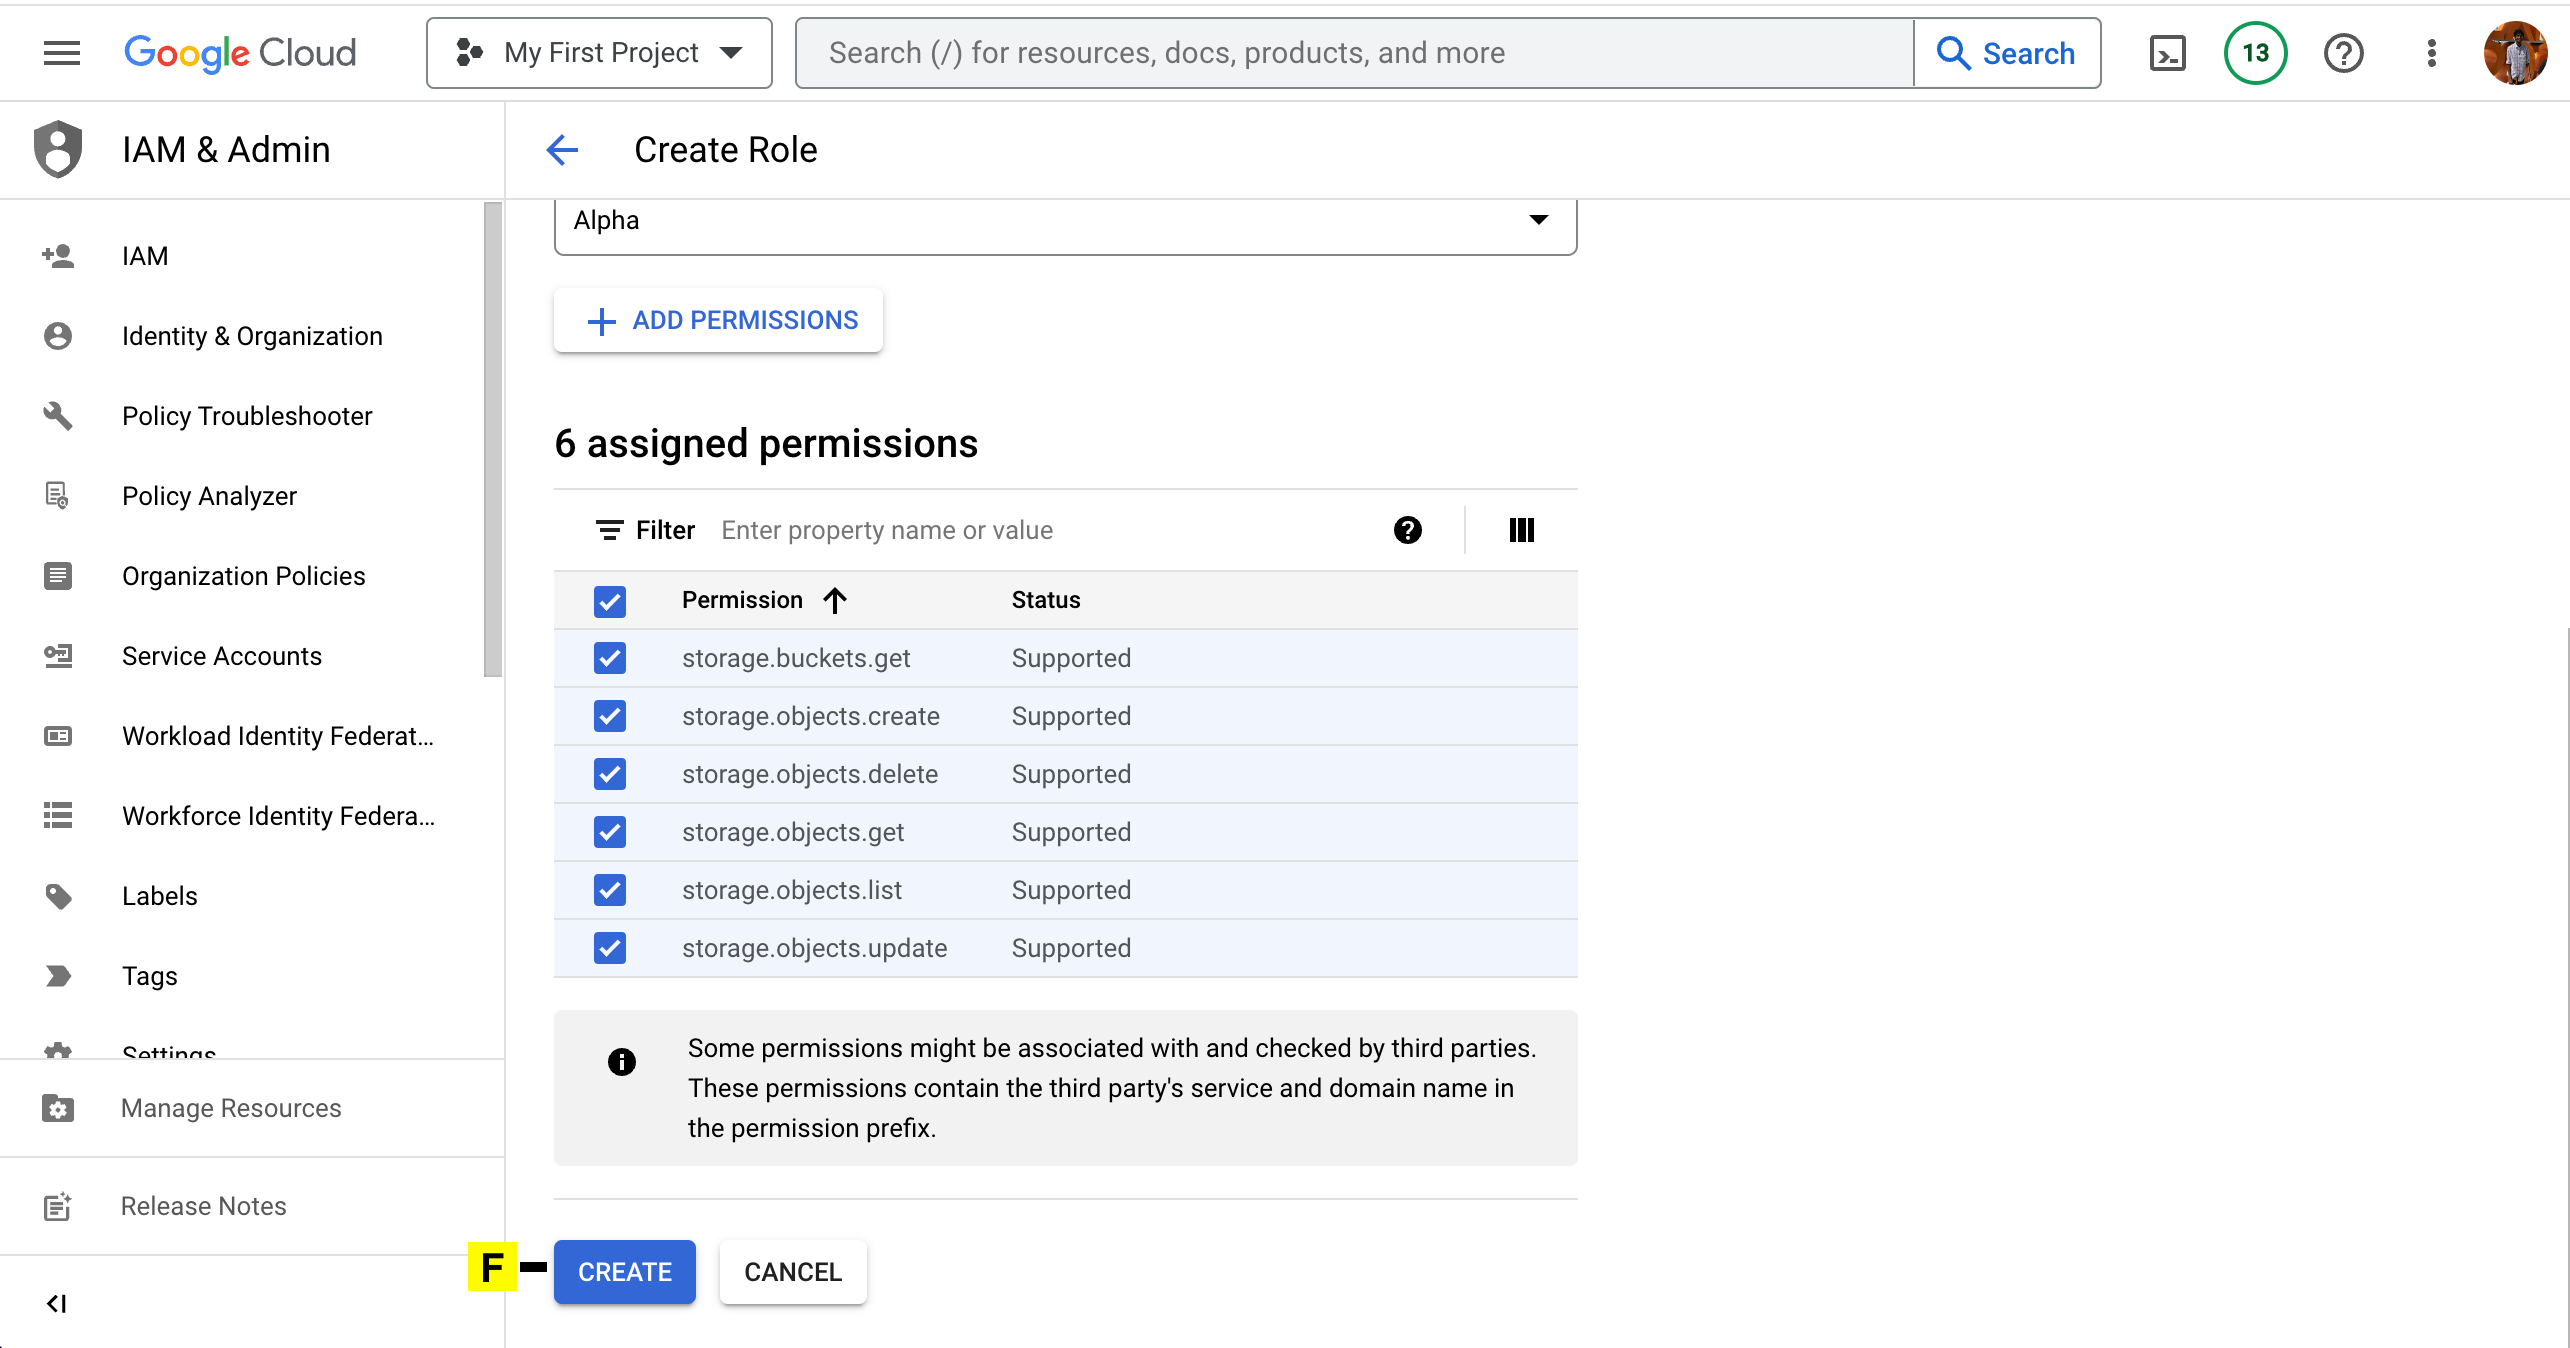
E. Click on ADD

F. Click on CREATE
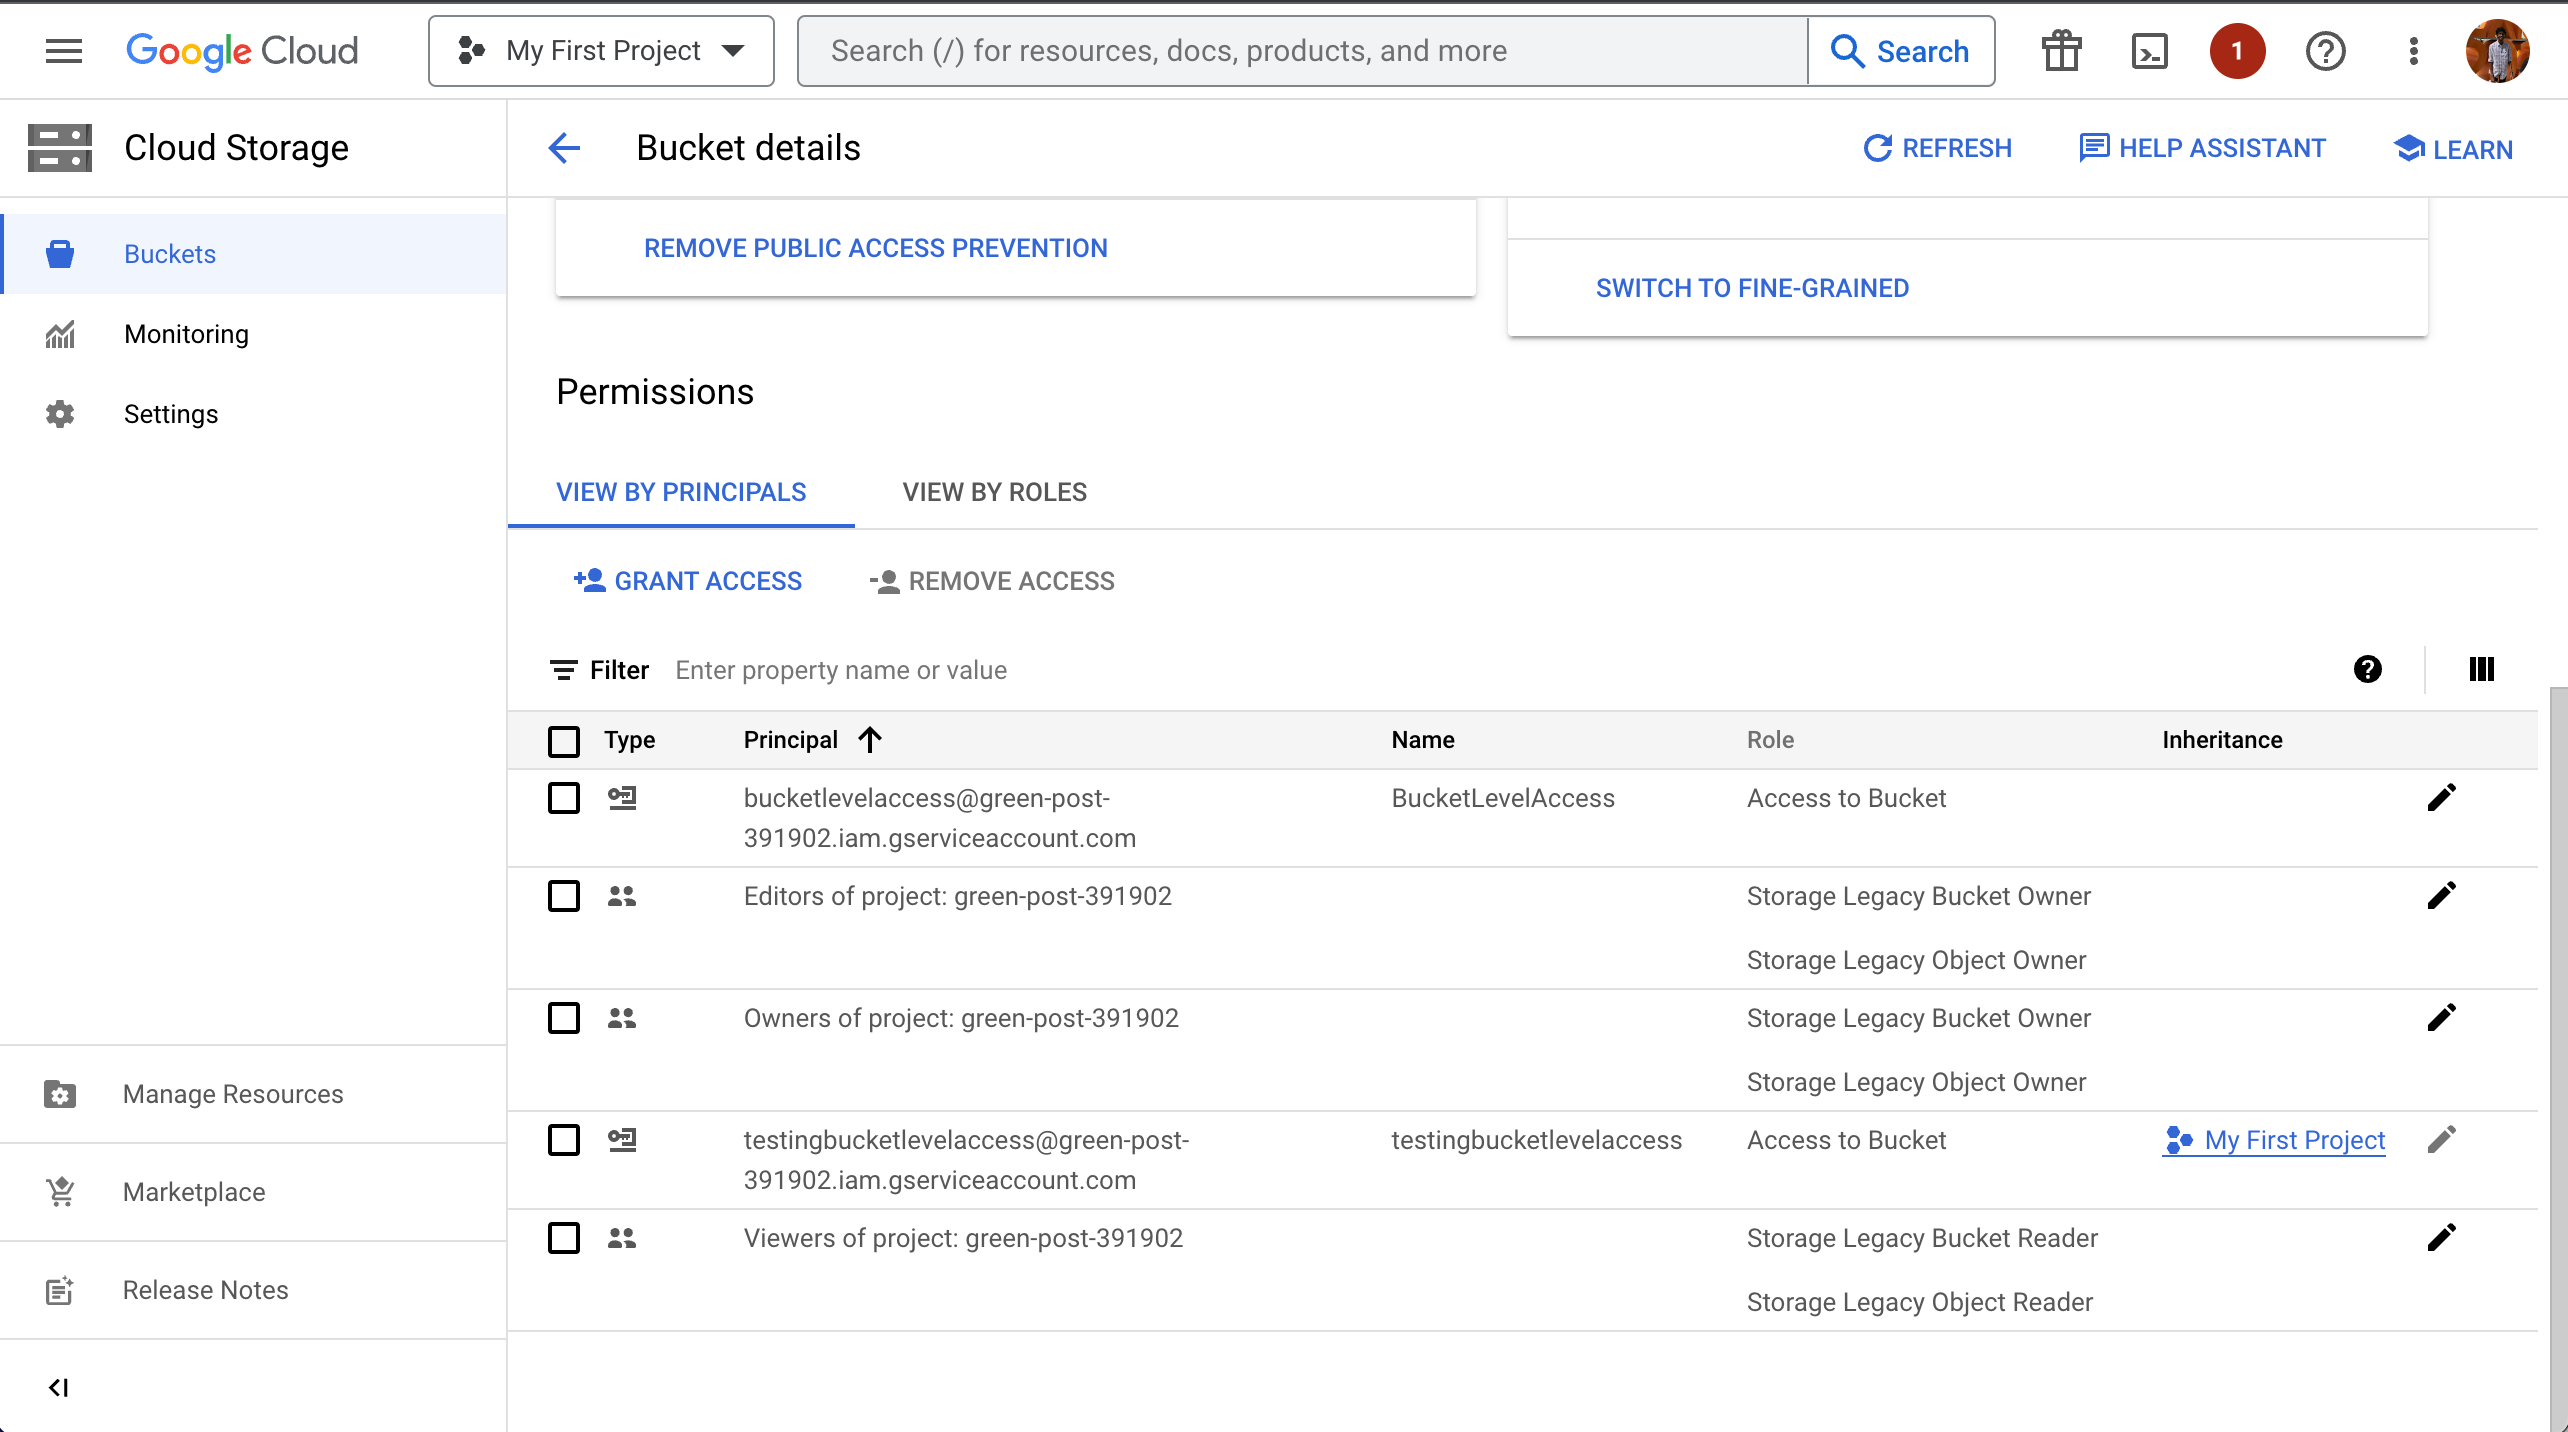
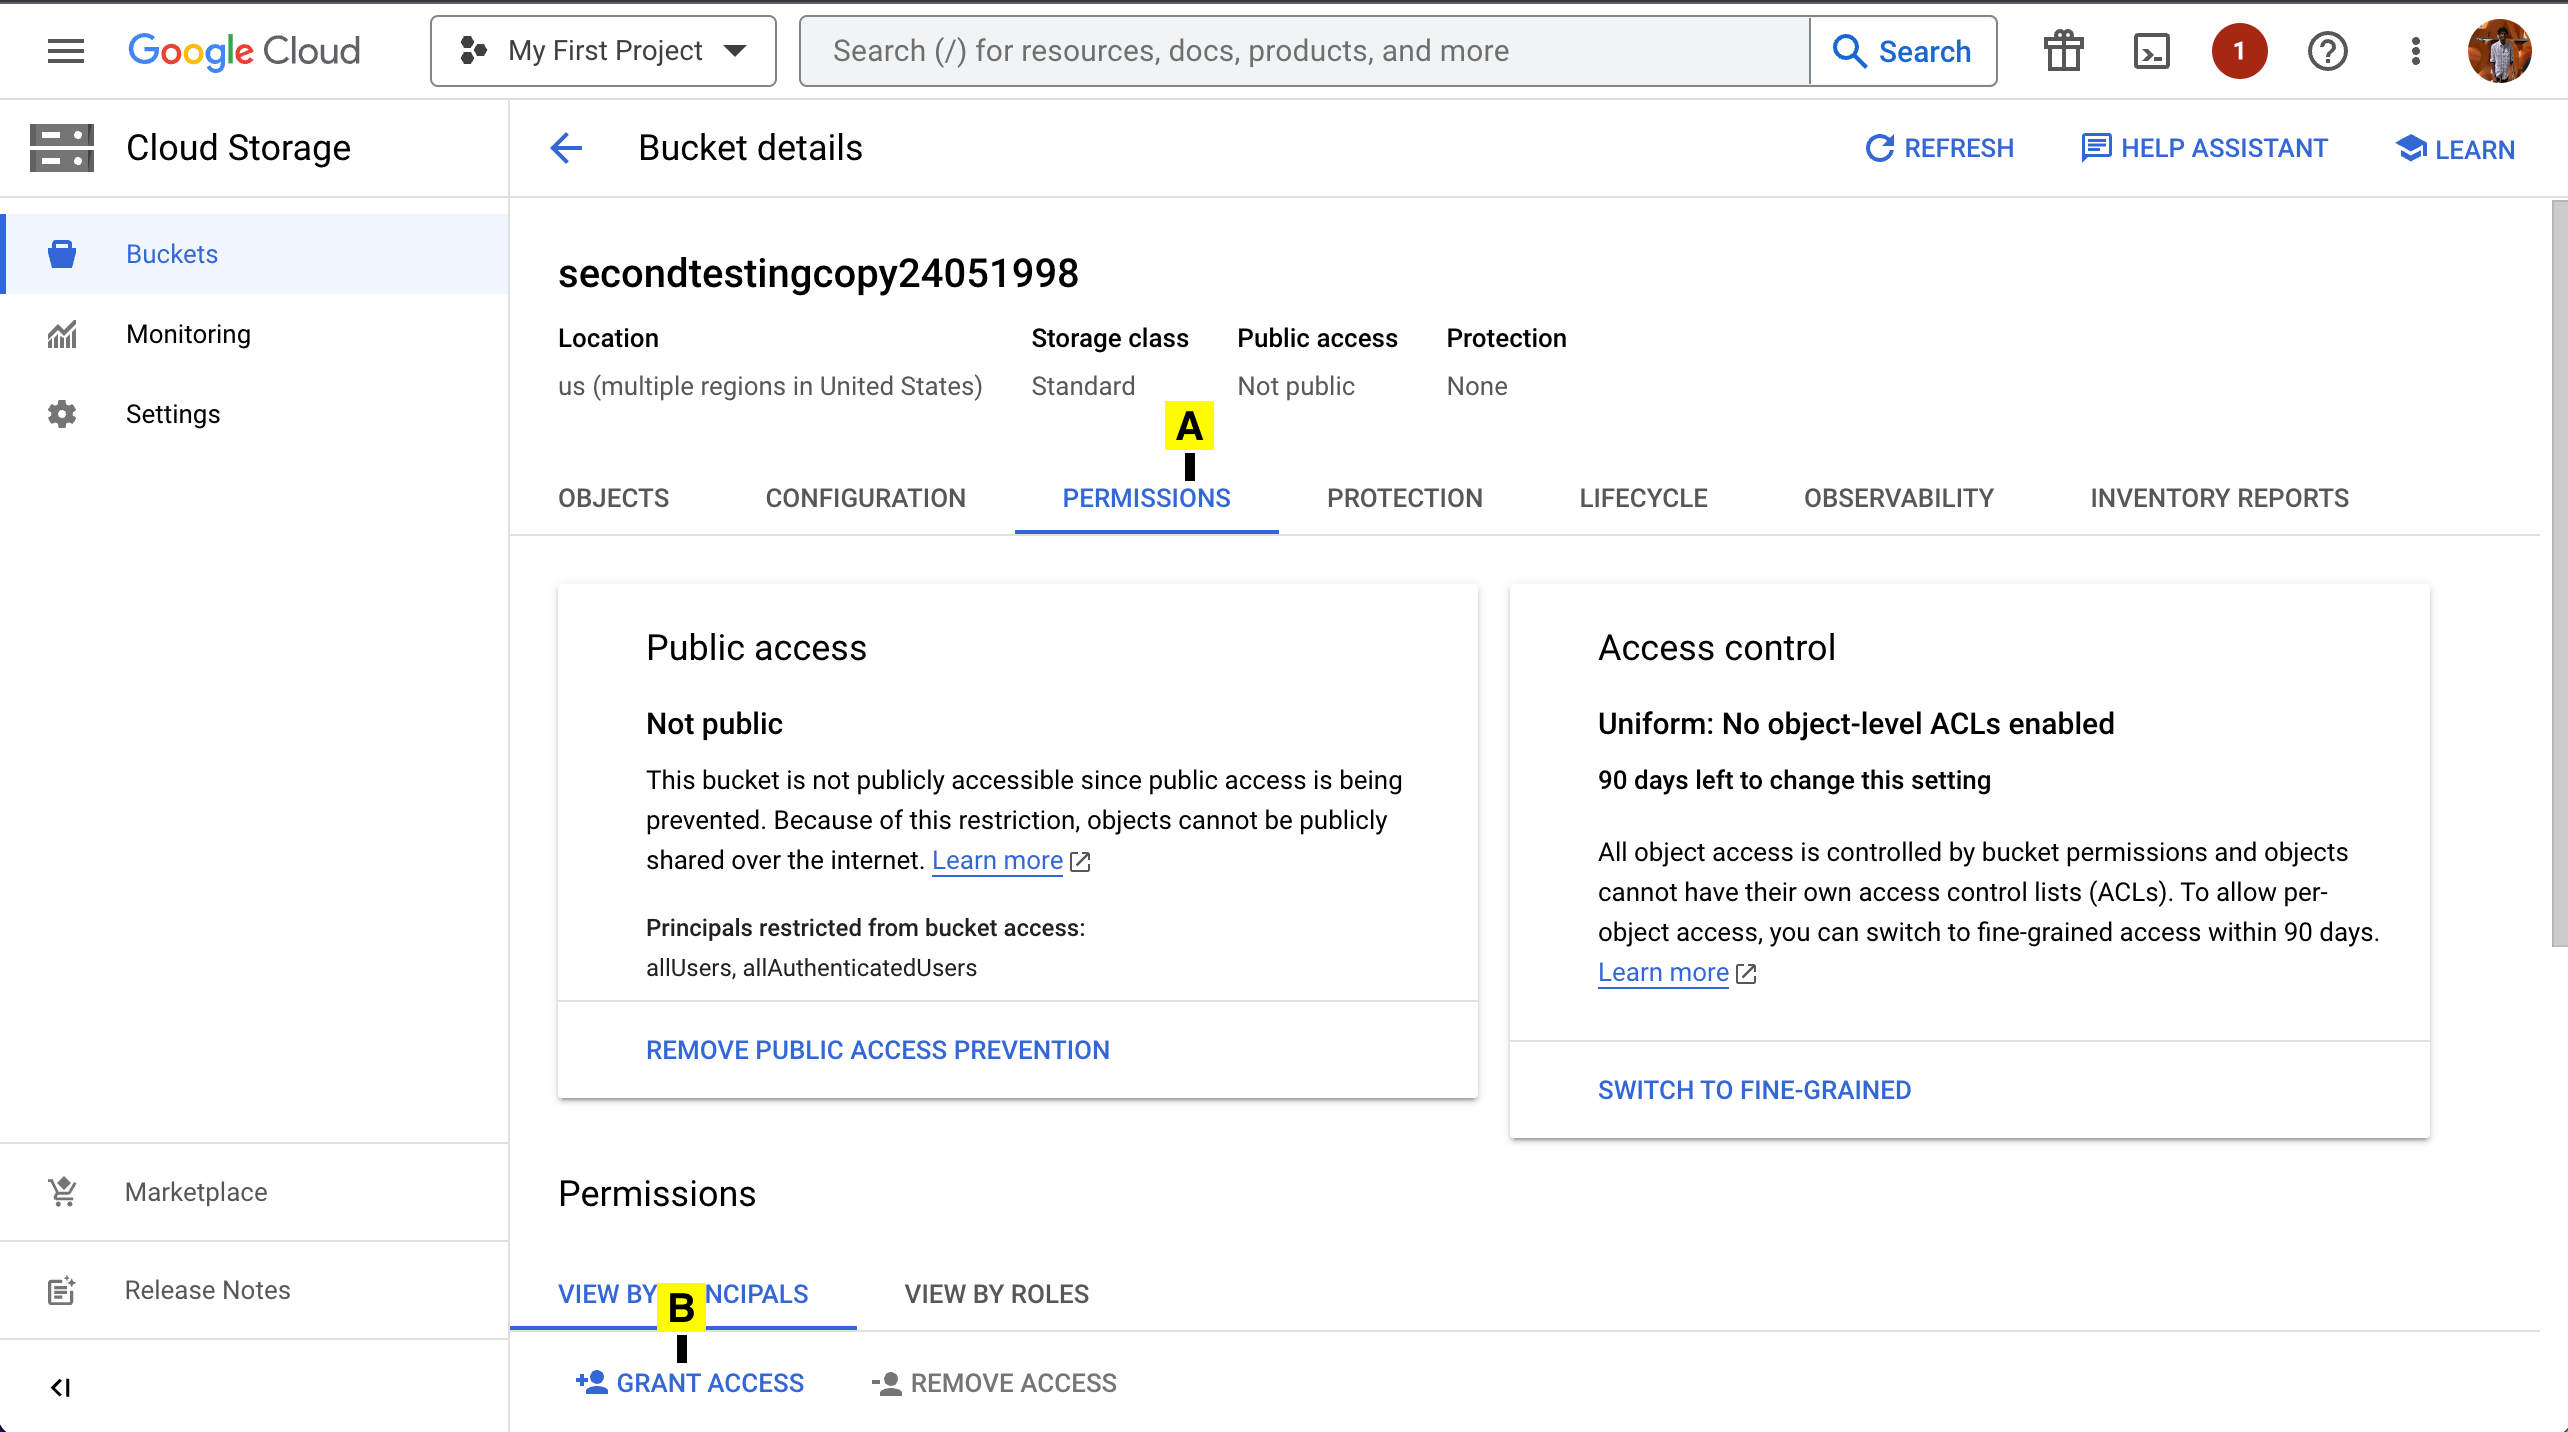
11. Find the Bucket you want to add permissions to in the Buckets section in Cloud Storage.
12. Click on the Bucket name to open its details page.
13. Add Permissions
A. Click on Permissions
B. Grant Access
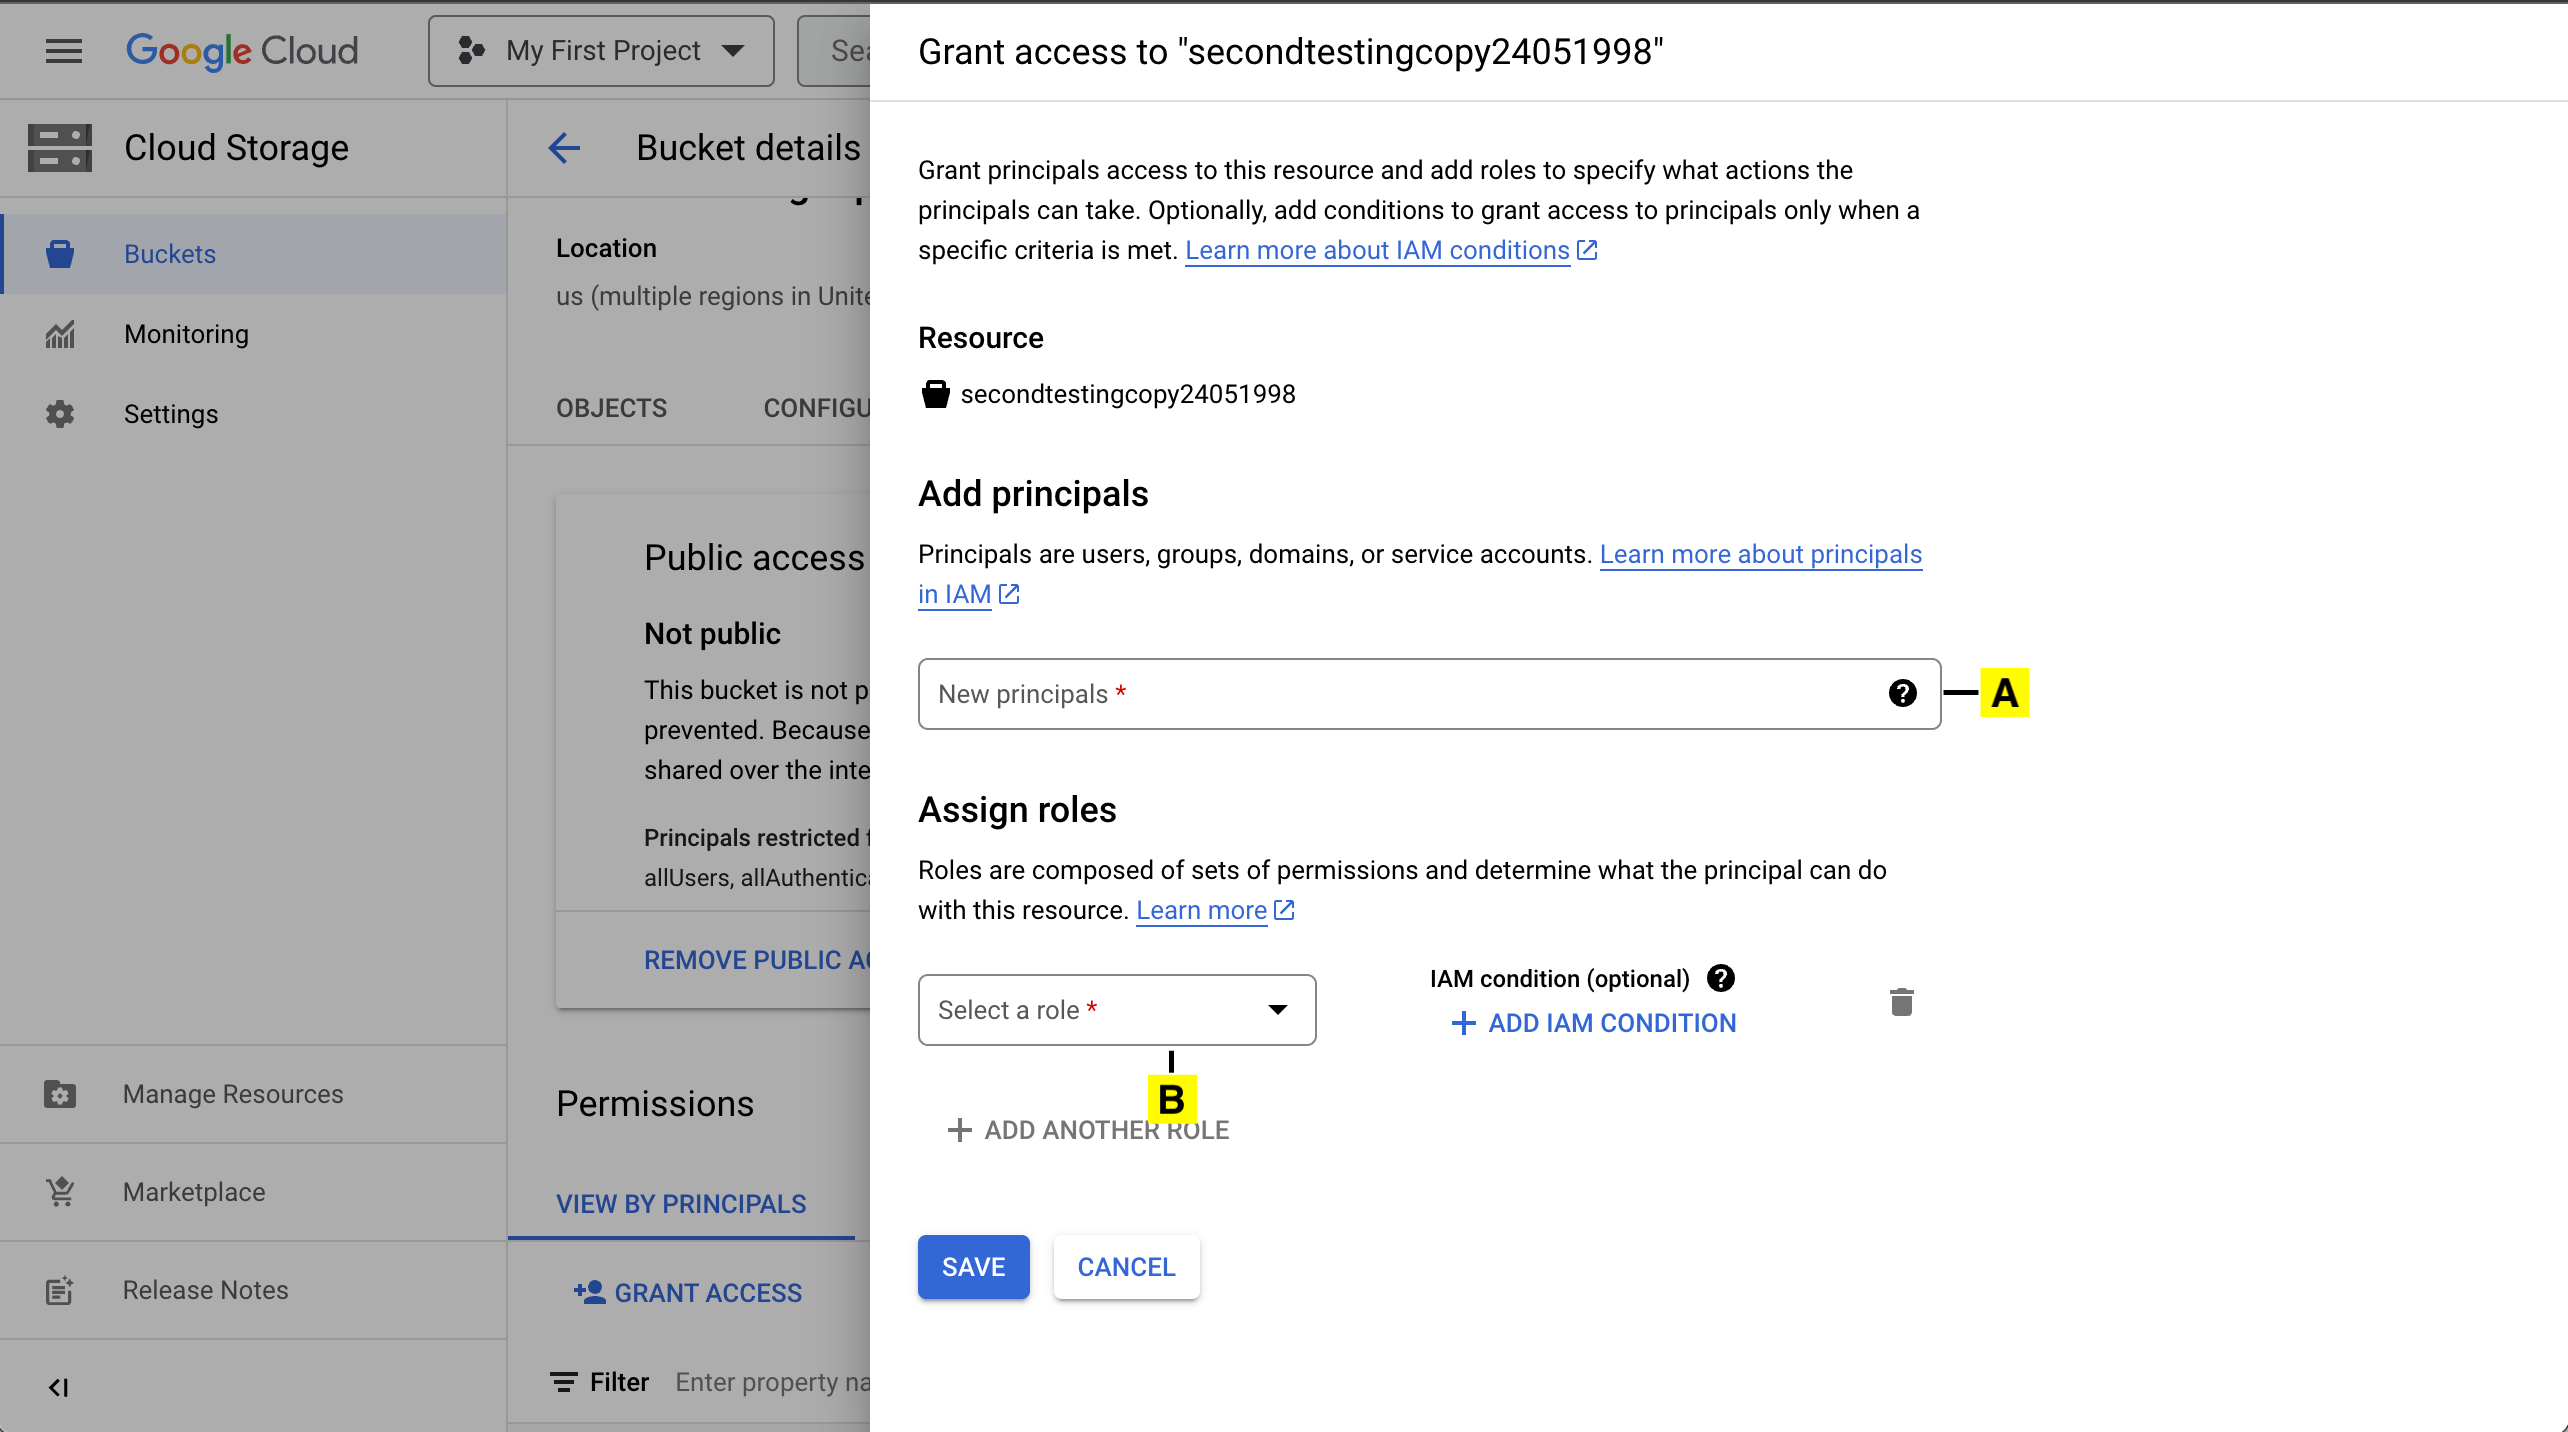
14. Add Principal
A. Paste the Service Account Email copied in STEP 7
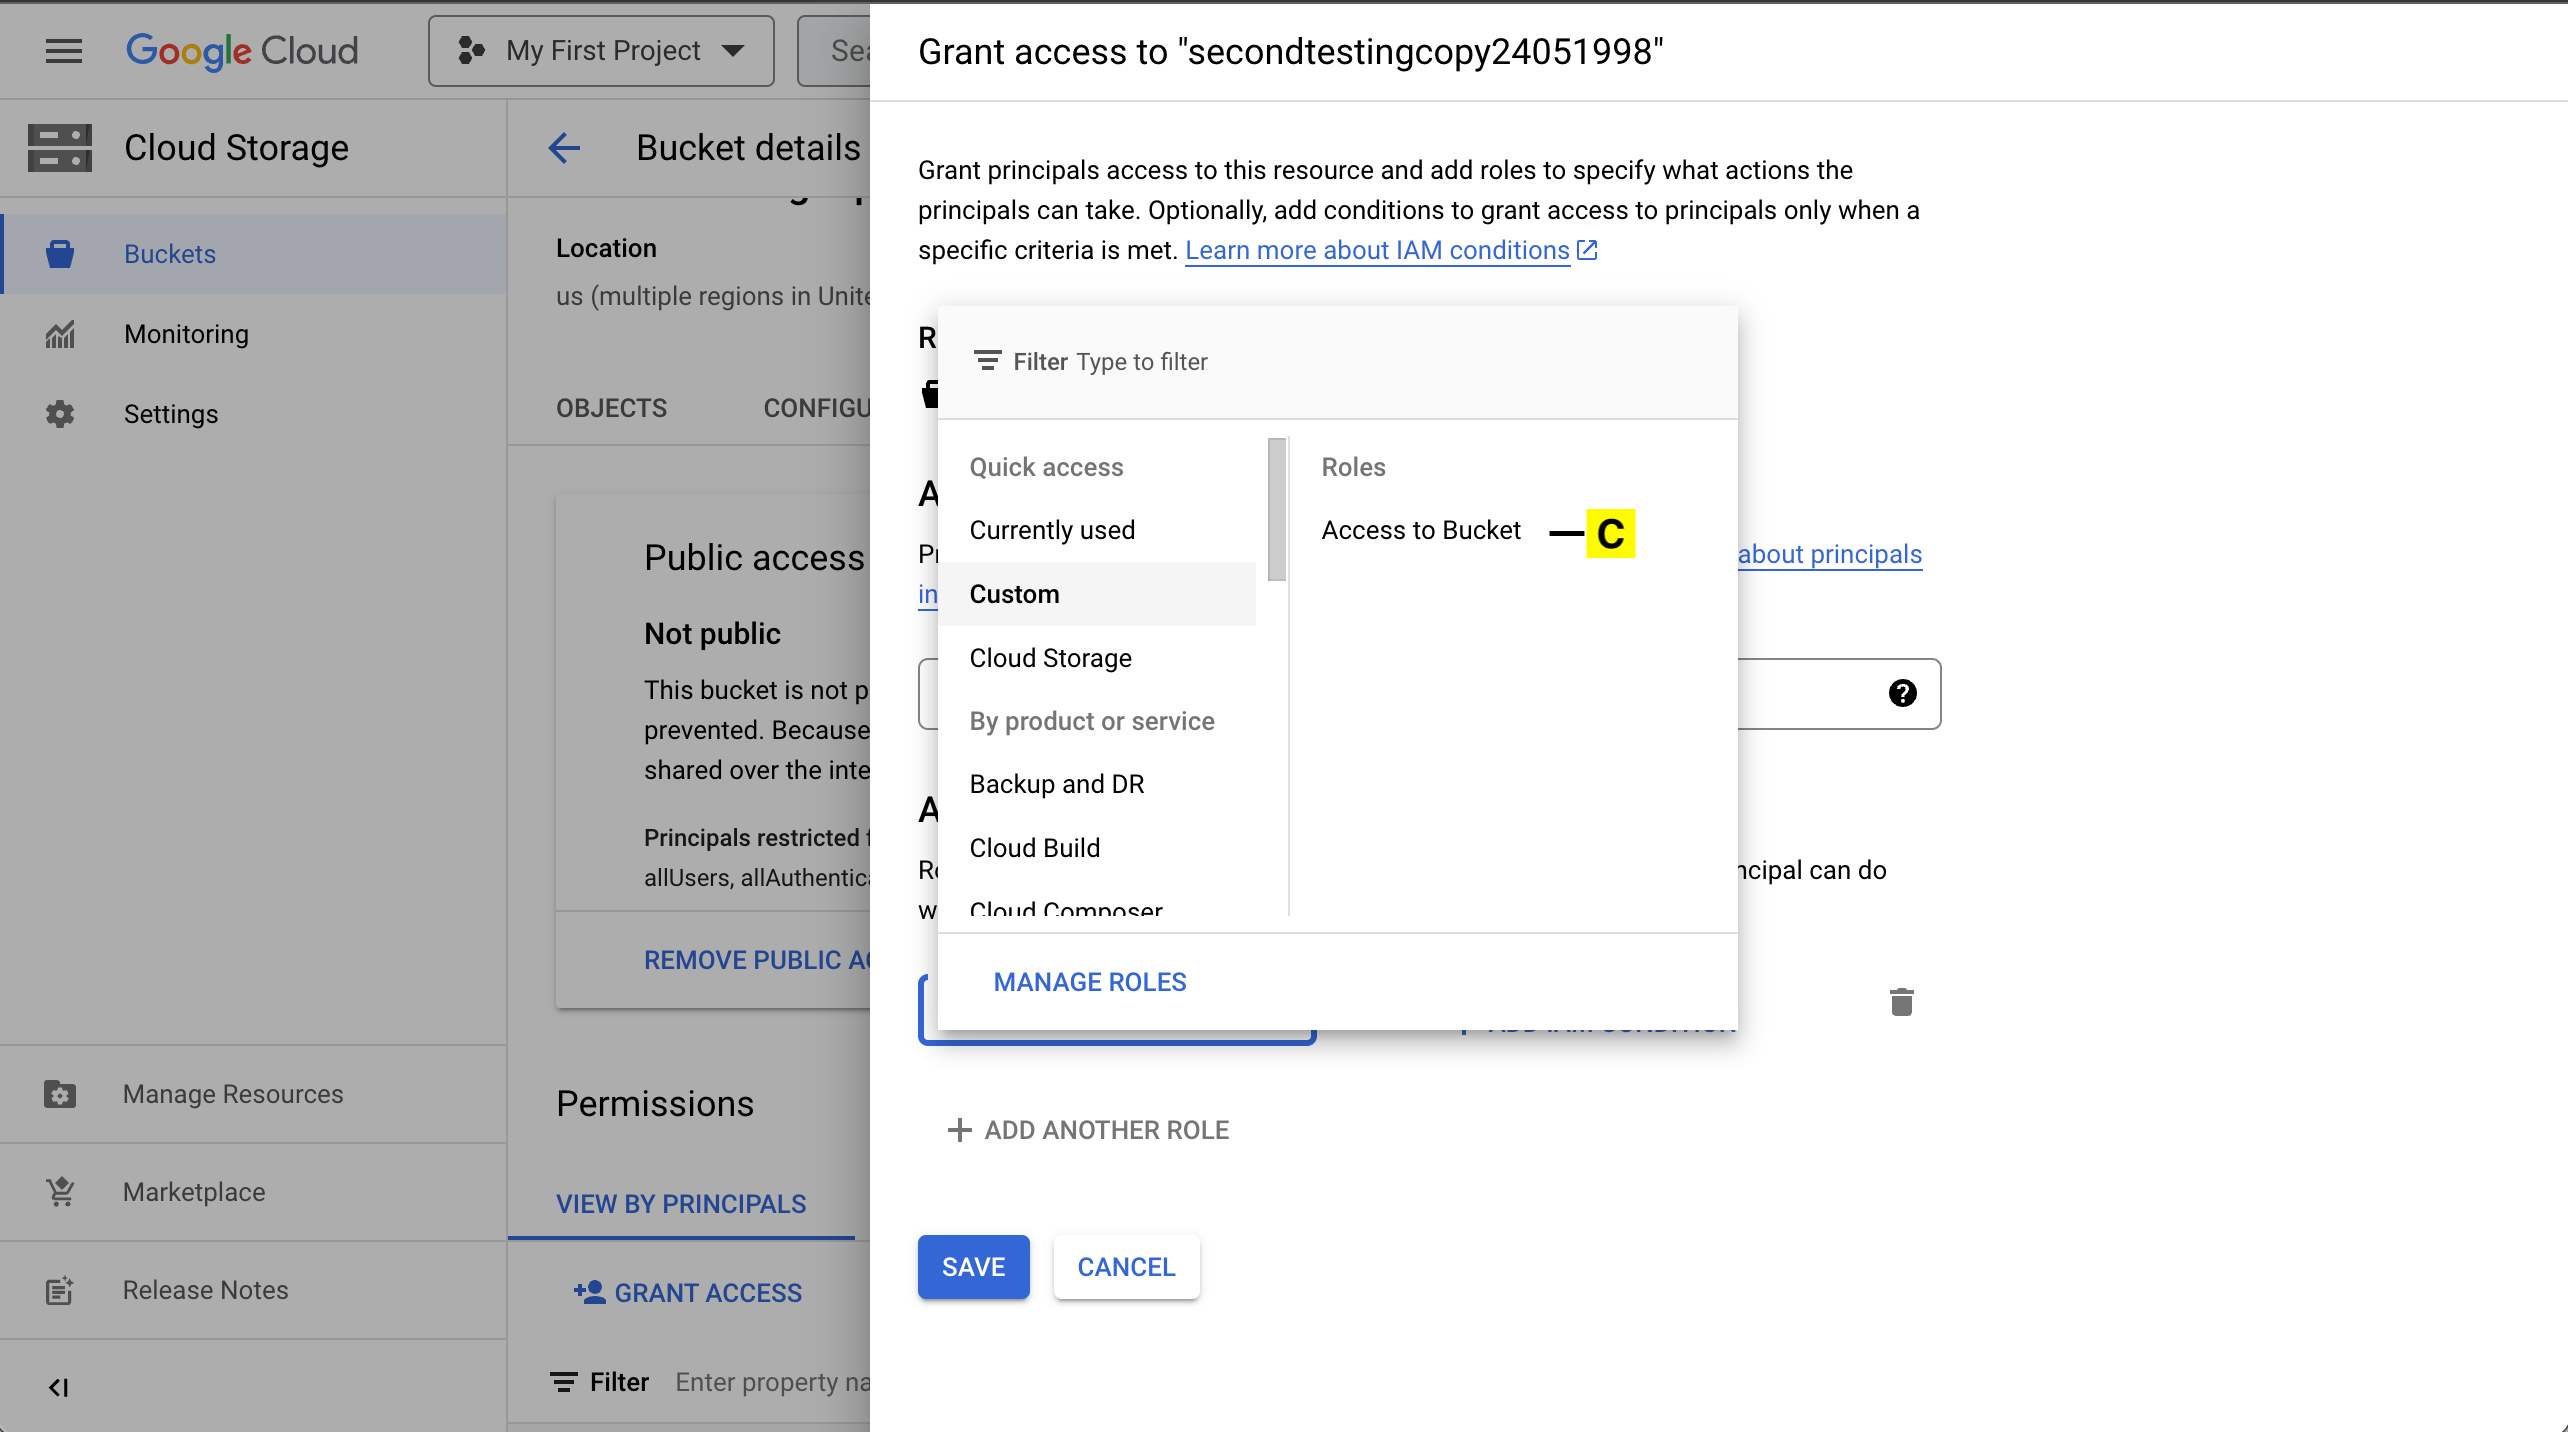
B. Choose the Custom IAM Role created in STEP 10
C. The custom role will be listed under Custom Group.
D. Click on SAVE
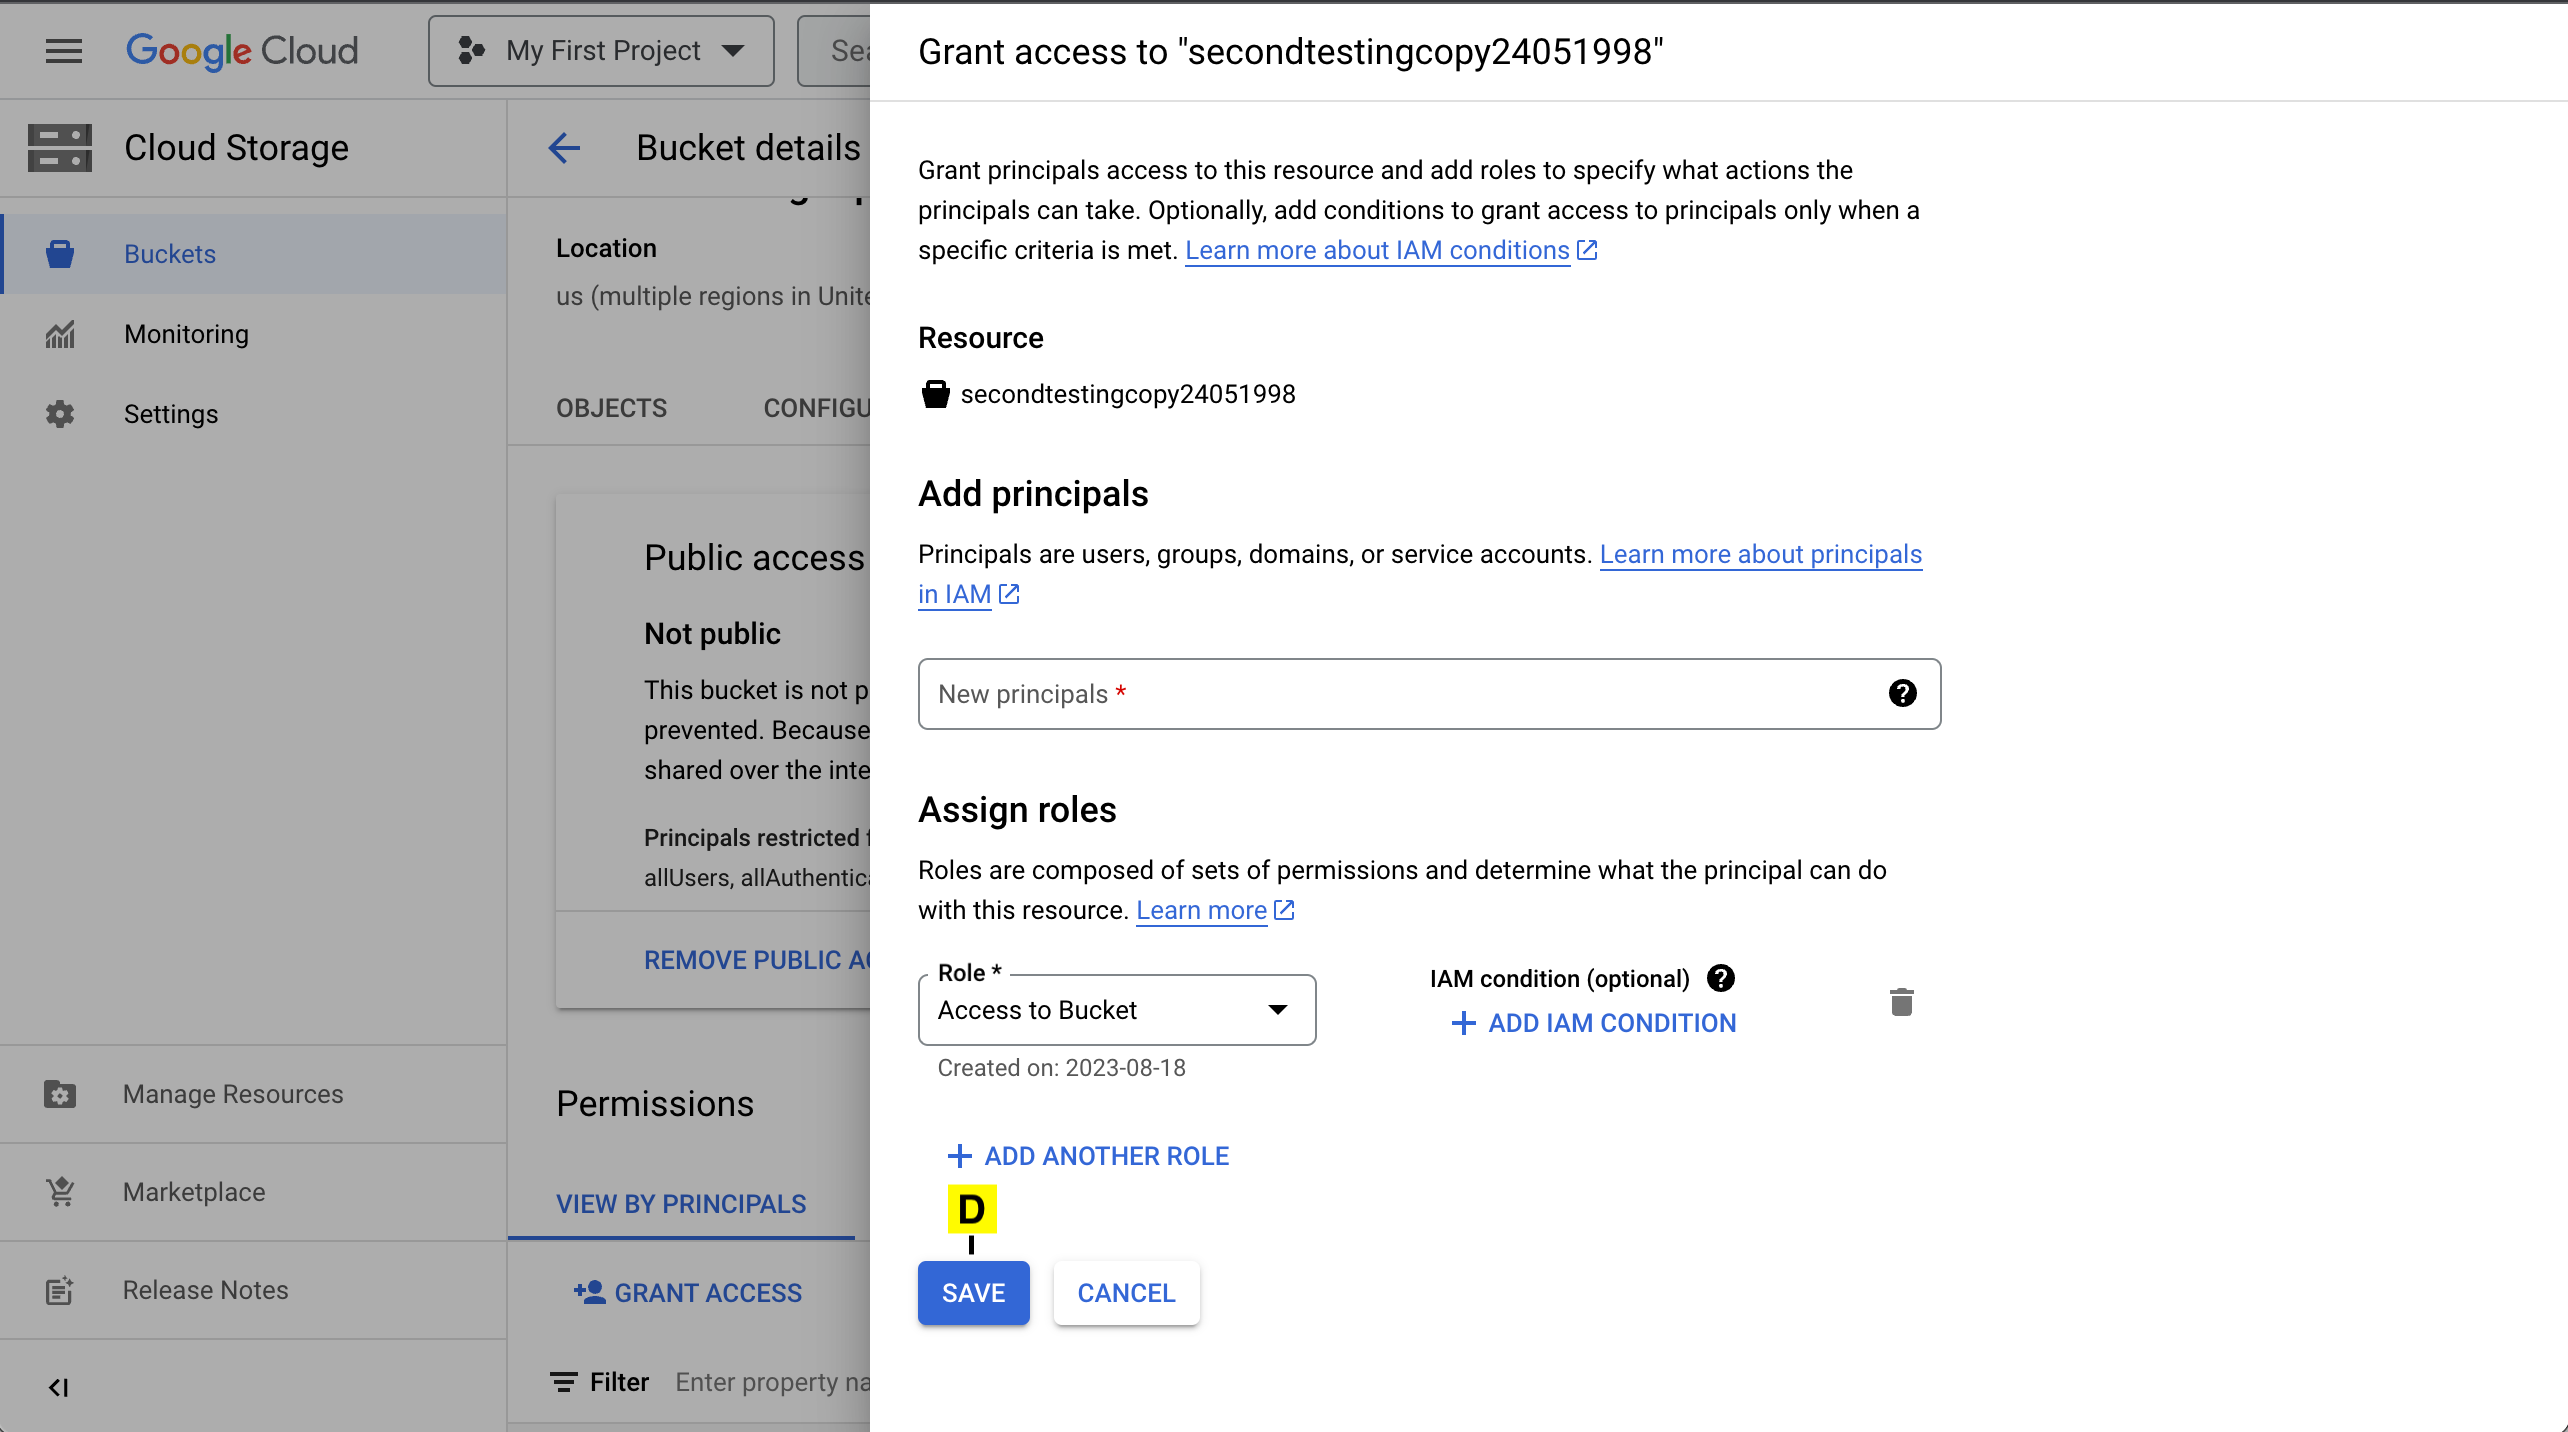
The principal will be added and will be listed below.